


Preparations for sampling
123
even though this level setting is very low, it is
possible that the sound is distorting earlier than the
AD converter. You’ll need to adjust the MIC/LINE
gain select switch, the LEVEL knob (AUDIO INPUT
1 and 2 only), or the output level of your external
audio source.
If Bus Select (IFX/Indiv.) is other than Off, raising
the Level will input the external input signal into
the OASYS. If audio cables are connected to AUDIO
INPUT 1–4 jacks at this time, any noise that may
exist will be input via the AD converters into the
OASYS even if no audio input signal is present, and
may be output from AUDIO OUTPUT L/R and 1–8.
If you’re not using an external input, turn its Bus
Select (IFX/Indiv.) off, or set its Level to 0.
Similarly, if you’re not using the S/P DIF IN jack, set
its Bus Select (IFX/Indiv.) off, or set its Level to 0.
REC Bus and FX Control Bus should also be turned
off if you’re not using them.
If you’ve set REC Source to Audio Input 1 or 2, the
output of the AD converter is input directly into the
OASYS without passing through Bus Select
(IFX/Indiv.) or “Level.” If the LEVEL setting of an
audio input is set to a high gain, any existing noise
component may be output from AUDIO OUTPUT
L, R, and 1–8 even though no audio input is actually
present. If you’re not using an audio input, set its
LEVEL setting to LINE, and turn the level down to
the minimum.
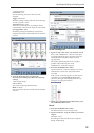
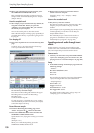
The Input/Audio Input page in each mode
One set of Input/Audio Input settings are maintained
by Sampling mode, and a different set of Input settings
are shared by Combination, Program, and Sequencer
mode. This latter set is saved as Global mode
parameters.
Each combination, program, and song can also have its
own Input/Audio Input settings. To enable this, turn
“Use Global Setting” OFF in the respective pages listed
below.
These settings can be made in the following pages:
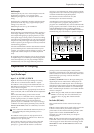
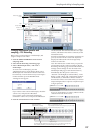
Setting the recording level
(Recording Level [dB])
Recording Level L, R
Level Meter
This adjusts the signal level at the final stage of
sampling. For the best-quality sampling, set the level
as high as possible without allowing the level meter to
indicate “CLIP !”
Press the SAMPLING REC switch to enter record-
standby mode; the level meters will indicate the
recording level of the signal from the bus line you
selected in “Source Bus.” You can use the slider to
adjust the signal level. Start with the slider at 0.00, and
adjust the level as high as possible without allowing
the bar indicator to exceed 0 dB.
The power-on default setting is 0.0 dB.
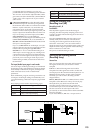
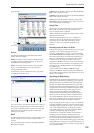
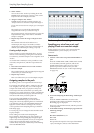
Specifying the recording method
(Recording Setup)
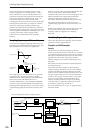
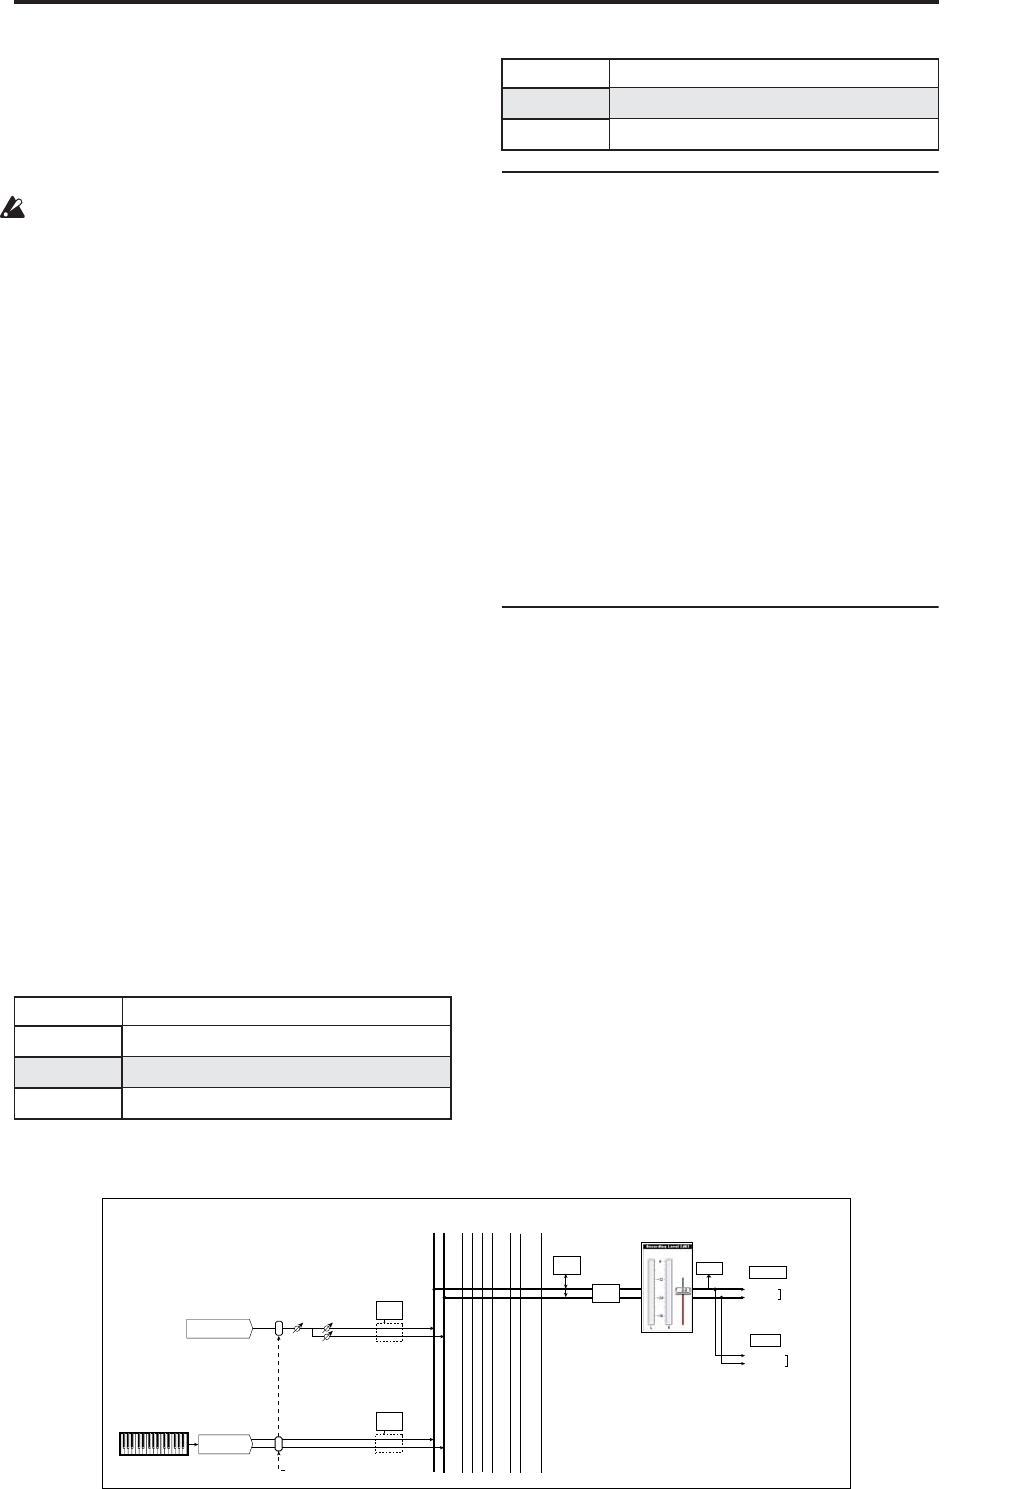
Source Bus
Here you can select the source that will be sampled.
The signals of the buses you select here will be
sampled.
L/R: The L/R bus following TFX1 and 2 will be
sampled. The audio signals sent to the L/R bus and
sounds played on the OASYS from the keyboard or via
MIDI IN and sent to the L/R bus will be sampled.
Normally you will use the L/R setting. (See the
diagram below)
REC1/2, REC3/4: The REC1/2 or REC3/4 buses will be
sampled. Use the REC buses when you want to play
the keyboard or play back an audio CD while
sampling only the audio input. You can also mix
several audio input sources to the REC buses, or mix
the direct sound of an audio input with sound
processed by an insert effect and mix them to the REC
buses for sampling.
If you choose REC1/2, REC bus 1 is input to the L
Mode Page
Sampling P0: Recording– Audio Input
Combination P0: Play– Audio Input/Sampling
Program P0: Play– Audio Input/Sampling
Sequencer P0: Play/REC– Audio Input/Sampling
Global P0: Basic Setup– Audio
Mode Page
L-Mono
R-Mono
Stereo
Level Pan
Insert
Effects
CLIP !!
L/MONO
Source BUS = L/R
R
AUDIO OUTPUT
HEADPHONES
Insert
Effects
L/R
BUS
REC
1/2
REC
3/4
...
Indiv.
1/2
3/4 5/6 7/8
BUS = L/R or IFX1-12
CD-R/RW Drive
Audio Input
OSC
Total
Effects
Master
Effects
Sampling
Monitor
For a signal flow chart of other source buses, refer to PG p.397.