Sampling (Open Sampling System)
128
5. Select “Index.”
You can also select “Index” by holding down the
ENTER switch and playing a pad or a note on the
keyboard. For this example, select 001.
6. Assign a sample to the “Index.”
If RAM memory already contains samples, use
“Sample Select” to select the sample and assign it.
If you want to record a new sample, you can sample
it now.
The sample you record will be automatically
assigned to the index you selected in step 4.
The assigned sample will sound when you play the
keyboard in the range of the index to which the
sample is assigned.
7. Repeat steps 5 and 6 to assign a sample to each
index.
The number and order of the indexes in a
multisample, the range of each index, and the
original key position can be freely changed later if
desired. (See “Multisample editing” on p.138)
Creating multiple samples
In the example procedure described above, several
indexes were created (by pressing the Create button
several times), and then samples were assigned to each
“Index.”
As an alternative method, it is also possible to create
one index, sample into it, and then repeat these two
steps.
1. Press the Create button once to create an index.
2. Record a sample.
The recorded sample will automatically be assigned
to the index you created in step 1.
3. Repeat steps 1 and 2.
This is an efficient way to record multiple samples.
Assigning samples to the pads
By default, pads 1–8 correspond to the C2–G2 keys.
For example, the default “Index” setting for 001/008
sets “OrigKey” and “Top Key” to C2. The assigned
sample will sound when you play the C2 key. The
same sample will also sound when you strike pad 1.
Similarly, if you assign samples to “Index” 002–008, the
samples that sound when you play the C#2–G2 keys
will also sound when you strike pads 2–8.
If you press the PAD MODE switch to make
VELOCITY SENSITIVE light, you will be able to
change the volume by adjusting the force with which
you strike the pads. If you make FIXED VELOCITY
light, the volume will be according to the velocity
values specified in the Sampling P4: EQ/Controller–
Pads Setup page.
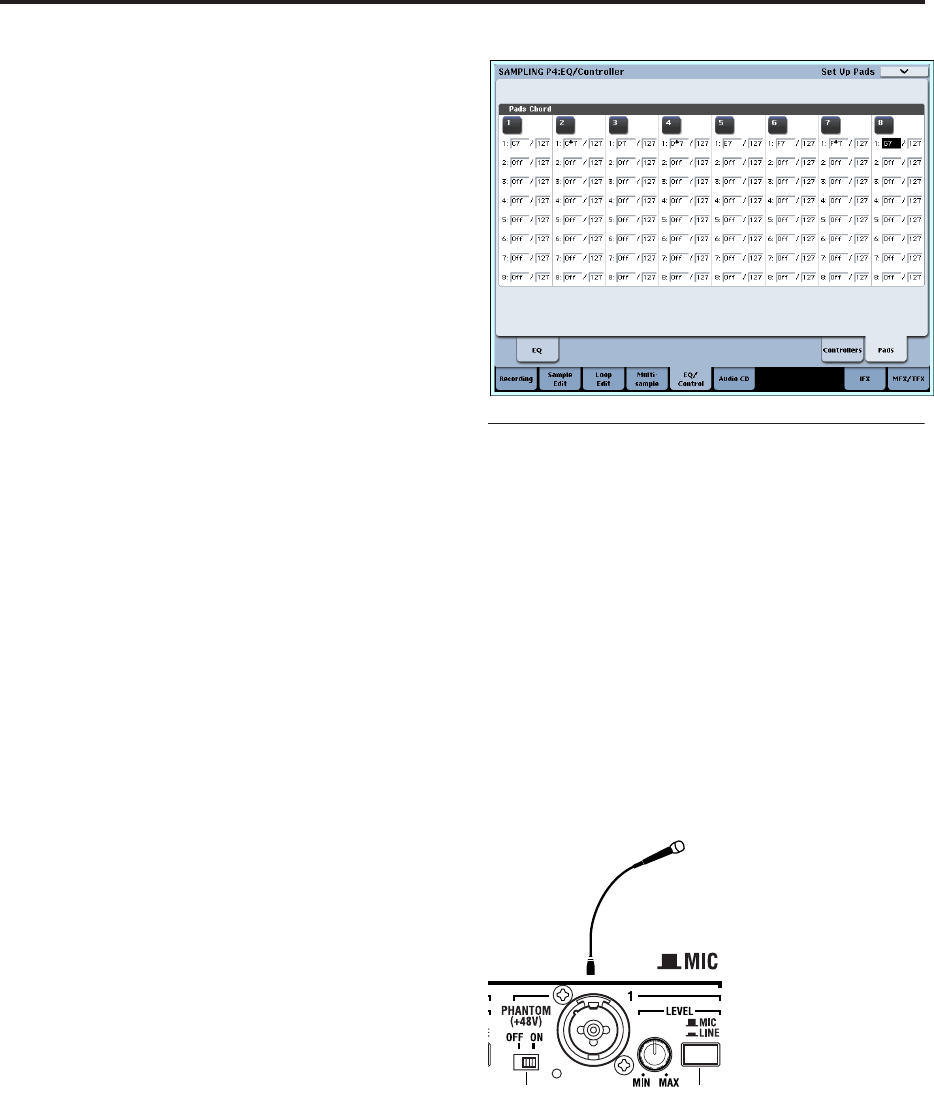
For each pad, you can change the note numbers used
to play samples.
These settings are made in the Sampling P4:
EQ/Controller– Pads Setup page. For example, you
might assign the infrequently-played highest eight
notes of the 76-note keyboard (C7–G7) to correspond
to the pads. To make the setting, select the note
number field, and play the desired key while holding
down the ENTER switch.
Basic examples of sampling
Sampling your voice from a mic, and
playing it back as a one-shot sample
In this example we will use a mic connected to the
AUDIO INPUT 1 jack to sample your voice in
monaural.
Connect a mic
1. Connect a mic to the rear panel AUDIO INPUT 1
jack.
Press the AUDIO INPUT MIC/LINE switch so that
it’s in the MIC (outward) position, and set the
LEVEL knob near the center. If you’re using a
phantom-powered condenser mic, turn the
PHANTOM switch on. (See “Audio input settings”
on page 121)
2. Access the Sampling P0: Recording– Audio Input
page.
Press the MODE SAMPLING switch to enter
Sampling mode. Make sure that the Sampling P0:
Recording page is displayed.
If it is not, press the EXIT switch, and then press the
Audio Input tab.
3. In the P0: Recording– Audio Input page, make the
following settings.
– INPUT1 –
Bus Select (IFX/Indiv.) L/R
Pan: L000
Level: 127
This specifies the input level and pan of the INPUT
1 jack, and assigns L/R bus as the destination.
Condenser
mic
ON MIC


