Creating songs (Sequencer mode)
114
With a setting of SEQ, patterns played by the RPPR
function while the sequencer is playing or recording
will start in synchronization with the measures of
the sequencer.
3. Select the P0: Play/REC– MIDI Track Prog
Select/Mixer page.
4. Check the “RPPR” check box, and set “Track
Select” to MIDI Track 02.
When the RPPR function is on, pressing a key to
which a pattern is assigned will cause the assigned
pattern to start playing, regardless of the track that’s
selected in “Track Select.”
Keys to which patterns are not assigned can be
played in the usual way. You can play the program
that’s assigned to the MIDI track you select here.
5. Since you want the tracks you play via RPPR and
the track you play from the keyboard to be
recorded at the same time, check the Multi REC
check box.
Note: If Recording Setup is set to “Loop All Tracks,”
it will not be possible to select Multi REC. Set the
Recording Setup to Overwrite.
6. Press the SEQUENCER REC/WRITE switch to
enter record-ready mode.
7. For the tracks you will be recording (MIDI Track 1,
2), press Play/Rec/Mute to make them indicate
REC.
Make sure that the tracks you’re not recording are
indicated as Play or Mute.
8. Press the LOCATE switch to set the location to
001:01.000.
9. Press the SEQUENCER START/STOP switch, and
then press a key that plays an RPPR pattern.
If, during the pre-count before recording, you press
a key that’s assigned to an RPPR pattern, the pattern
will begin playing (and being recorded) the moment
that recording begins.
Record the RPPR pattern playback and keyboard
performance.
When recording the playback of patterns triggered
by RPPR, the timing of the recorded events may be
slightly skewed. If this occurs, try setting “REC
Resolution” to a setting other than Hi.
10.When you are finished performing, press the
SEQUENCER START/STOP switch.
Recording will end, and the sequencer will return to
the location at which recording began.
If you made a mistake during your performance or
would like to re-record, you can use the Compare
function (press the COMPARE switch) to re-record
as many times as you wish.
11.If you want to record other tracks, un-check the
Multi REC (See step 5) or “RPPR” (See step 4)
check boxes as necessary.
Sampling in Sequencer mode
Sampling is still available in Sequencer mode - which
can be very convenient. The main areas of functionality
are summarized below. For more information, see
“Examples of sampling in Sequencer mode” on
page 143.
• Multisample etc. you create can be played back in
Sequencer mode together with internal programs.
The Time Slice function of Sampling mode lets you
divide up a rhythm loop sample, and create
playback data that triggers the divided samples at
the appropriate timing. You can play back this
performance data in Sequencer mode, and adjust
the playback tempo without affecting the pitch of
the rhythm loop sample. You can even exchange
the note numbers of the performance data or
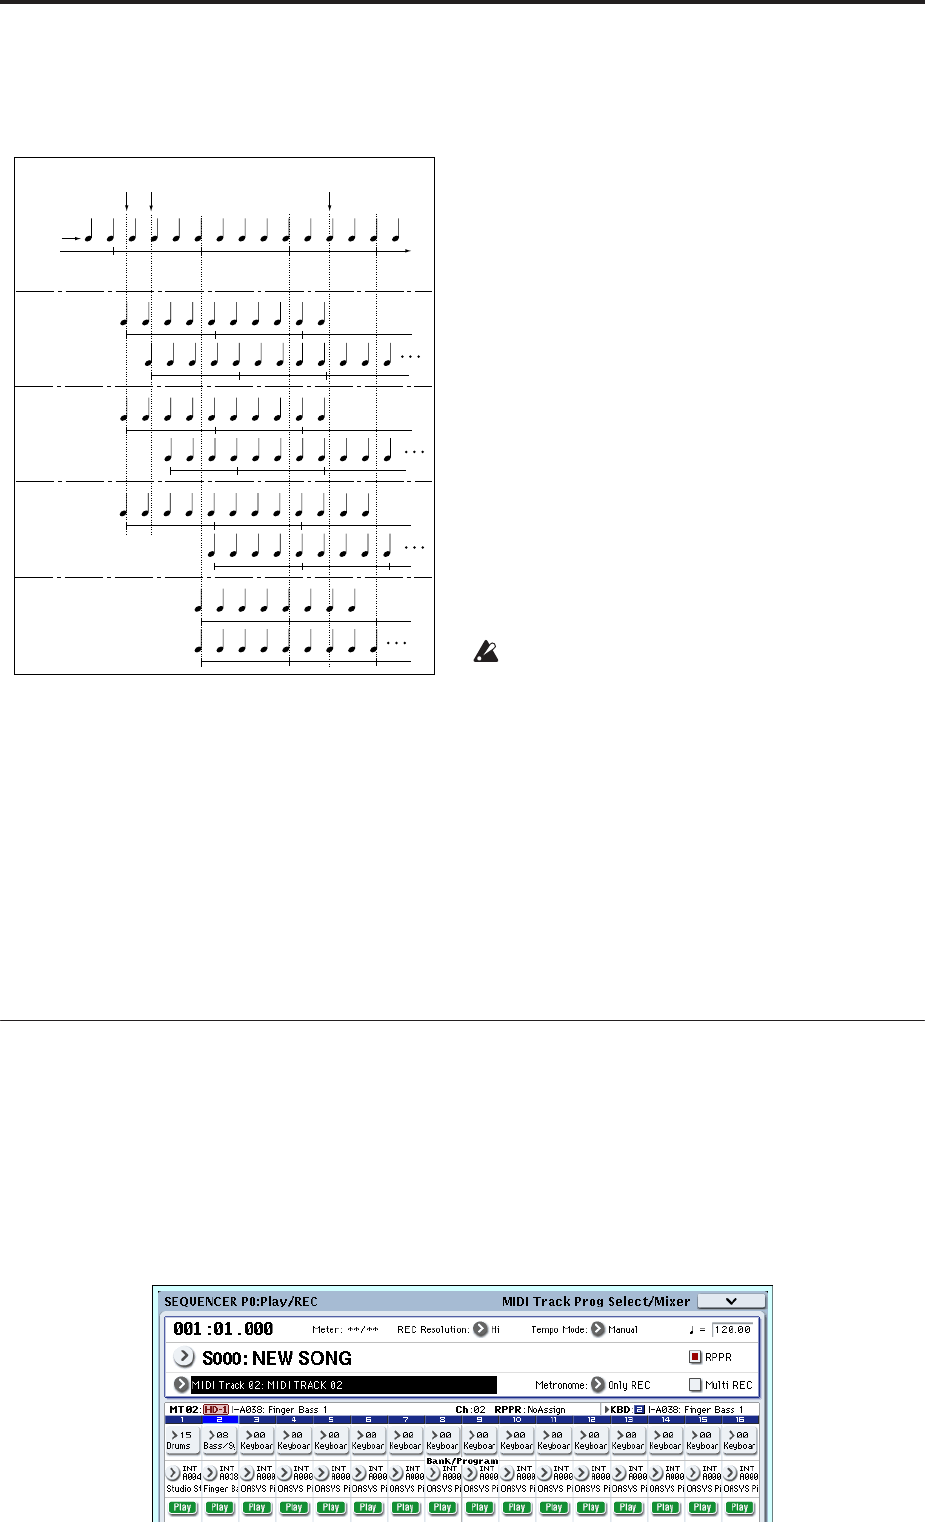
Sync: Off
Sync: Beat
Sync: Measure
Sync: SEQ
Key 1 on
Song
Key 2 on
Key 1 off
Sync settings
Patterns 1 and 2 are set to
Mode=Manual, and have
identical Sync settings
Pattern 1
Pattern 2
Pattern 1
Pattern 2
Pattern 1
Pattern 2
Pattern 1
Pattern 2


