Loading & saving data, and creating CDs
176
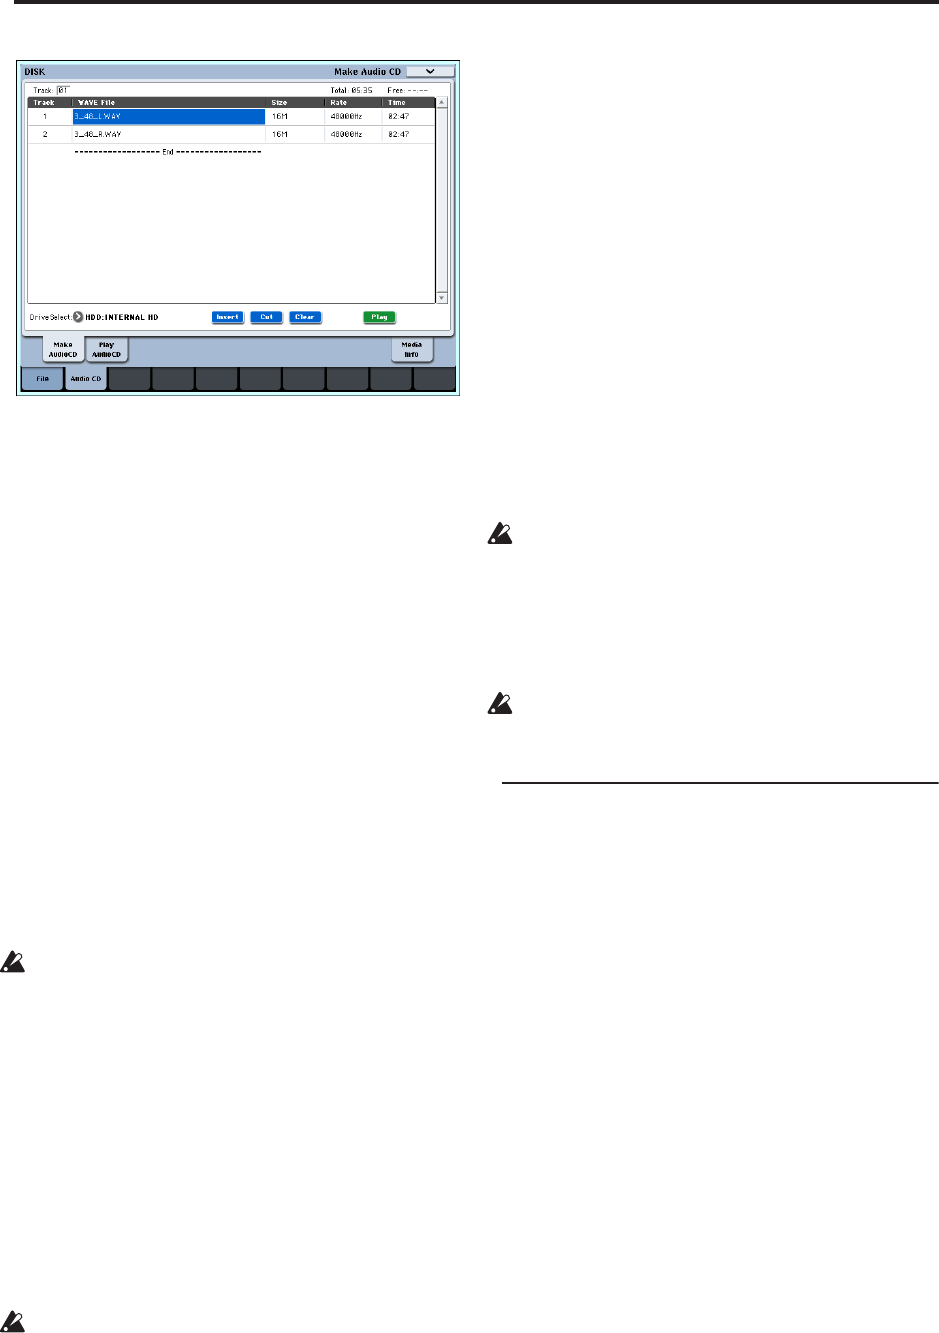
If you select a WAVE file in this page whose sampling
frequency is 48 kHz, you can also use the Play button
to play the sample.
To add other WAVE files to the track list, press the
Insert button once again.
If you want to add another track, select the WAVE file
that follows the track you want to add. If you want to
add the track to the end of the track list, select
“====End====.” Then press the Insert button.
To delete a WAVE file from the track list, select the
WAVE file that you want to delete, and press the Cut
button. Subsequent tracks will be moved forward in
the list.
Note: For more details on other editing operations,
please see “1–1c: Drive Select, Command buttons” on
page 699 of the Parameter Guide, and “Swap Track”
on page 724 of the Parameter Guide.
3. Insert a blank CD-R or CD-RW disk into the drive.
In the Make Audio CD page, use Drive Select to select
the internal CD-R/RW drive or an external USB CD-
R/RW drive. The CD-R/RW drive is shown as “CDD:
Blank Disc.”
An audio CD cannot be created on a disc that
contains data other than audio (e.g., files). In this
case, it will not be possible to select the page menu
commands “Write to CD” or “Finalize Audio CD.”
Note: Even when the recommended CD-R/RW media
is used, some audio CD players may be unable to play
back the disc. Also, since some audio CD players are
unable to play back CD-RW media, we recommend
that you use CD-R media.
4. Select the page menu command “Write to CD” to
access the dialog box, and specify how the CD will
be written.
Use Speed to set the writing speed. This will indicate
the speeds supported by the CD-R/RW drive you are
using. In this example, set Speed to 1x.
Be aware that if you use a faster writing speed in a
slower system, writing errors will occur.
Use “Mode” to specify the writing method.
Note: Depending on the drive you are using, it may not
be possible to write at the specified speed. We
recommend that the first time you write, you select
Test to perform a writing test in order to determine the
speed capabilities of your drive. Test will not write
data to the CD-R/RW media, but will perform all other
processing just as when data is actually written. If an
error occurs, the display will indicate “Error in writing
to medium.”
Press the OK button to execute the writing test.
After verifying that data can be written correctly at the
specified speed, select Write.
“Execute finalize too” specifies whether Finalization
will be executed after the audio tracks have been
written to the CD-R/RW media. If finalization has
been executed, the disc can be played back on a CD
player, but it will no longer be possible to add more
tracks.
Note: If you only want to execute finalization, execute
“Finalize Audio CD.”
5. When you are ready to write to the CD-R/RW
media, or to execute a writing test, press the OK
button. To cancel without executing, press the
Cancel button.
When you press the OK button, the “Obey
Copyright Rules” dialog box will appear.
6. Carefully read COPYRIGHT WARNING on v, and
if you consent to the terms, press the OK button to
begin burning the CD. If you do not consent to the
terms, press the Cancel button to cancel the
operation.
In order to avoid causing errors, do not subject the
drive to physical shock or vibration while CD-
R/RW media is being written.
Saving Track Lists
The track list will be lost when the power is turned off.
If you want to keep this data, you must save it.
1. In the Save page, select the directory in which you
want to save the track list.
2. Select the page menu command “Save Audio CD
Track List” to open the dialog box.
3. Press the OK button to save the data, or press the
Cancel button to cancel without saving.


