Using KARMA
198
The note or chord you played in step 1 will be
assigned to the pad, and the CHORD ASSIGN
switch LED will go dark.
4. Press the pad to which you assigned a note or
chord.
The KARMA function will start playing according
to the note or chord you assigned.
Making the performance continue after you
remove your hand from the keyboard or pads 1–
8: LATCH switch
You can make the KARMA function continue playing
even after you remove your hand from the keyboard or
pads 1–8.
LED lit: Latch is on. The performance will continue
even after you remove your hand from the keyboard or
pads 1–8.
LED dark: Latch is off. The performance will stop
when you remove your hand from the keyboard or
pads 1–8.
Modifying the phrase or pattern generated by the
KARMA module: KARMA CONTROLS 1–8 sliders,
KARMA SWITCHES 1–8, SCENE 1–8 switches
Parameters useful for controlling the phrase or pattern
are already assigned to the KARMA CONTROLS 1–8
sliders, KARMA SWITCHES 1–8, and SCENE 1–8
switches. You can operate these controllers to create a
wide range of changes in the phrase or pattern that’s
playing.
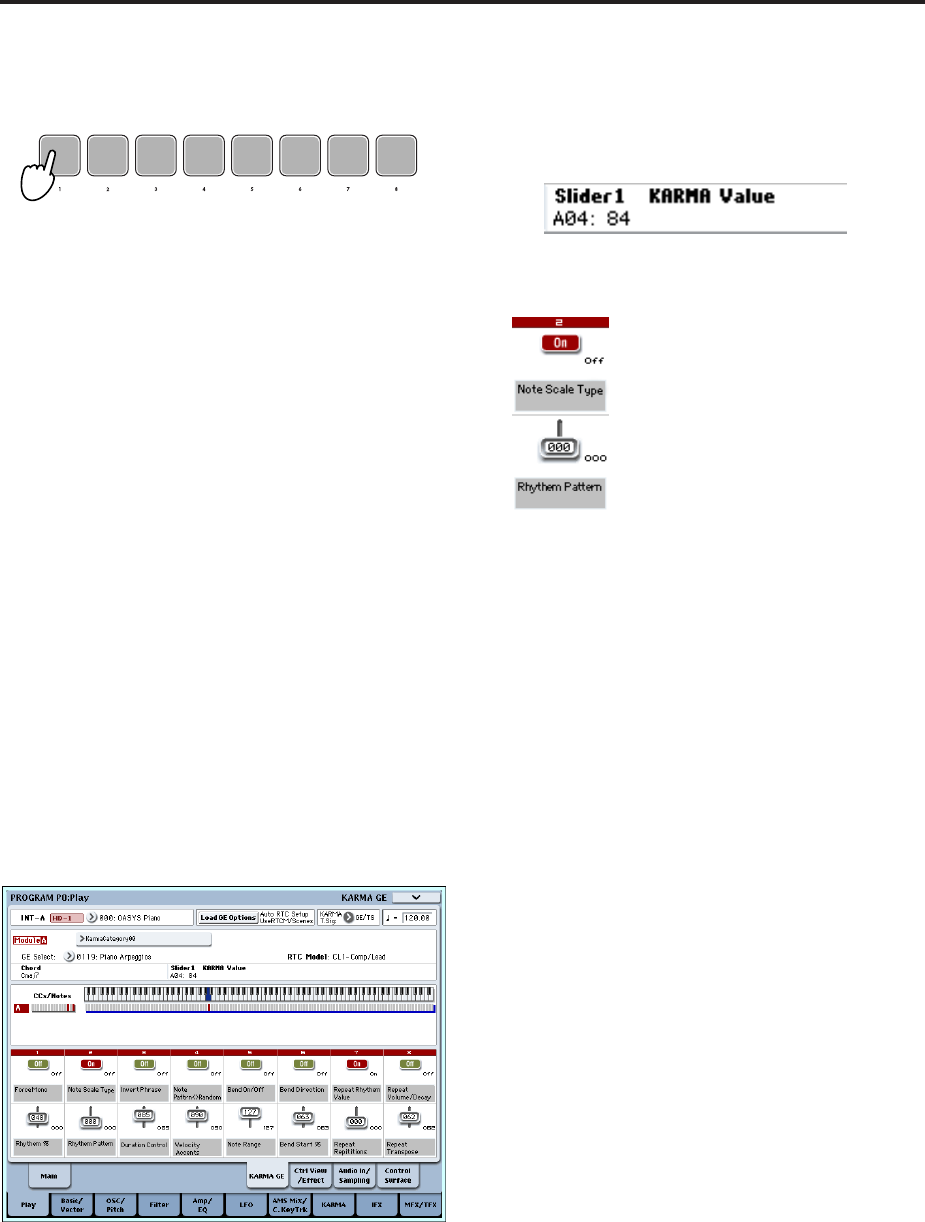
1. Access the Program P0: Play– KARMA GE page.
The lower part of the display shows the names of
the sliders and switches that are assigned in this
program. In the pre-loaded programs, the KARMA
CONTROLS sliders and KARMA SWITCHES have
already been assigned.
2. Operate the front panel KARMA CONTROLS 1–8
sliders and KARMA SWITCHES 1–8.
The pattern or phrase will change accordingly.
You can also turn the switches on/off by pressing
them in the display. You can operate the sliders by
selecting them and then using the VALUE controller
to adjust the value.
The type or value of the parameter being controlled
by the sliders and switches is shown in the KARMA
Module Info “KARMA Value” field. This lets you
see how the parameters are being affected by your
slider or switch operations.
The saved value is shown at the lower right of each
slider or switch.
3. Use the front panel SCENE 1–8 switches to choose
a scene.
The sliders and switches will change to the settings
that were saved in the scene you chose.
Each of the eight scenes contains the values of
sliders 1–8 and switches 1–8. By pressing a SCENE
1–8 switch to choose a scene, you can instantly recall
settings for the eight sliders and eight switches.
Even if you switch scenes, the changes you make
using sliders 1–8 and switches 1–8 are remembered
until you select another program. When you write a
program, your slider and switch settings are saved
in the respective scene 1–8.
Restoring the state of the sliders and switches
You can do this by adjusting the controls while you
watch the sliders and switches in the screen, or you can
use the following method.
Restoring the entire program
1. Press the COMPARE switch.
The entire program will revert to the state in which
it was written. (See “Using COMPARE” on page 54.)
2. Press the COMPARE switch once again.
The program will return to the edited state.
Restoring all sliders and switches of the selected
scene
1. Operate the sliders and switches to edit the values
saved in the program.
The LED of the selected SCENE switch will blink.
2. Hold down the RESET CONTROLS switch, and
press the SCENE switch.
All sliders and switches will be reset to their stored
settings, and the SCENE switch LED will light.
3. Once again, hold down the RESET CONTROLS
switch and press the SCENE switch.
All sliders and switches will return to the edited
state of step 1, and the SCENE switch LED will
blink.
Restoring a single slider or switch


