Audio recording Song editing
109
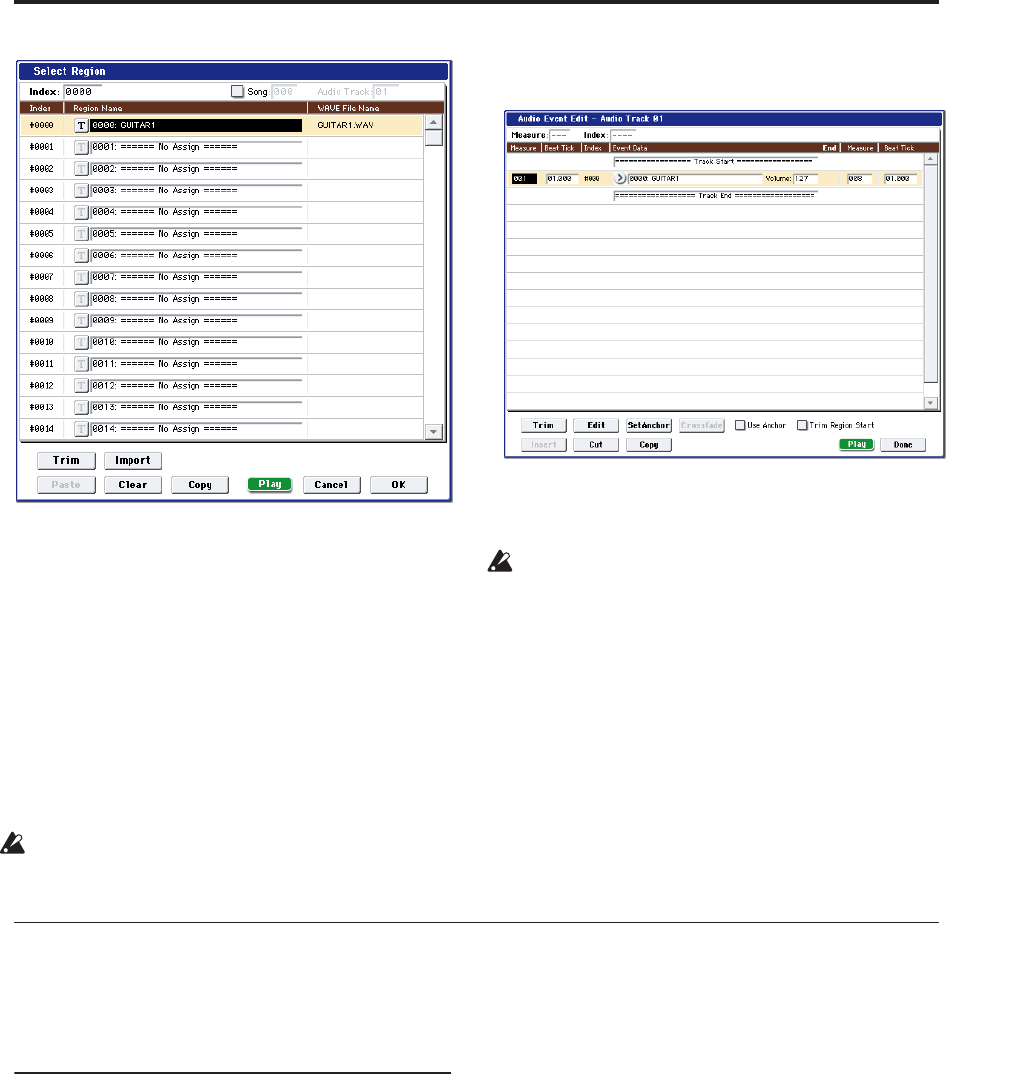
When selecting a WAVE file, you can press the Play
button to audition the files to help you find the
desired one.
You can also use the “Name” field located above to
assign a name to the region. Edit the “Name” after
you’ve selected a file.
Note: The OK button is available only if you’ve
selected a 48 kHz monaural WAVE file. If you’ve
selected a 44.1 kHz file or a 48 kHz stereo file, the
button will be grayed-out and you won’t be able to
press it.
The Play button is available only if you’ve selected a
48 kHz WAVE file.
Editing a region will affect the audio track for the
entire song. Use caution when editing a region
that’s already used in an audio track.
7. Press the OK button, the selected region will be
placed in the audio track.
8. Select the event that you want to edit, and use the
location parameters “Measure” and “Beat Tick” to
edit the location of the event.
You can’t place two or more events at the same
location.
9. Press the Done button.
10.Press the SEQUENCER START/STOP switch, and
make sure that the WAVE file plays back.
You can press the COMPARE switch to return to the
state prior to the edit you just performed.
We’ve kept this example simple, but you can also
perform editing operations such as changing the
playback position of the WAVE file in steps of a single
sample, changing the location relative to an anchor
point, or crossfading two audio events. For more
information, see “Audio Automation Edit” on
page 540 of the Parameter Guide.
Song editing
You can apply a variety of editing operations to a song.
The available types of editing operation are listed
below.
Song
Delete Song: This command deletes the currently
selected song. For more information, see “Delete Song”
on page 524 of the Parameter Guide.
Copy From Song: This command copies all of the
setting data and musical data from the specified song
to the currently selected song. For more information,
see “Copy From Song” on page 524 of the Parameter
Guide.
FF/REW Speed: This allows you to set the speed at
which fast-forward or rewind will occur when you
press the FF switch or REW switch. For more
information, see “FF/REW Speed” on page 525 of the
Parameter Guide.
GM Initialize: This command transmits a GM System
On message to the Sequencer mode, resetting all MIDI
tracks to the GM settings. For more information, see
“GM Initialize” on page 526 of the Parameter Guide.
Auto HDR/Sampling Setup: This command
automatically makes the appropriate two-channel mix
settings etc. for hard disk recording, audio track
bouncing, sampling/resampling (in-track sampling,
etc.), or creating an audio CD. For more information,
see “Auto HDR/Sampling Setup” on page 529 of the
Parameter Guide.
Initialize: Set parameters related to hard disk
recording and sampling to their default values.
HDR (Audio Track Recording): Make the necessary
settings for recording external audio signals such as
guitar or vocal from the audio inputs to audio
tracks.
Bounce Audio Track: Make the necessary settings
for bounce-recording audio tracks.
2ch Mix to Disk: Make settings for resampling a
completed song in order to create a two-channel
stereo WAVE file on the hard disk. (Use this if you
want to create a WAVE file and then use the Disk
mode Make Audio CD page to burn the file to an
audio CD on the internal CD-R/RW drive.)


