Playing and editing Programs
46
Joystick Lock
The joystick is spring-loaded, so that it automatically
returns to the center position when you let go.
However, you can use either of the two front-panel
switches (SW1 or SW2), or a foot-switch, to “lock” the
current position of the joystick. This leaves your hands
free to play on the keyboard, or to use other
controllers. For more information, please see “Using
the Lock function” on page 46.
Vector Joystick
The Vector Joystick lets you
control the volume balance
between OSC1 and OSC2,
and can also generate CC
messages to modulate
Program and effects
parameters.
In Combi and Sequence modes, the Vector Joystick can
do all of this, plus balance the volumes of the different
Programs in the Combi.
The Vector Joystick does all of this in conjunction with
the Vector Envelope, which is a flexible, multi-segment
envelope with a few interesting twists. For more
information, see “Using Vector Synthesis” on page 64.
Resetting the Vector Joystick to the center
You can use the front-panel RESET CONTROLS button
to reset the Vector Joystick to its default center
position. To do this:
1. Hold down the RESET CONTROLS button.
2. While holding RESET CONTROLS, move the
Vector Joystick.
3. Release the RESET CONTROLS button.
The joystick will now be reset to its center position.
Ribbon Controller
Move your finger to
the left and right on the
ribbon controller to
apply an effect.
Normally, this is used to control pitch, volume or filter
etc.
You can use the Lock function of SW1 or SW2 keys to
hold the effect even after you release your finger from
the ribbon controller. For more details, see “Using the
Lock function” on page 46.
SW1, SW2
You can use these buttons to
control program parameters
via AMS (Alternate
Modulation), or effect parameters via DMod (Dynamic
Modulation).
They can also transpose the keyboard by octaves, turn
portamento on/off, or lock the position of the ribbon
controller, joystick, or aftertouch.
Each button can work as either a Toggle or
Momentary switch. In Toggle mode, the assigned
function is switched between on and off each time the
key is pressed. In Momentary mode, the assigned
function is active on only as long as you hold down the
switch.
In Program mode, you can check the assignments of
SW1 and SW2 on the Play page Assignment tab.
When you write a Program or Combination, the on/off
status of the SW1 and SW2 keys is saved.
For more details, please see “Setting the functions of
SW1 and SW2” on page 180.
Using the Lock function
Locking the Joystick
1. Using the standard factory sounds, select Program
INT-A016: Real Suit E.Piano, and play the
keyboard.
To select a program, make sure that you are in Pro-
gram mode, and press the BANK INT A button,
numeric key 1, 6, and then the ENTER key.
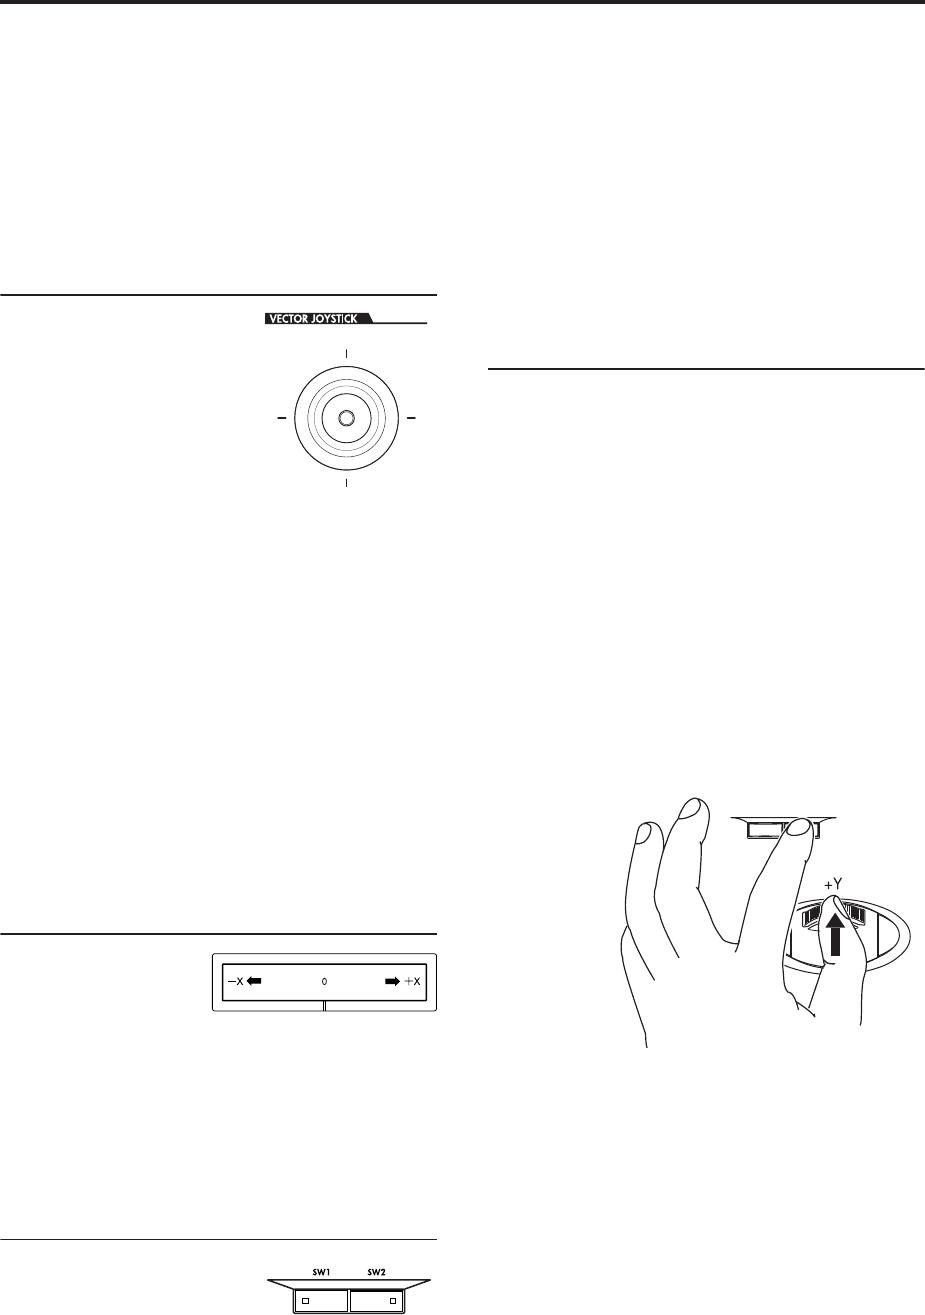
2. Move the joystick away from yourself (the +Y
direction).
The vibrato effect will deepen.
3. While holding the joystick away from yourself,
press the SW2 switch.
When you press the switch, its LED will light up,
and the modulation effect at this point will be
maintained.
4. Release the joystick, and play the keyboard.
The modulation will stay the same as it was when
SW2 was pressed. Moving the joystick away from
yourself will not affect the sound.
5. Press the SW2 key once again to release the Lock
function.
Locking the Ribbon Controller
Make sure that the INT-A016: Real Suit E.Piano
program is selected.
1. Press the SW2 key.
The LED on SW2 will light up.
2. Touch the ribbon controller, and move your finger
left and right.
Movement in the +X direction will brighten the
tone, and movement in the –X direction will darken
the tone.
3. Lift your finger up from the ribbon controller.
SW 1
SW 2
