101
Counter
Rename
METER
MIXERCH
VIEW
EFFECTSENDEQPAN
SONGSYSTEM
/MIDI
TRACKCD
UNDOTUNER
SESSION
DRUMS
STORE
SCENE
MARK
SCRUB
LOC 1/IN ...
LOC 4/END
REC/PLAY
MODE
Transport
keys
Reference
2a. CH INPUT/SubMixer
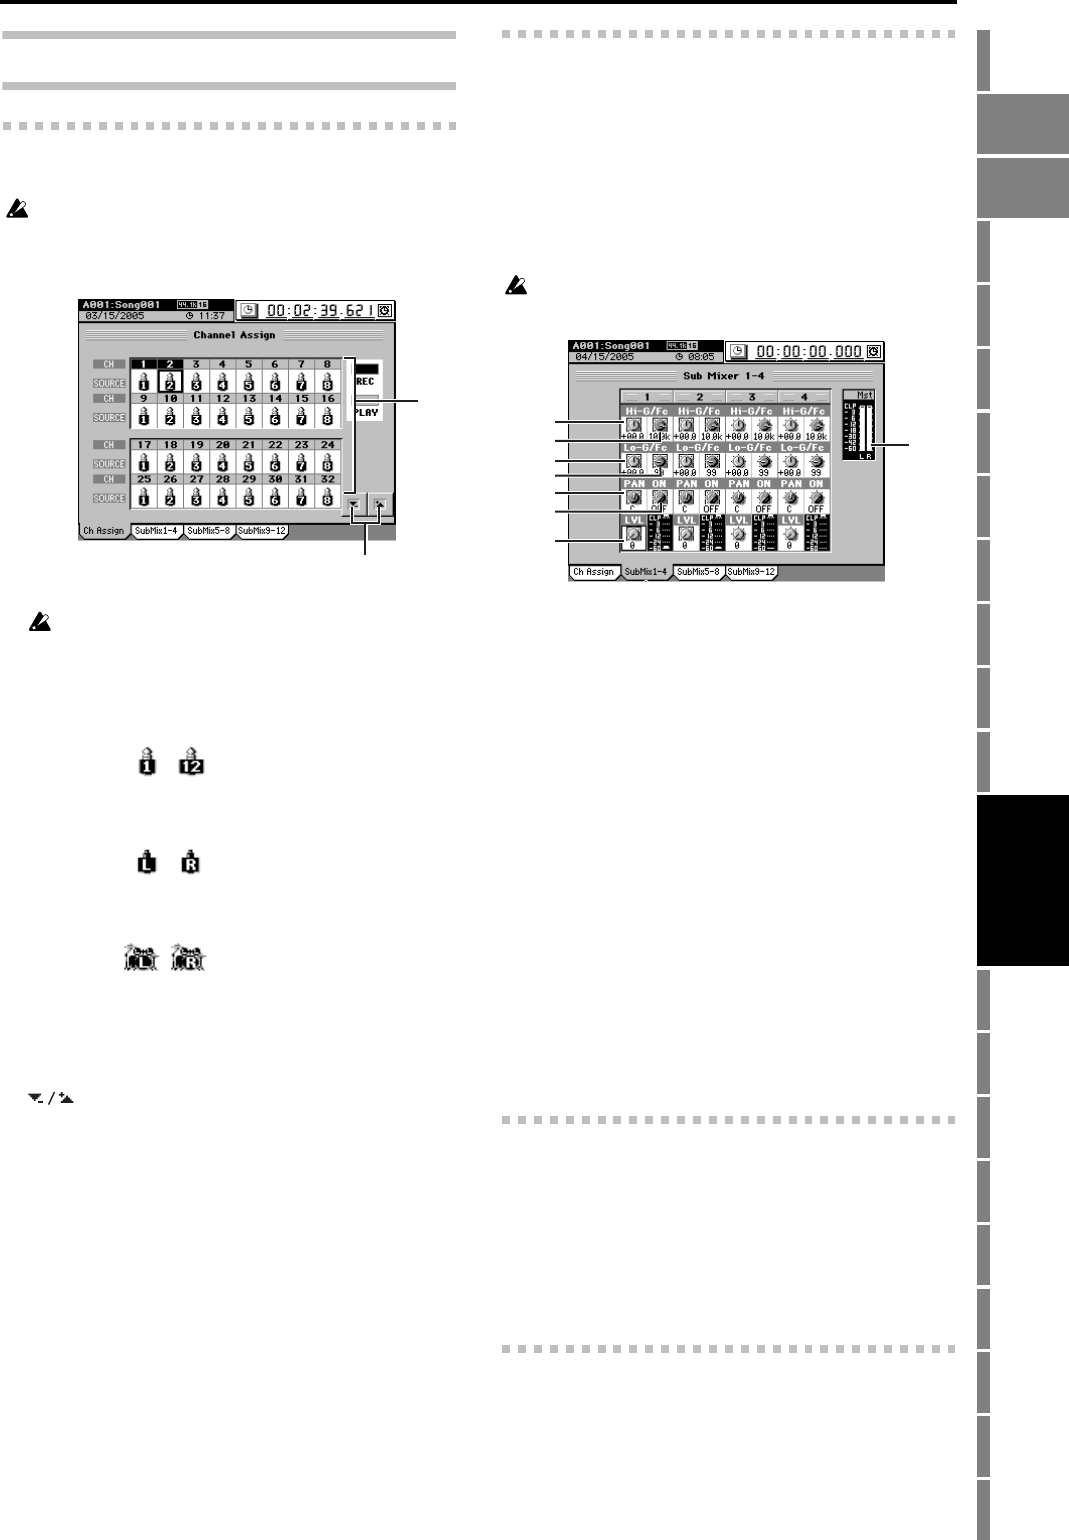
2a-1. Channel Assign
Here you can specify the input for each mixer channel 1–32.
When you select a digital input such as S/P DIF, noise may occur
if the digital data is not synchronized. You should turn down these
faders or turn down the volume of your monitor system before you
change these settings.
1. CH1…32 [1…12, S/P DIF L, R, Rhythm L, R]
The number of assignable channels will depend on the sam-
pling rate and bit depth of the current song (→p.117).
Select a channel icon “CH1”–“CH32,” and then select the
source that will be input to this channel.
The icon will be highlighted if the channel status is set to
Record (REC).
INPUT 1…12: …
The analog signal from an instrument etc. connected
to the INPUT 1/GUITAR IN–INPUT 12 jacks will be
input to the mixer channel.
S/P DIF L, R: ,
The digital signal from a device (e.g., DAT) connected
to the S/P DIF IN jack will be input to the mixer chan-
nel.
Drums L, R: ,
The pattern you selected for “Session Drums” will be
input to each channel. If the “Drums Track Mixer”
parameter “Assign” is set to “CH Input” and the
Click Monitor button is on, you can record while lis-
tening to the rhythm (→p.143).
2. buttons
Use these up/down buttons to select the INPUT source.
2a-2. Sub Mixer 1–4
These settings allow you to use the inputs as “sub inputs” for
inputting the return from an external effect to the INPUT 1/
GUITAR IN–INPUT 4 jacks, or so that the sound of an instru-
ment connected to these jacks can be mixed with the track
playback. (→p.44)
After completing a song on the D3200, you can synchronize
a sequencer to the D3200 and use sub inputs to mix the se-
quenced sounds with the track playback of the D3200.
These inputs are sent to the master bus.
Use the AUX jack to transmit the effect send to your external ef-
fect processor. (→p.109)
1. HIGH.G [–15 dB…+15 dB]
Sets the high-frequency gain of the sub input.
2. HIGH.Fc [21 Hz…20.1 kHz]
Sets the cutoff frequency at which the shelving-type EQ
will adjust the high-frequency range of the sub input.
3. LOW.G [–15 dB…+15 dB]
Sets the low-frequency gain of the sub input.
4. LOW.Fc [21 Hz…20.1 kHz]
Sets the cutoff frequency at which the shelving-type EQ
will adjust the low-frequency range of the sub input.
5. PAN [L63…C…R63]
Sets the panning at which the sub input will be sent to the
master bus.
6. ON [ON, OFF]
Specifies whether the sub input will be sent to the master
bus (ON) or not (OFF).
7. Level [0…100]
Specifies the level at which the sub input is sent to the
master bus.
8. Level meter
Indicates the level of the master bus.
2a-3. Sub Mixer 5–8
These settings allow you to use the inputs as “sub inputs” for
inputting the return from an external effect to the INPUT 5–
INPUT 8 jacks, or so that the sound of an instrument connect-
ed to these jacks can be mixed with the track playback.
(→p.44)
For the parameters, refer to the preceding section “2a-2. Sub
Mixer 1–4.”
2a-4. Sub Mixer 9–12
These settings allow you to use the inputs as “sub inputs” for
inputting the return from an external effect to the INPUT 9–
INPUT 12 jacks, or so that the sound of an instrument con-
nected to these jacks can be mixed with the track playback.
(→p.44)
For the parameters, refer to the preceding section “2a-2. Sub
Mixer 1–4.”
1
2
1
2
3
4
5
6
7
8
MIXER
METER


