108
Click the button to display the Recall dialog box, verify
the EQ program and the loading-destination channel,
and click the Yes button (or press the panel YES key). If
you decide not to load, click the No button (or press the
panel NO key).
Since channels 25–32 have a two-band EQ with Low and High,
loading a four-band EQ library item into these channels will have
the following result.
• The LowMid and HighMid settings will be ignored.
• The Gain and Fc of the Low and High bands will remain as
they are, but the Q will be forcibly changed to Shelving.
5. Store
This stores the EQ settings of the “EQ/ATT” tab page into
one of the user EQ programs.
The EQ settings of the channel selected by 2.”CH” will be
stored.
A name will automatically be assigned to the stored EQ
program.
The PlayEQ of channel 8: CH08-I.EQ
The RecEQ of channel 10: CH10-EQ
Verify the store-destination number and click the Yes but-
ton (or press the panel YES key). If you decide not to
store, click the No button (or press the panel NO key).
5a. Rename
You can click this button to edit the name of the library
program (→p.99).
5b. Program number cell
Here you can select the store-destination program
number. Click the cell to highlight it, and use the
value dial (or the +/– keys) to make your selection.
2d-3. Phase
You can invert the phase of each channel.
If one channel of the stereo signal from an audio device is be-
ing input via a jack whose hot and cold conductors are re-
versed, their stereo position may be blurred, or portions of
the sound may be cancelled. This setting lets you invert the
phase to correct such situations.
1. PHASE [N, R]
N (NormalPhase): The phase of this channel will not be
inverted. Normally you will leave this at “N.”
R (ReversePhase): The phase of this channel will be
inverted.
On the D3200, pin 2 is hot and pin 3 is cold (→p.6). Set this
to “R” if the connected audio device uses the opposite pin wir-
ing.
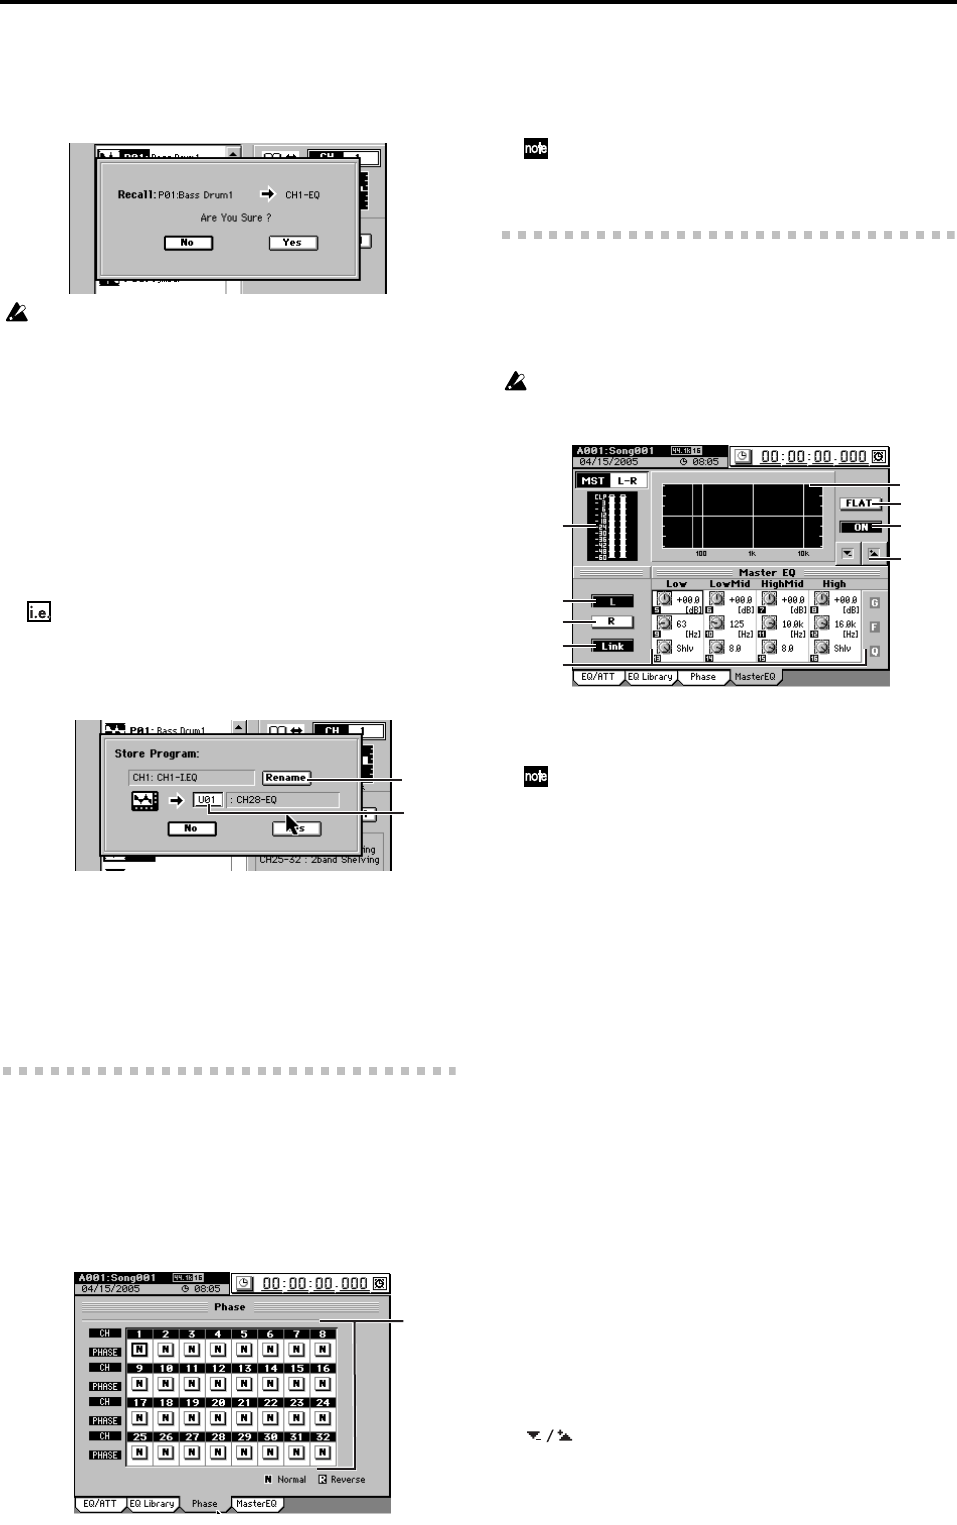
2d-4. Master EQ
Here you can adjust the equalizer settings for the master bus.
This is an four-band peaking equalizer. The Low and High
bands can also be set to a shelving-type (Shlv) EQ.
The master EQ is used as a Rec EQ for the master track.
The master EQ cannot be used when playing back the master track
or when using “Solo→Master.”
1. Level meter
This indicates the level of the master bus.
If clipping occurs, adjust the MASTER fader.
2. L
Selects the master EQ settings for the left channel.
3. R
Selects the master EQ settings for the right channel.
4. Link
Sets the left and right channels of the master EQ to the
identical settings. You can adjust the settings from either
the left or right channel.
5. Band 1…4 EQ G/F/Q
[–15 dB…+15 dB/21 Hz…20.1 kHz/0.1…10, Shlv*]
These parameters adjust the gain, center frequency, and
Q (filter sharpness) of each band. Use the Knob Matrix to
adjust the setting.
* By selecting Shlv as the “Q” value for the Low and
High bands, you can switch them to shelving-type EQ;
in this case the F value will become the cutoff fre-
quency.
6. EQ curve graph
This graphically displays the EQ curve specified by these
parameters.
7. FLAT
This sets the Gain of each band to 0 dB. The center fre-
quency and Q settings for each band will remain
unchanged.
8. ON/OFF
Switches the master EQ on/off. This turns both channels
on/off regardless of the channel (L or R) you are cur-
rently editing.
9. buttons
Use these up/down buttons to edit the parameter values.
5a
5b
1
1
5
8
7
2
9
4
3
6
