89
Operation
Song,
Locate
MixerEffects
Session
Drums™
Recorder
CDDataDriveUSBMIDIUpgrading
the system
Recovery
CD
ClickPoint
calibration
The D3200’s hard disk can be divided into one, two or four
song drives used to record and play back songs, and a PC
drive used to exchange data with a personal computer.
The D3200 also has a built-in CD-R/RW drive that lets you
write backup data or the audio data for a completed song to
a CD, or load audio files or backup data from a CD.
The D3200 provides the following utility functions for man-
aging these drives.
Partition: Divide a song drive
Drive Info: View information about a song drive, or
rename a drive
Check Drive: Check the hard disk
Format: Format the hard disk
Load System: Update the system
Save System: Create a system recovery CD
You can also check the size of files in the PC drive, and re-
name or delete them. (→p.92)
1. Specifying the drive size
You can partition the hard disk into as many as four song
drives. You can also change the size of the PC drive.
1-1. Partitioning the hard drive into
separate song drives (Partitions)
When you partition the hard disk, all data in the song drive area
will be erased. However, and “User Data”(→p.83, 122), SYS-
TEM/MIDI “Control” tab page data.
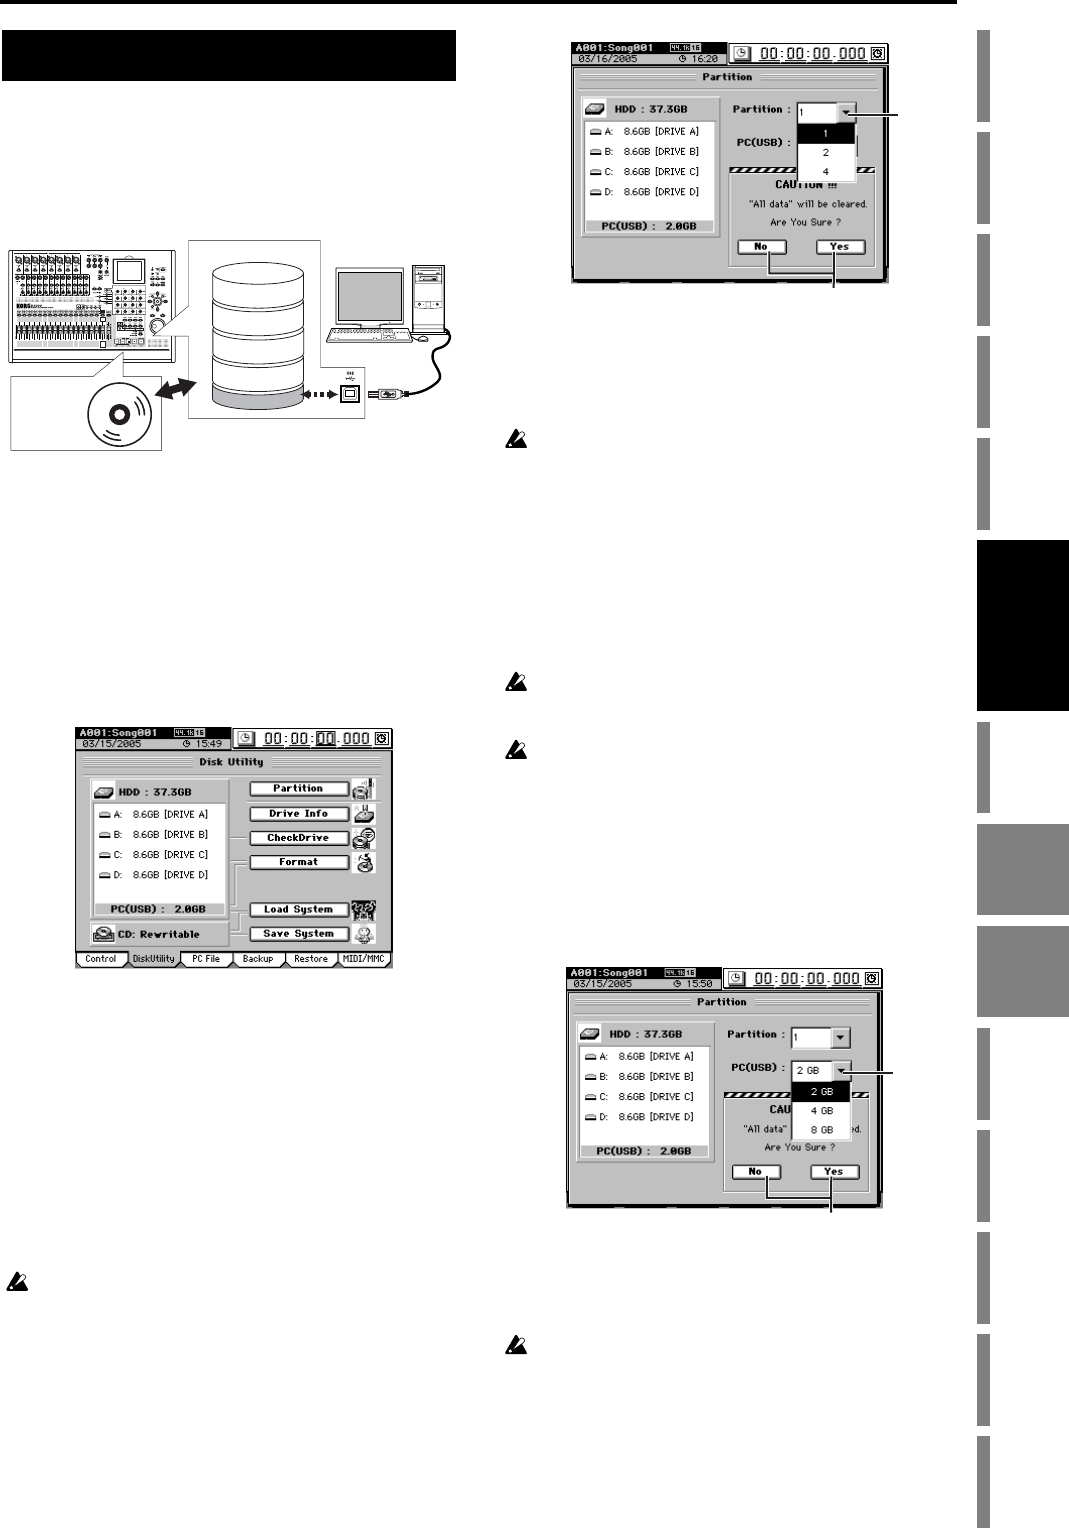
(1) Access the SYSTEM/MIDI, “DiskUtility” tab page,
and click the Partition button to display the Partition
dialog box.
(2) Click the Partition list button and select the number of
hard disk partitions you wish to create.
(3) Execute the Partition operation.
When you
click the Yes button (or press the panel YES
key)
, the display will ask
“Are You Sure?”
Click the Yes
button (or press the panel YES key)
to begin the opera-
tion.
When you make partition settings, a warning dialog box will ap-
pear if the drive contains even one song for which Protect is turned
on. (→p.120)
Partitioning will erase all data from the song drive area of the
hard disk. When the operation is completed, the display will
indicate “Completed.” Click the OK button (or press the
panel YES key) to return to the “DiskUtility” tab page.
The song drives are identified as A, B, C, and D.
1-2. Specifying the PC drive size
If connected to a Windows 98 computer, only 2 GB can be detected
for a PC (USB) drive. The drive will not be detected if it is 4 GB
or 8 GB in size.
When you execute a change in the PC (USB) drive size, the data
of the PC (USB) drive and all song drives will be lost, but the
“User Data” (→p.83, 122) and SYSTEM/MIDI, “Control” tab
page data will be preserved.
(1) Access the SYSTEM/MIDI “DiskUtility” tab page, and
click the Partition button to display the Partition dia-
log box.
(2) Click the PC Drive list button and choose the desired
size for the PC (USB) drive.
(3) Execute the change in the PC drive size.
When you click the Yes button a message of “Are You
Sure?” will appear; click the Yes button (or press the
panel YES key) once again to execute.
When you change the size of the PC drive, a warning dialog box
will appear if the drive contains even one song for which Protect
is turned on. (→p.120)
When you change the size of the drive, the entire hard drive
will be erased, including all data on the song drives and PC
drive.
When the operation has been completed, the display will in-
dicate “Completed”, click the OK button (or press the panel
YES key) to return to the “DiskUtility” tab page.
Drive
D3200
PC drive
Drive B
Drive C
Drive D
Drive A
Hard disk
CD-R/RW drive
(2)
(3)
(3)
(2)
Drive Data


