111
Counter
Rename
METER
MIXERCH
VIEW
EFFECTSENDEQPAN
SONGSYSTEM
/MIDI
TRACKCD
UNDOTUNER
SESSION
DRUMS
STORE
SCENE
MARK
SCRUB
LOC 1/IN ...
LOC 4/END
REC/PLAY
MODE
Transport
keys
Reference
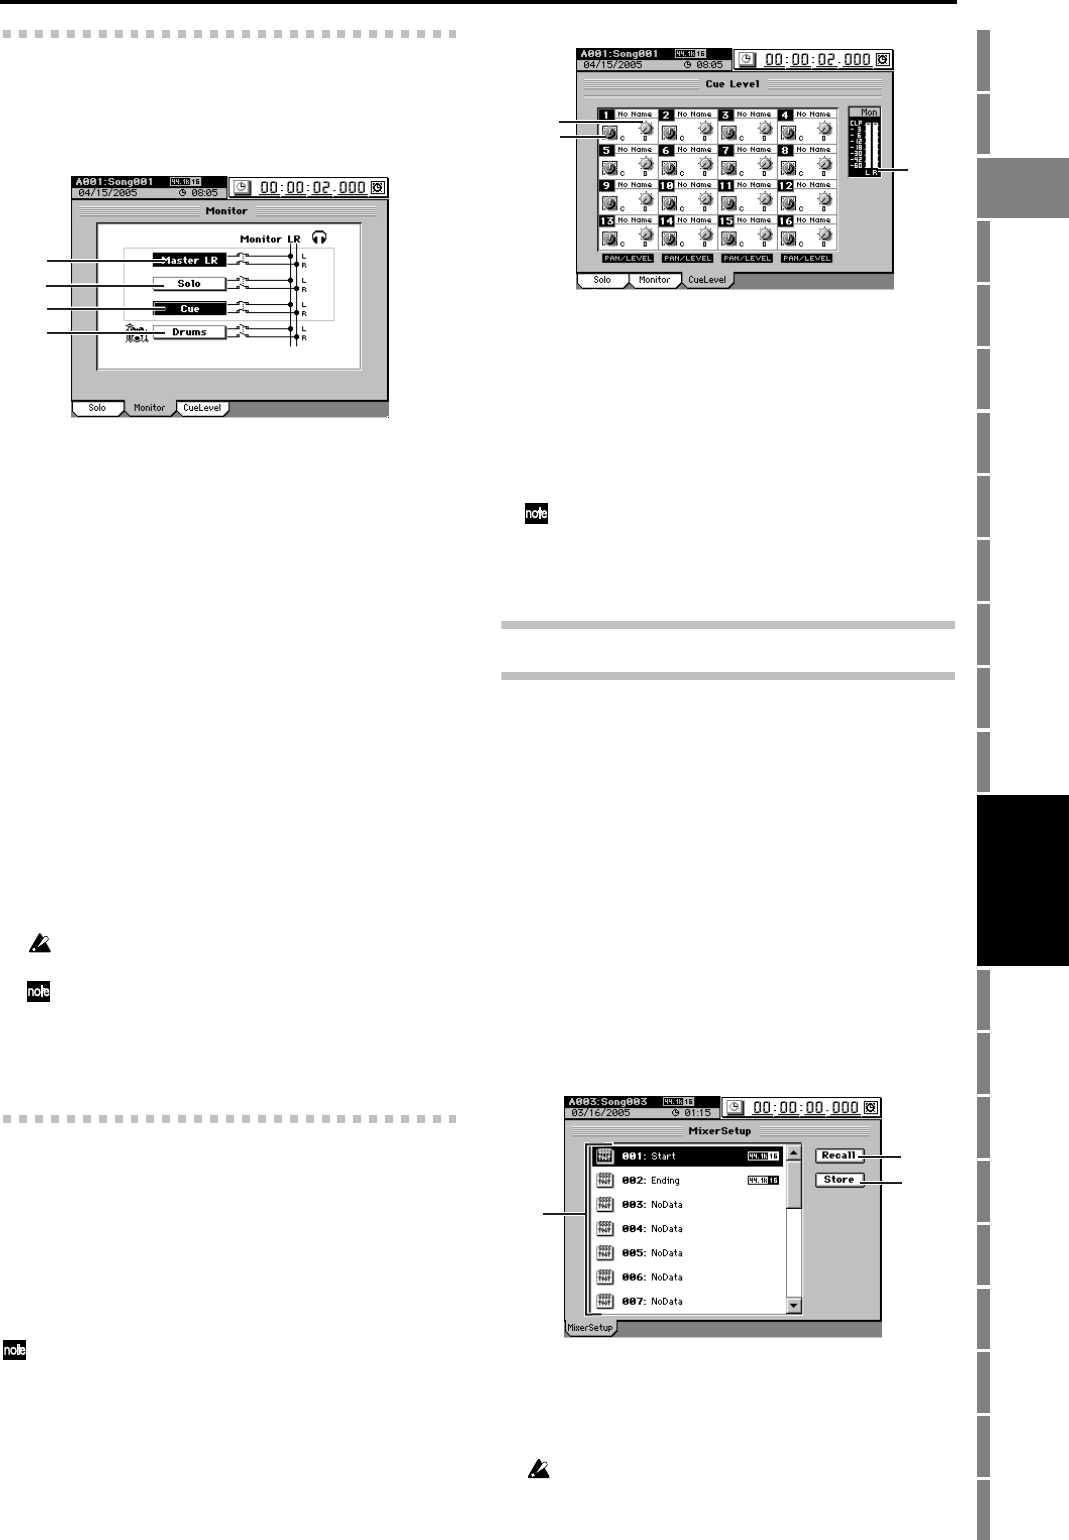
2f-2. Monitor
Here you can select the audio signals that will be output from
the monitor output (MONITOR L/R jacks) and headphone
output (PHONES jack).
1. Master LR
Sends the master LR bus to the monitor output. Normally
you will select this.
2. Solo
When you select a signal to be soloed in the “Solo” tab
page, this will be selected automatically, and it will not be
possible to select “Master LR” or “Cue.” To select these
items, you must first turn “Off” all soloed signals.
3. Cue
Sends the signal specified by the “Cue Level” (see the
section that follows) level and pan settings to the monitor
output. If you select this when recording, you will be able
to adjust the monitor volume and pan for comfortable
playing, without affecting the recording level of the sig-
nal.
4. Drums
The audio from the Session Drums will be sent directly to
the monitor output. You can use this when you want to
listen to the Session Drums through headphones as the
rest of the audio tracks are output from the MASTER L/R
jacks, for example during a live performance. Normally
you will keep this turned off.
The drum sound will not be output unless the Session Drums
channel key is on.
If you turn Drums on here, the SESSION DRUMS
“DrmsMixer” tab page “Assign” setting will change to
“Monitor.” If you turn Drums off, the SESSION DRUMS
“DrmsMixer” tab page “Assign” setting will change to
“Master.”
2f-3. Cue Level
When “Cue” is turned on in the “Monitor” tab page, use the
settings here to adjust the audio level and pan of each mixer
channel.
During playback, the audio will be sent regardless of the
channel on/off setting. During recording, audio will be sent
only for channels whose CH ON keys are set to on.
Use the 1–16 key and 17–32 key to switch the display be-
tween sixteen-channel groups.
The audio that is set to Cue will be the playback signal if a track is
playing, or the signal being recorded if the track is recording.
1. Pan [L63…C…R63]
Adjusts the panning of each channel’s cue signal.
You can click a knob icon and use the Knob Matrix to
make settings for a group of sixteen channels.
2. Level [0…100]
Adjust the level of each channel’s cue signal.
You can click a knob icon and use the Knob Matrix to
make settings for a group of sixteen channels.
Unity level is 100.
3. Level meter
This bar graph indicates the cue mix output volume.
2g. MIXER SETUP
Here you can save the current mixer settings, or recall previ-
ously-saved mixer settings.
This allows you to store mixer settings that you use frequent-
ly, and then recall them when creating a new song. You can
also use this method to copy mixer settings to a different
song.
A mixer setup contains the following parameters.
• Channel Assign, Sub Mixer, REC/ PLAY, and MASTER
TRACK STATUS
• Pair, Group
• Fader, Pan, Play/Rec EQ
• ATT, CH ON, Phase, AUX/EFF Send, Rec Send
•Effect (all settings including the parameters being edited)
• Master Fader, Master EQ, Send Out level, Send Select
All
• Solo, Monitor, Cue, drum pattern output assignment,
drum pattern volume
1. Mixer setup list
Click the screen to select the mixer setup program you
want to use. The list shows the program numbers and
program names.
When the D3200 is shipped from the factory, mixer setup pro-
grams 1 through 20 are stored as “NoData.” Recalling one of
these programs will set the mixer to the same settings as when
it is initialized (i.e., when you create a New Song).
1
2
3
4
1
2
3
1
2
3
MIXER


