83
Operation
Song,
Locate
MixerEffects
Session
Drums™
Recorder
CDDataDriveUSBMIDIUpgrading
the system
Recovery
CD
ClickPoint
calibration
Whenever you switch songs or turn off the power, the
D3200’s Auto Save function will automatically save (to the
hard drive) the songs or parameters that you recorded or ed-
ited.
This means that you do not need to perform any particular
operations to save your data as long as you power -off using
the procedure described on page 2. (→p.42 “Saving a song”).
You do need to save the effect settings if you have edited effect pro-
grams.
The data saving operations explained in this section are used
when you have created important data on the D3200 that you
want to save on a CD-R/RW or your computer, or when you
want to delete data from the hard disk to obtain more free
space.
Depending on the type of data, you can use either Backup or
Export to save it.
Data you save in this way can be used again by restoring or
importing it.
For details on the file names, restrictions, and filename exten-
sions of the data that you can backup/restore or export/im-
port, refer to “More about drives and files” (→p.171).
If you want to save data on your computer, first store the data in
the PC drive of the D3200’s hard disk, and then save that data on
your computer.
The following table shows the data you can save.
Data save/load methods and types of file that can be saved
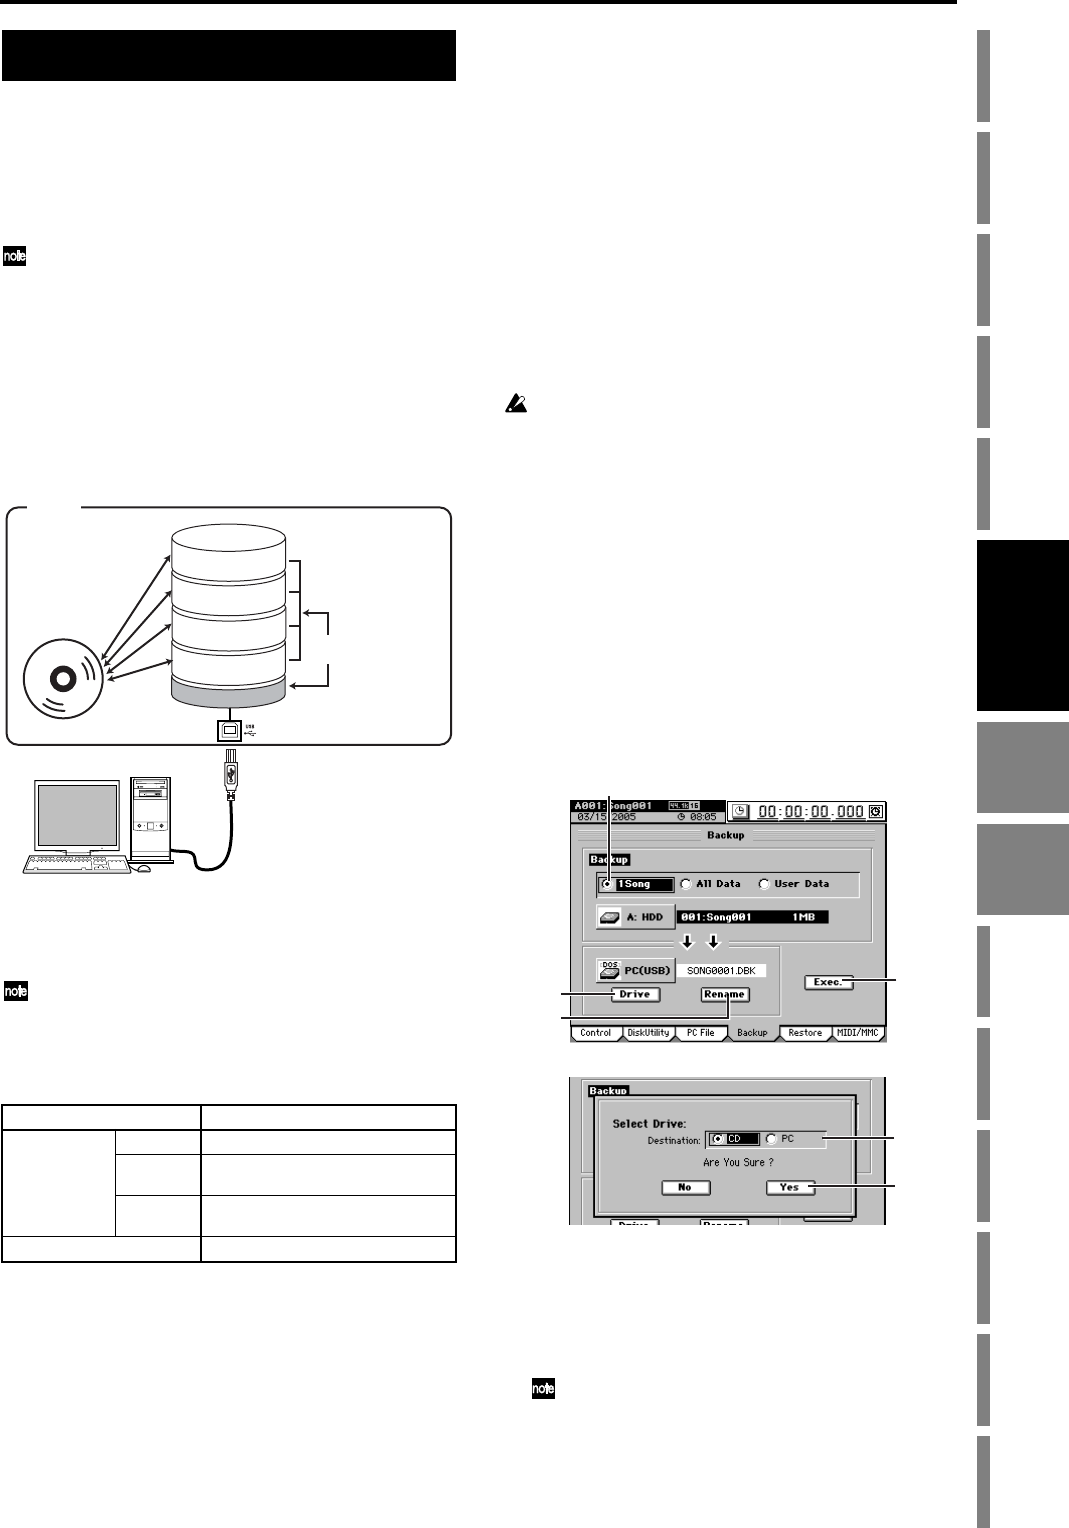
1. Backing up and restoring
1-1. Backing up
You can back up data to CD-R/RW or the PC drive.
The following data can be backed up.
1Song
Back up one song from the selected drive and the user
data.
All Data
Back up all songs from the selected drive, the user data,
and the album CD project.
User Data
Back up only the user data (user effect programs, user
EQ libraries, mixer setup).
A backed-up song cannot be played back directly. In order to play
the song, you must restore it.
Backing up 1 Song
(1) Select the song that you want to back up (→p.36).
(2) Select the type of backup.
In the SYSTEM/MIDI, “Backup” tab page, click the
“1Song” radio button.
(3) Select the backup-destination drive.
Click the Drive button to open the Select Drive dialog
box. Click either the “CD” or “PC” radio button, and
then click the Yes button (or press the panel YES key).
(4) If you are backing-up to CD-R/RW, insert a disc in the
CD-R/RW drive.
Use a blank disc or an ISO9660 format disc that has not
been finalized.
(5) Edit the file name.
A file name is assigned automatically (→p.172).
If you want to edit the file name, click the Rename but-
ton.
Use the Rename dialog box to edit the file name
(→p.36).
If the backup-destination already contains an identically-
named file, you will be unable to execute the backup. Please
rename the file.
Save method File types
Backup/
Restore
1Song Data for one song + User data
All Data
All song data on the selected song
drive + Album CD project + User Data
User Data
User effect programs + User EQ librar-
ies + mixer setup
Export/Import Audio file data (WAV format)
Data
D3200
PC drive
Song Drive A
Hard disk
CD-R/RW drive
Song Drive B
Song Drive C
Song Drive D
Backup/Audio file
Backup/Restore
Export/Import
Backup/Restore
Export/Import
USB Slave Mode
(2)
(3)
(5)
(6)
(3)
(3)
Data CD


