20
Step 2: Quick recording
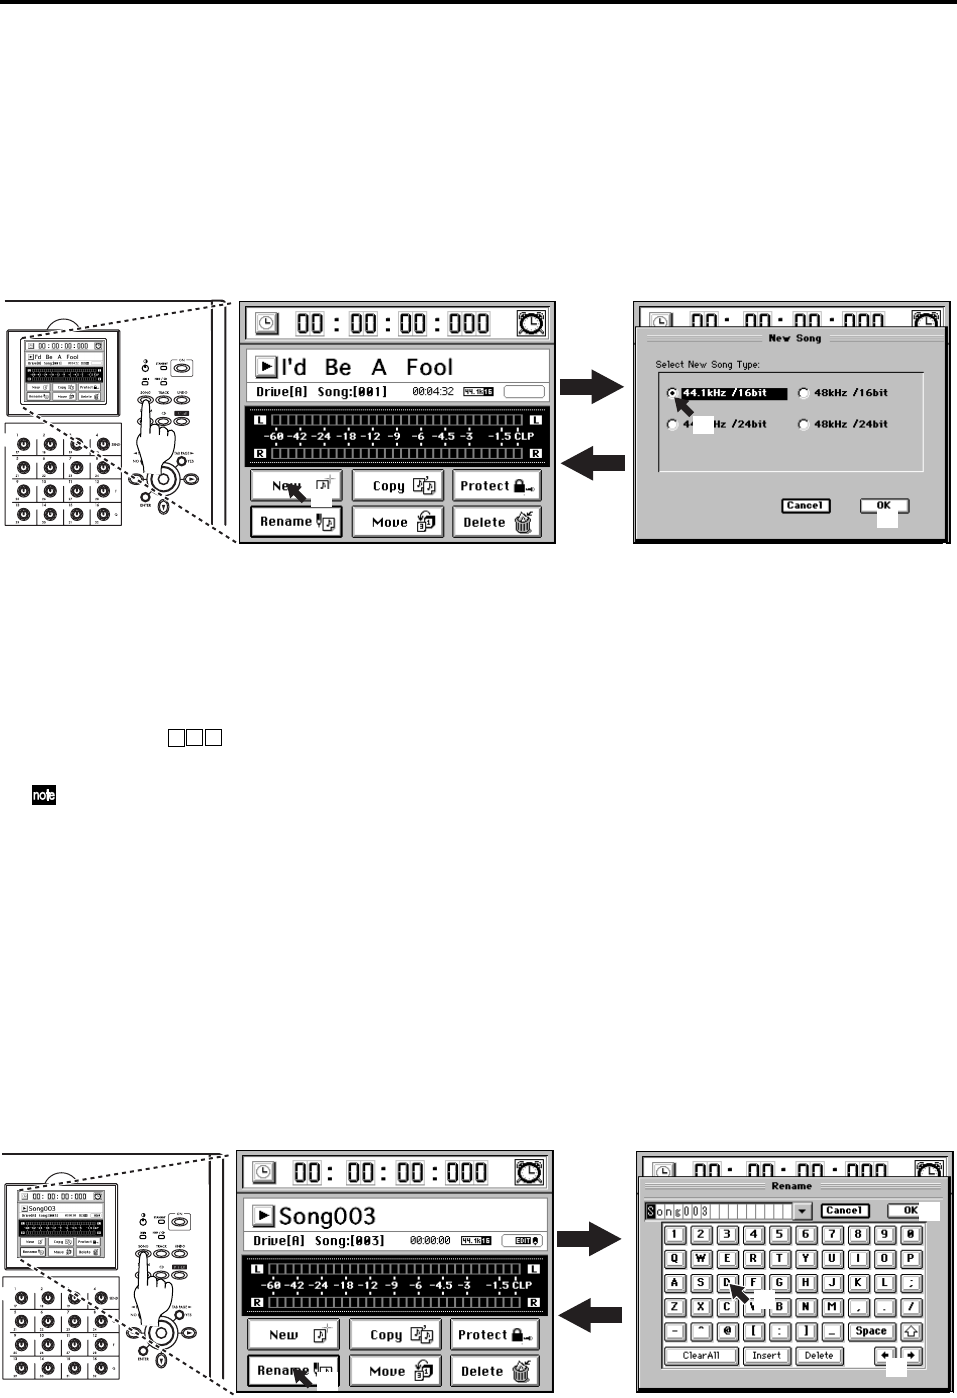
1. Create a new song
In order to begin recording, you must first create a new song.
(1)Press the SONG key to access the SONG page.
(2)Click the New button. The New Song dialog box will appear.
In the “Select New Song Type” area, select the desired sampling frequency
and bit depth for the song that you want to create.
For this example, click 44.1 kHz/16 bit.
(3)Create the song.
Click the OK button in the screen (or press the panel YES key). A new song
named “Song ”* will be created following the last existing song.
The newly created song will be selected, and will appear in the SONG page.
You can change the location (song drive) in which the song is created (→p.36 “Selecting a
song from another song drive”).
2. Name the song
Here’s how to rename the newly created song.
Before you start recording, we recommend that you give your song a name that
will help you recognize the content of the song.
(1)Press the SONG key to access the SONG page.
Here you can edit the name of the song that’s displayed. If you want to select
a different song, refer to “1-3. Selecting a song” (→p.36).
(2)Click the Rename button to display the Rename dialog box.
(3)Edit the song name.
When you press a character or numeral button, the highlighted character in
the song name will change.
(2)
(2)
(3)
(1)
(2)
(1)
(3)
(3)
(4)


