48
You can also turn “Drums” on by setting the SESSION
DRUMS, “DrmsMixer” tab page parameter Assign to
Monitor.
(3) Adjust the monitor volume.
The monitor volume is adjusted by the MONITOR
LEVEL knob for the MONITOR L/R jacks, and by the
PHONES LEVEL knob and MONITOR LEVEL for the
PHONES jacks.
3-8. Adjusting the cue level
Cue Level is a function that lets you adjust the monitor vol-
ume and pan independently of the settings of the master bus.
The cue signal is output from the MONITOR L/R jacks and
the PHONES jacks.
(1) Select cue as the source for monitoring.
In the MIXER, SOLO/MONITOR
, “Monitor” tab page,
click the “Cue” and turn it on (highlighted).
If you have made “Solo” settings, defeat “Solo” before you
select Cue.
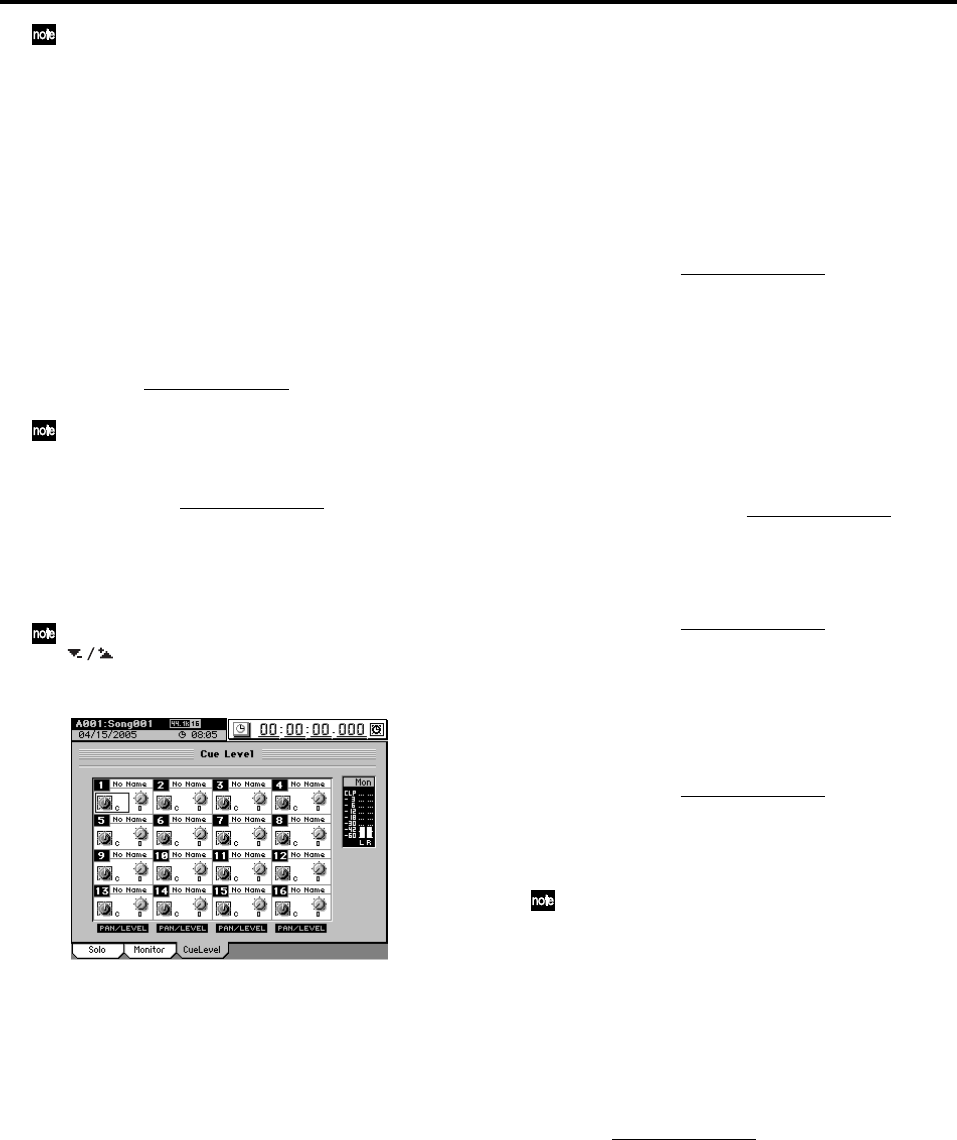
(2) Adjust the cue level.
Access the MIXER, SOLO/MONITOR
, “CueLevel” tab
page.
If you click the “LEVEL” knob icon, you can use the
Knob Matrix to adjust the volume of each channel.
If you click the “PAN” knob icon, you can use the Knob
Matrix to adjust the pan of each channel.
Alternatively, you can click a channel icon and use the
buttons, value dial, or +/– keys to adjust the volume
level and pan.
3-9. Solo settings
Use the Solo function when you want to listen to only a spe-
cific channel(s) without affecting the signal being recorded or
sent to the MASTER L/R bus. You can also use the solo when
you want to listen to one of the Send signals or to one of the
Return signals from one of the internal master effects. The
solo signal is output from the MONITOR L/R jacks and the
PHONES jacks.
Soloing just one channel
(1) Access the MIXER, SOLO/MONITOR, “Solo” tab
page.
(2) Use the Mode radio buttons to click “Last.”
(3) Press the SOLO key to select SOLO mode.
The channel keys of all channels will blink.
(4) Press the channel key for the channel you want to solo.
The key of the selected channel will continue blinking,
and the keys of the other channels will go dark.
(5) Listen to the soloed signal.
As an alternative to using the channel key to select solo, you
can click a button in the MIXER, SOLO/MONITOR
, “Solo”
tab page. This method allows you to select a Send or Return
signal for soloing, as well as the signal of a channel (→p.110).
Soloing more than one channel
(1) Access the MIXER, SOLO/MONITOR, “Solo” tab
page.
(2) Use the Mode radio buttons to click “Mix.”
(3) Use steps (3) and (4) in “Soloing just one channel”
(above) to select the channels that you want to solo.
Cancelling solo
(1) Access the MIXER, SOLO/MONITOR, “Solo” tab
page, and click off the button(s) that you selected for
soloing.
If you want to clear all solo settings, click the Clear All
button.
You can defeat Solo by pressing the REC/PLAY, CH ON,
SOLO, or CH SELECT keys.
(2) Verify the setting.
In the “Monitor” tab page, verify that Solo is now off.
Sending the soloed audio from the master bus
If you want to, you can send the soloed audio signal to the
MASTER L/R jacks. Use this when you want to hear the solo-
ed audio through the monitor system connected to the MAS-
TER L/R jacks.
In the MIXER, SOLO/MONITOR
, “Solo” tab page, click the
Solo→Master button on (highlighted).
3-10. Muting a channel
You can turn the CH ON key on and use the channel keys to
mute (silence) each channel.
(1) Turn on the CH ON key.
The channel keys of all channels will light.
(2) When you press the channel key of a channel, it will be
muted (the key will be dark).


