


23
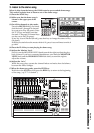
Quick Start
Step 1: PreparationsStep 2: Quick recordingStep 3: OverdubbingStep 4: Mixdown and
mastering
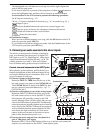
Using these settings, the keyboard connected to INPUT 3 and 4 will be assigned to CH 3 and 4.
Set the pan knob of channel 3 all the way to the left; set the pan knob of channel 4 all the way to
the right. Now you can monitor your keyboard in stereo.
Check the keyboard sound and set the level as described in steps (4)–(8).
4. Adding EQ and EFFECTS
If you want to record without any further processing, proceed to “5. Recording.” If you want to use
each inputs’s 4-band parametric EQ and/or apply the D3200’s internal effects as you record, read
the following sections: “Applying EQ to the input sound” and “Applying effects to the input
sound.”
Applying EQ to the input sound
On the D3200 it’s also easy to apply EQ after recording.
Channels 1–23 are equipped with a four-band parametric EQ to shape the tonal characteristics of
the sound. Channels 24–32 feature a two-band shelving EQ. In the next example, you can apply EQ
to your guitar.
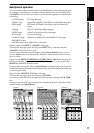
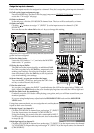
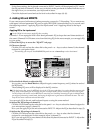
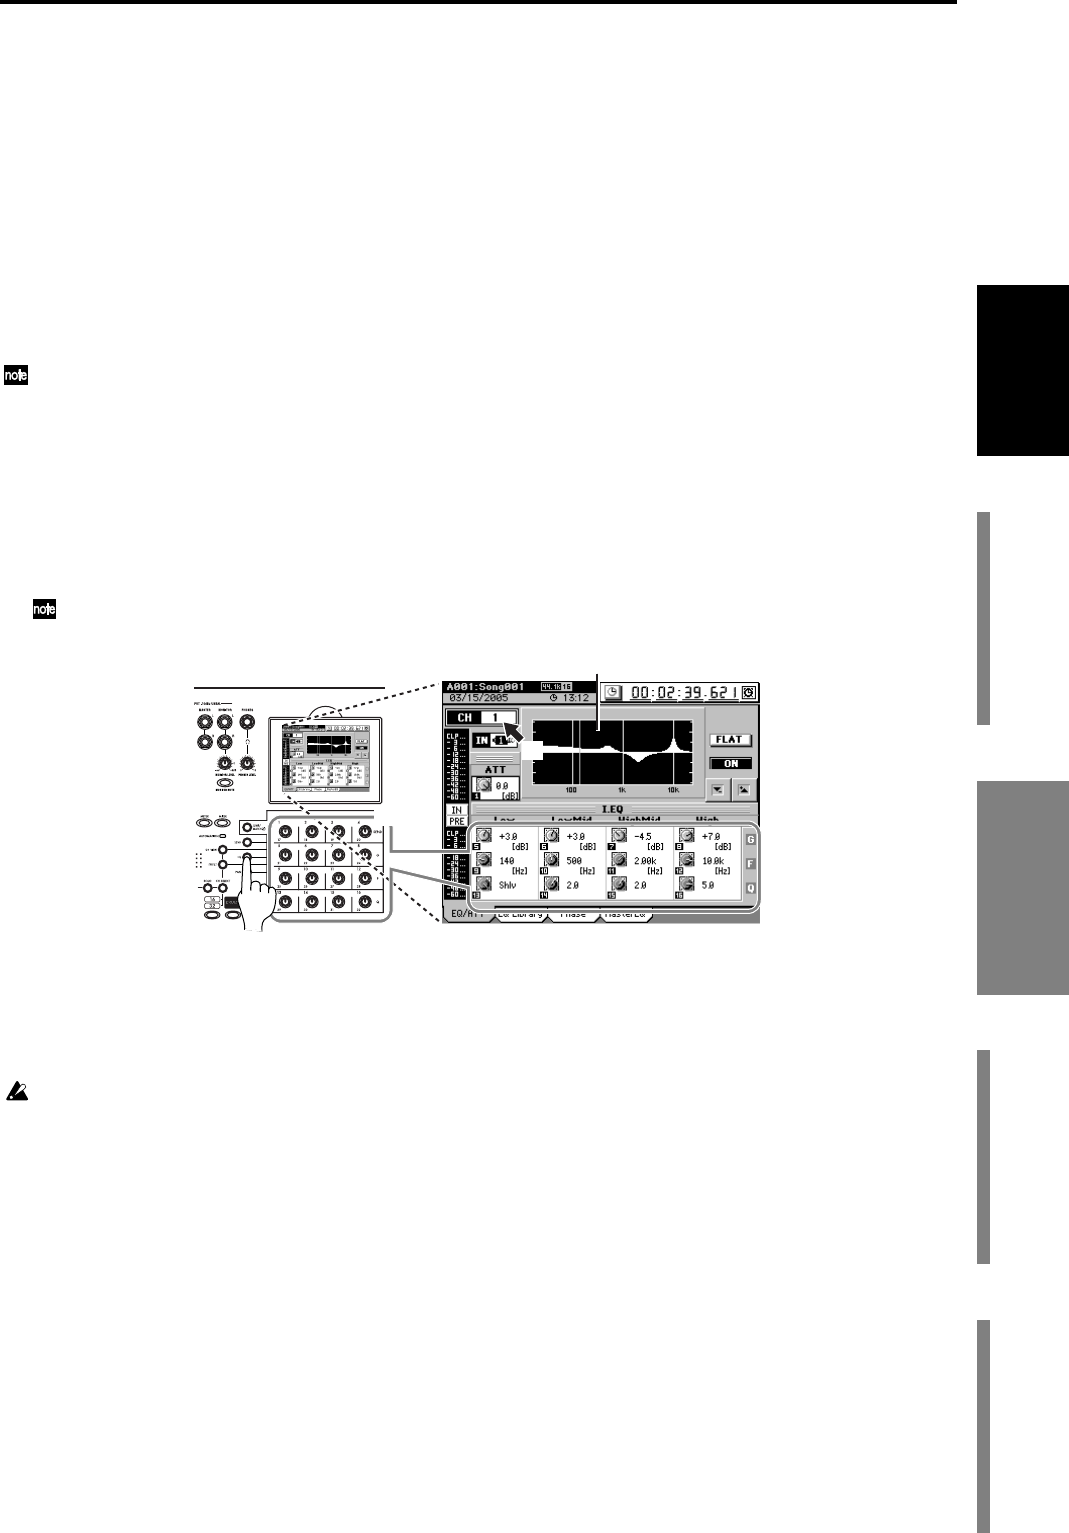
(1)Press the EQ key to access the “EQ/ATT” tab page.
(2)Choose a channel.
Click the CH cell, and use the value dial or the panel + or – keys to select channel 1, the channel
assigned to your guitar input.
Alternatively, you can press the CH SELECT key and turn on a channel key to select the channel.
(3)Use the Knob Matrix to adjust the EQ.
As you play, use the Knob Matrix to adjust the gain, center frequency, and Q values for each of
the EQ bands.
The resulting EQ curve will be displayed in the EQ window.
If the level meter clips, press the ATT knob icon in the LCD screen and adjust it to a value that does not cause clip-
ping. Keep in mind that if you are boosting the gain in multiple bands, you are increasing the level of the signal
overall, and you will need to use the ATT knob to control the level. Instead of increasing the gain in multiple bands,
you might try decreasing certain bands, but keeping the difference in gain between the bands the same. This will
keep the level more consistent and avoid distortion.
You can apply EQ to the mic and keyboard inputs as using the same method.
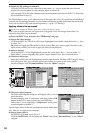
(4)Adjust the EQ settings of channel 2.
Click the CH cell and use the value dial or the panel + or – keys to select the channel assigned to
your microphone input 2 (channel 2).
Now you can apply EQ to the mic connected to INPUT 2. Adjust the EQ as described in step (3).
(5)Adjust the EQ settings of channel 3.
Click the CH cell and use the value dial or the panel + or – keys to select the first channel
assigned to your keyboard. In this example, input 3 (channel 3).
Now you can apply EQ to one channel of the stereo keyboard connected to INPUT 3. Adjust the
EQ as described in step (3).
EQ window
(3)
(1)
(2)
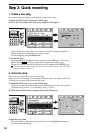
Step 2: Quick recording