118
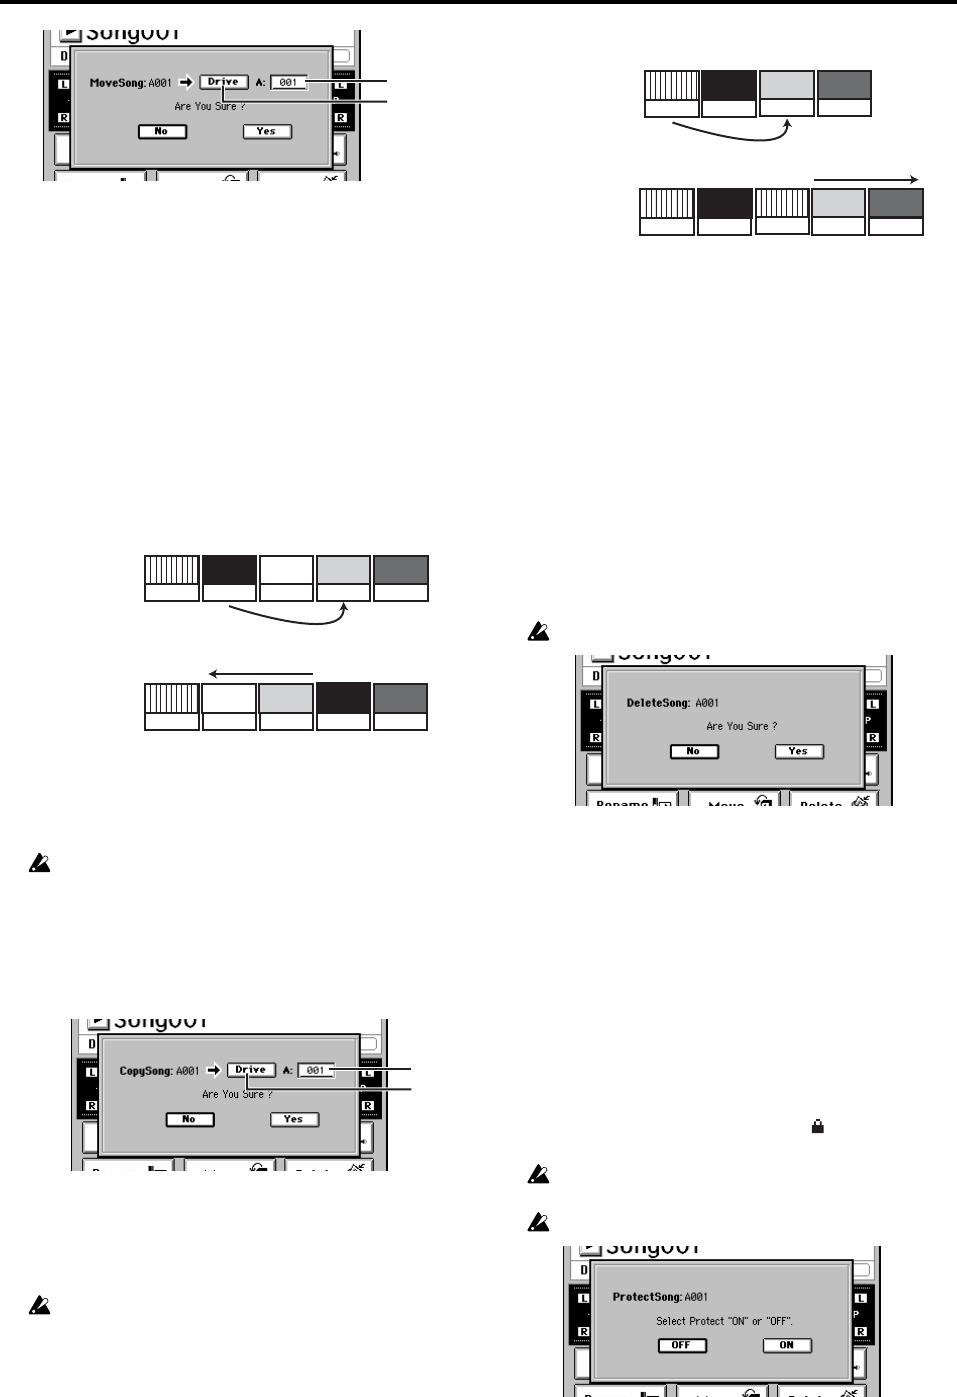
5a. Move-destination song number cell
This shows the drive that contains the selected song,
and lets you select the song number.
If you’re moving a song within the same song drive,
the selectable numbers will be the number of existing
songs. If you’re moving a song to a different song
drive, the selectable numbers will range from “001” to
one greater than the number of existing songs.
When you execute the move, no data will be overwrit-
ten. If the move-destination number you selected is
higher than the move-source number, preceding song
numbers will be renumbered forward. If the move-
destination number is lower than the move-source
number, subsequent song numbers will be renum-
bered down by one.
5b. Move-destination drive
If you want to move the song to a different drive, click
this button to open the Select Drive dialog box. Select
the desired drive, and click the OK button (or press
the panel YES key).
When you move a song to another drive, song numbers will be
adjusted in the same way as for the Copy operation.
6. Copy
This operation copies the currently selected song to
another song number in the desired drive.
When you click this button, the Copy Song dialog box
will appear.
Click the Yes button (or press the panel YES key) to exe-
cute the copy, or click the No button (or press the panel
NO key) to cancel. When the copy operation is finished
and the display indicates “Completed,” click the OK but-
ton (or press the panel YES key).
This Copy operation cannot be undone.
6a. Copy-destination song number cell
This shows the copy-destination drive, and lets you
select the song number. You can select a number in the
range of “001” through “existing song numbers + 1”.
When you execute the copy, the song will be copied to
the copy-destination song number. If the copy-desti-
nation is an existing song number, it will not be over-
written; that song and subsequent songs will be
renumbered upward by one as shown in the diagram
below.
6b. Copy-destination drive
If you want to copy the song to a song drive other than
the current drive, click this button to open the Select
Drive dialog box. Select the desired drive and click the
OK button (or press the panel YES key).
7. Delete
This operation deletes the current song.
When you click this button the DeleteSong dialog box
will appear. Click the Yes button (or press the panel YES
key) to delete the song, or click the No button (or press
the panel NO key) to cancel.
When you execute this operation, the selected song will
be deleted and subsequent songs will be renumbered for-
ward.
When the song has been deleted and the display indi-
cates “Completed,” click the OK button (or press the
panel YES key).
This Delete operation cannot be undone.
8. Protect
Writing, deletion, or editing of the current song can be
prohibited (protect on) or allowed (protect off).
When protect is on, it will not be possible to rewrite the
parameters or data of that song; e.g., an error message
will appear if you attempt to record.
The song will automatically be saved when you turn this
protect setting on.
When you click this button, the Protect dialog box will
appear. Click the ON button to turn protect on, or click
the OFF button to turn protect off. When the protect set-
ting has been applied and the display indicates “Com-
pleted,” click the OK button (or press the panel YES
key).
When protect is on, a protect symbol ( ) will appear fol-
lowing the sampling frequency indication of the song.
If protect is on, adjustments to the faders or EQ will be reflect-
ed during editing, but will not be recorded.
This Protect operation cannot be undone.
5a
5b
EFF
3
Before moving
ABC
CDR
4 5
1
AAA ZZZ
2
Renumbered forward
Song number
Song name
Song number
Song name
EFF
3
After moving
ABC
CDR
4 5
1
AAA
ZZZ
2
Move to song number “4”
6a
6b
Before copying
ABC
CDR
3 4
1
AAA ZZZ
2
Song number
Song name
After copying
Song number
Song name
Copy to song number “3”
ABC CDR
4 5
1
AAA ZZZ
2
3
AAA
Moved backward


