17
Introduction
Before using the D3200
for the first time
Main featuresParts and their functionItems and functions in the
LCD screen
Basic operation
Examples of operation
You can use the sixteen control knobs of the Knob Matrix in the following tab pag-
es. In pages where there are seventeen or more knob icons, you can hold down
the JUMP key and use the cursor keys to switch between groups of sixteen knobs
for editing.
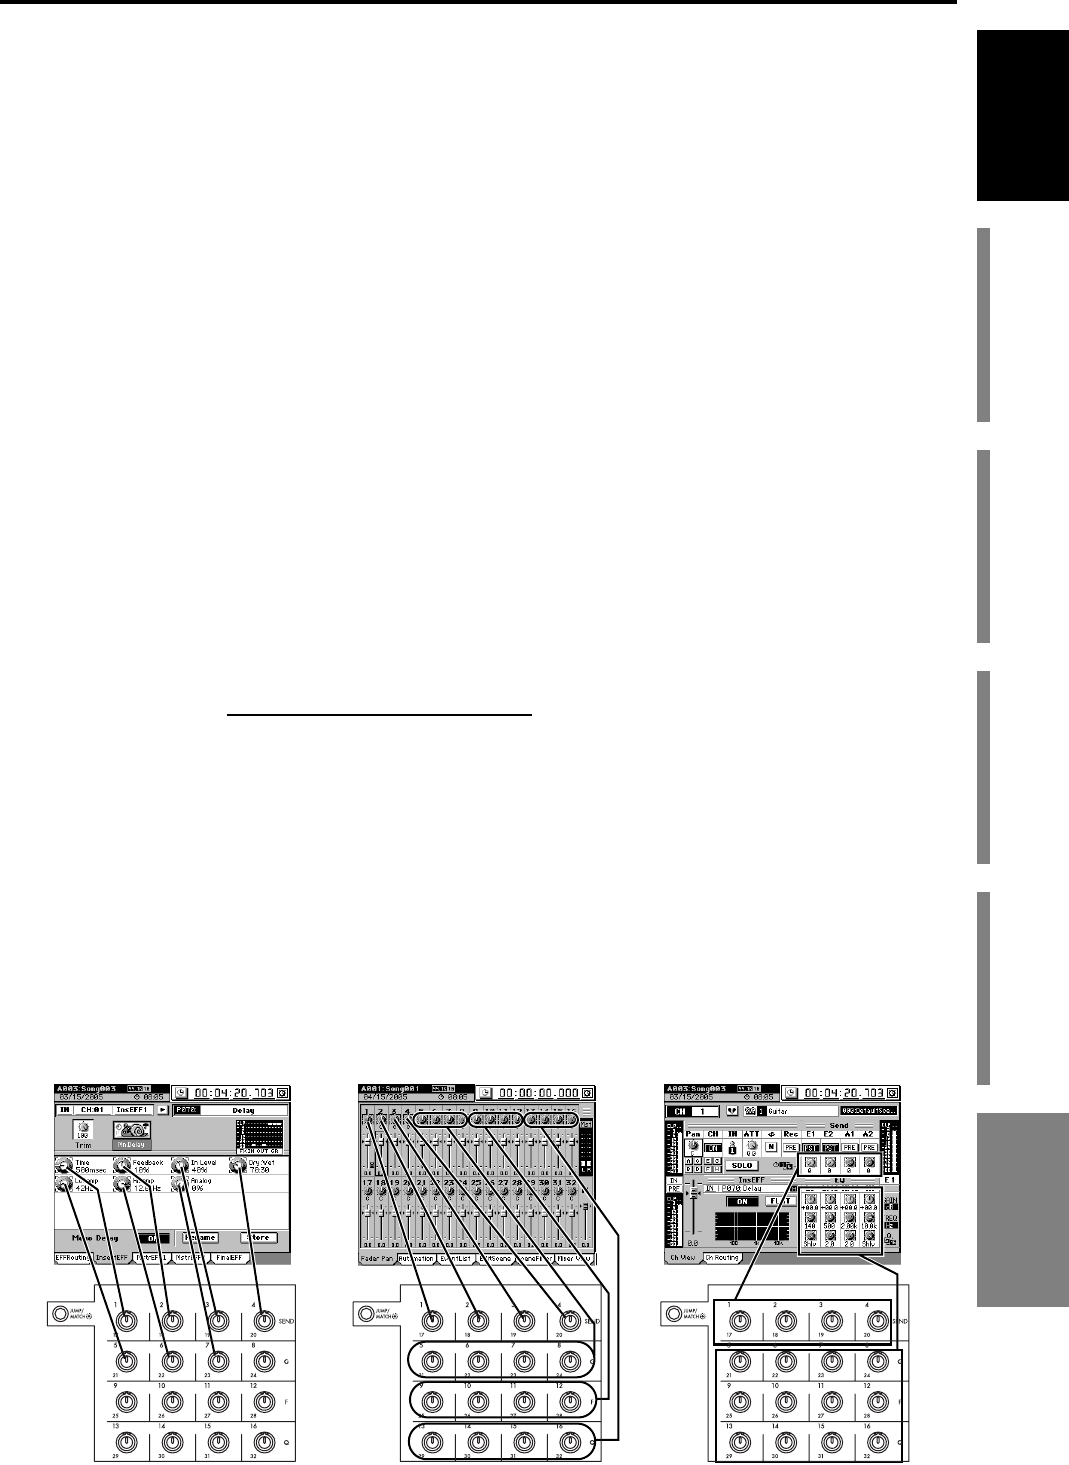
Figure 1 shows the EFFECT, “MstrEFF1” tab page.
To select this tab page, press the top panel EFFECT key, and then click the
“MstrEFF1” tab in the LCD screen.
In this screen, the knob icons are linked with the Knob Matrix below; you can
move a knob to edit the value directly. Knobs for which no knob icon is shown
have no effect.
Figure 2 is the MIXER, FADER/PAN/AUTOMATION
“Fader Pan” tab page. To
select this tab page, press the direct key PAN. Alternatively, you can press the
MIXER key and then click the screen.
In this screen, moving the fader or Knob Matrix (corresponding to pan for each
channel) of the desired channel will automatically select that channel, and change
its fader or pan value.
Figure 3 is the CH VIEW, “Ch View” tab page.
To select this tab page, press the direct key CH VIEW.
You can also click the screen to select this tab page after pressing the CH VIEW
key.
In this screen, the fader, EQ, and Send are controlled directly by the fader of that
channel and by the Knob Matrix.
CH VIEW page Ch View tab page
EFFECT page InsertEFF, MstrEFF1, MstrEFF2, and FinalEFF tab pages
SEND page EFFSend1, EFFSend2, Aux1Send, and Aux2Send tab
pages
EQ page EQ/ATT and MasterEQ tab pages
FADER page Fader Pan and Mixer View tab pages
SOLO page CueLevel tab page
CH INPUT page SubMix1-4, SubMix5-8, and SubMix9-12 tab pages
DRUMKIT screen
METER screen (when FaderView is selected)
Figure 1 Figure 3Figure 2
Basic operation


