


94
If you don’t want to transmit or receive mixer control messag-
es, disable control change transmission and reception
(→“Using MIDI to control the mixer”).
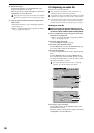
(4) Press the PLAY key of the slave D32XD/D16XD unit.
An MMC message will be transmitted from the slave
D32XD/D16XD unit. The master unit will receive this
message, and will start playing. When playback begins,
the master unit will transmit MTC, and when the slave
unit achieves synchronization, it will begin playback.
It may take several seconds for synchronization to be
achieved.
Using MIDI to control the mixer
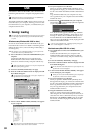
Recording D32XD/D16XD mixer operations on your ex-
ternal MIDI sequencer
(1) Use a MIDI cable to connect the two devices.
Use a MIDI cable to connect the D32XD/D16XD’s MIDI
OUT connector to the MIDI IN connector of your exter-
nal MIDI sequencer.
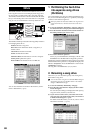
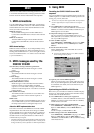
(2) Adjust the synchronization settings on the D32XD/
D16XD and on your external MIDI sequencer.
Access the MIDI/SYNC, “MIDI/MMC” tab page, and
set “MIDI Sync” to “MIDIClockMaster” or “MTC
Master.”
Adjust the synchronization settings on your external
MIDI sequencer as well. (For details, refer to the manual
of your MIDI sequencer.)
(3) Enable control change transmission on the D32XD/
D16XD.
• In the MIDI/SYNC, “MIDI/MMC” tab page, turn the
“MIDI” parameter “Control Change” on.
• If you want scene change data and mixer parameter
changes created by event automation playback to be
transmitted, turn the SCENE, “Automation
[*EditScene]” tab page “Automation” parameter on,
and also turn the MIDI/SYNC “MIDI/MMC” tab
page “MIDI” “Program Change” parameter on.
The D16XD will transmit only scene change data.
(4) Put the external MIDI sequencer in record-ready
mode.
The D32XD/D16XD’s mixer control data is transmitted
on MIDI channels 1–16. Set your external MIDI
sequencer so that it will record all sixteen MIDI chan-
nels. (For details, refer to the manual of your MIDI
sequencer.)
For details on the parameters, refer to the MIDI implementa-
tion. Consult your local Korg distributor for more informa-
tion on MIDI Implementation.
(5) Begin recording.
Press the D32XD/D16XD’s PLAY key to begin playback,
and the external MIDI sequencer will begin synchro-
nized recording. Now if you operate the mixer parame-
ters (faders, pan, EQ etc.), the corresponding control
change messages will be transmitted from the D32XD/
D16XD and will be recorded on the external MIDI
sequencer.
(6) Stop the D32XD/D16XD.
When you press the D32XD/D16XD’s STOP key to stop
playback, the external MIDI device will also stop record-
ing. The D32XD/D16XD’s mixer parameter operations
have now been recorded on the external MIDI device.
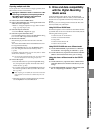
Receiving the mixer operations recorded above in “i.e.
Recording D32XD/D16XD mixer operations ...” from
your external MIDI sequencer to control the D32XD/
D16XD mixer
(1) Use a MIDI cable to connect the two devices.
Use MIDI cables to connect the MIDI IN connectors and
MIDI OUT connectors of the D32XD/D16XD and your
MIDI sequencer to each other.
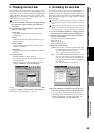
(2) Adjust the synchronization settings on the D32XD/
D16XD and on your external MIDI sequencer.
Access the MIDI/SYNC, “MIDI/MMC” tab page, and
set “MIDI Sync” to “MTC Master.”
Set your external MIDI sequencer to function as MTC
Slave. (For details, refer to the manual of your MIDI
sequencer.)
(3) Enable control change reception on the D32XD/
D16XD.
• In the MIDI/SYNC, “MIDI/MMC” tab page, turn the
“MIDI” parameter “Control Change” on.
• In the SCENE, “Automation [*EditScene]” tab page,
turn “Automation” off.
(4) Press the D32XD/D16XD’s PLAY key.
When the D32XD/D16XD starts playing, your external
MIDI sequencer will also begin playing in synchroniza-
tion.
The previously-recorded mixer operation data will be
transmitted from the MIDI sequencer, causing the set-
tings of the D32XD/D16XD’s mixer to change.