


111
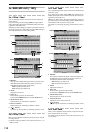
Reference
Counter
Rename
METER
CH
VIEW
MIXEREFFECTCDSYSTEMMIDI/
SYNC
TEMPOSONGTRACKUNDO
STORESCENEMARK
SCRUB
LOC1/IN
...LOC6
ENTERMARK
JUMP
REC/PLAY
MODE
Transport
keys
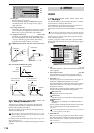
1. PHASE [N, R]
N (NormalPhase): The phase of this channel will not be
inverted. Normally you will leave this at “N.”
R (ReversePhase): The phase of this channel will be
inverted.
On the D32XD/D16XD, pin 2 is hot and pin 3 is cold (→p.7).
Set this to “R” if the connected audio device uses the opposite
pin wiring.
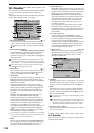
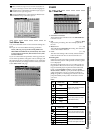
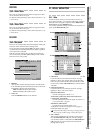
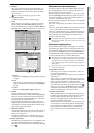
3d-4. Master EQ
Here you can adjust the equalizer settings for the master bus.
This is an eight-band peaking equalizer. Bands 1 and 8 can
also be set to a shelving-type (Shlv) EQ.
The master EQ is used as a Rec EQ for the master track.
The switches and Gain/Freq./Q knobs located at the right of the
display cannot be used to adjust the master EQ.
The master EQ cannot be used when playing back the master track
or when using “Solo→Master.”
1. EQ curve graph
This graphically displays the EQ curve specified by the
parameters.
2. Band 1…8 EQ G/F/Q
[–15 dB…+15 dB/21 Hz…20.1 kHz/0.1…10, Shlv*]
These parameters adjust the gain, center frequency, and
Q (filter sharpness) of each band.
* By selecting Shlv as the “Q” value for bands 1 and 8,
you can switch them to shelving-type EQ; in this case
the F value will become the cutoff frequency.
3. FLT (Flat)
This sets the Gain of each band to 0 dB.
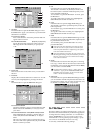
4. Level meter
This indicates the level of the master bus.
If clipping occurs, adjust the MASTER fader.
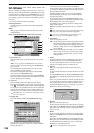
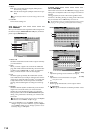
5. L
Selects the master EQ settings for the left channel.
6. R
Selects the master EQ settings for the right channel.
7. Link
Sets the left and right channels of the master EQ to the
identical settings. You can adjust the settings from either
the left or right channel.
8. ON/OFF
Switches the master EQ on/off. This turns both channels
on/off regardless of the channel (L or R) you are cur-
rently editing.
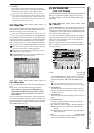
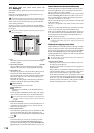
D32XD
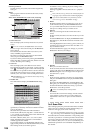
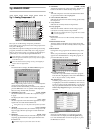
3d-5. Rec Send
Here you can set the position from which signals will be sent
from each mixer channel to the recording tracks.
If you select the pre-fader setting (PRE), the signal will be re-
corded at the level immediately before the fader, regardless
of how the fader is adjusted.
With the pre-fader setting, the recording level will be the
same as when the post-fader (PST) setting is used with the
fader level set to unity (0 dB).
1. PRE/PST
This specifies whether the signal will be recorded at the
level immediately before the fader (Pre Fader) or the level
immediately after the fader (Post Fader).
PRE: Immediately before fader location
PST: Immediately after fader location
2. Select All
Links the PRE/PST buttons of all channels.
1
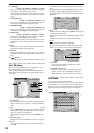
D16XD
1
2
4
3
6
5
8
7
1
2
MIXER