


74
This editing operation will take a longer time for execution (until
the Completed indication appears) in proportion to the length of
the IN–OUT region you specify.
Even if you have not repeatedly edited or recorded a specific track,
the HDD/CD access indicator may stay lit continuously (not
blinking) during recording or playback. The “Disk too busy.” er-
ror message may appear in such cases.
Execute the Optimize (normal) operation with Destination set to
All, and the IN-OUT parameters set to the beginning and end of
the song.
Erasing regions of silent audio data
Erasing regions of recorded silence, or areas of a recorded
track where no audio information is present, restores valua-
ble blank space to the hard drive for increased recording ca-
pacity.
Erasing regions of silent audio data from the IN–OUT re-
gion of track 1, converting them to blank space
(1) Specify the region that you want to optimize.
Set the locations as follows (→p.69).
• Set the IN location to a point slightly earlier than the
region of silence that you want to erase.
• Set the OUT location to the point after the region of
silence.
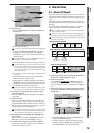
(2) Select “OptimizeTrk.”
In the TRACK, “EditTrk” tab page, press the Edit Trk
Type cell. In the Edit Trk Type dialog box, select “Opti-
mizeTrk” and press the OK button.
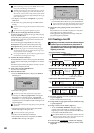
(3) Select the optimize mode.
Press the Mode button to display the Optimize Mode
dialog box.
For this example, select “Erase Silence” and press the
OK button to return to the “EditTrk” tab page.
(4) Select the destination track number for optimization.
• For this example, set the Destination cell to track “1”.
• Check the IN and OUT locations. If you want to set
the locations with more precision, press the Destina-
tion Wave button, and use the Wave dialog box
(→p.139) to set the location.
(5) Execute the editing operation.
Press the Exec. button. Then in the OptimizeTrk dialog
box, press the Yes button to execute the operation.
When the operation is finished, the display will indicate
“Completed.” Press the OK button.
(6) Verify the results of the operation.
Press the LOC1/IN key, and play back from the IN point.
If necessary, you can use Undo to return to the state
prior to execution (→p.147).
This editing operation will take a longer time for execution (until
the Completed indication appears) in proportion to the length of
the IN–OUT region you specify.
Erasing noise
Erasing noise from the IN–OUT region of track 1
(1) Specify the region that you want to optimize.
Set the locations as follows (→p.69).
• Set the IN location to a point slightly earlier than
where the noise occurs.
• Set the OUT location to a point after the noise.
(2) Select “OptimizeTrk.”
In the TRACK, “EditTrk” tab page, press the Edit Trk
Type cell. In the Edit Trk Type dialog box, select “Opti-
mizeTrk” and press the OK button.
(3) Select the optimize mode.
Press the Mode button to display the Optimize Mode
dialog box.
For this example, select “Erase Punch Noise” and press
the OK button to return to the “EditTrk” tab page.
(4) Select the destination track number for optimization.
• For this example, set the Destination cell to track “1”.
• Check the IN and OUT locations. If you want to set
the locations with more precision, press the Destina-
tion Wave button, and use the Wave dialog box
(→p.139) to set the location.
(5) Execute the editing operation.
Press the Exec. button. Then in the OptimizeTrk dialog
box, press the Yes button to execute the operation.
When the operation is finished, the display will indicate
“Completed.” Press the OK button.
(6) Verify the results of the operation.
Press the LOC1/IN key, and play back from the IN point.
If necessary, you can use Undo to return to the state
prior to execution (→p.147).
If this does not remove the noise, use Undo to return to the previ-
ous state, and in the Optimize Mode dialog box of step (3), raise
the “Sense” value slightly (→p.143).
This editing operation will take a longer time for execution (until
the Completed indication appears) in proportion to the length of
the IN–OUT region you specify.
Expand/compress a track (ExpCmpTrk)
This command expands or compresses the specified region
(IN–OUT) of recorded track data to fit the specified region
(TO–END) of another track.
• The expanded or compressed data can be created in a dif-
ferent track, while preserving the original data.
•You can specify whether to convert the pitch.
•You can simultaneously convert up to two tracks of data.
• The converted data can be copied one or more times in
succession.
This command can be used in ways such as the following.
•To convert drum loops of differing tempos to the same
tempo.
•To make a phrase fit within a specified location.
Converting the IN–OUT region of track 1 into the length of
the TO-END region of track 2 without changing the pitch,
and copying it three times starting at the TO location of
track 2
Before you execute this operation, check the virtual tracks of the
expansion/compression Source and Destination.
(1) Specify the regions for expansion/compression.
Set the locations as follows (→p.69).
• Set the IN point to the beginning of the source region.
• Set the OUT point to the end of the source region.
• Set the TO point to the beginning of the destination
region.
• Set the END point to the end of the destination region.
(2) Select “ExpCmpTrk.”
In the TRACK, “EditTrk” tab page, press the Edit Trk
Type cell. In the Edit Trk Type dialog box, choose
“ExpCmpTrk” and press the OK button.
(3) Select the expansion/compression-source track
number.
• For the Source cell, select track “1”.
• Check the IN and OUT locations. If you want to set
the locations with more precision, press the Source
Wave button, and use the Wave dialog box (→p.139)
to set the location.
(4) Select the expansion/compression-destination track
number.
• For the Destination cell, select track “2”.