


105
Reference
Counter
Rename
METER
CH
VIEW
MIXEREFFECTCDSYSTEMMIDI/
SYNC
TEMPOSONGTRACKUNDO
STORESCENEMARK
SCRUB
LOC1/IN
...LOC6
ENTERMARK
JUMP
REC/PLAY
MODE
Transport
keys
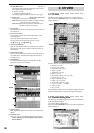
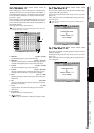
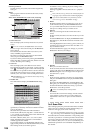
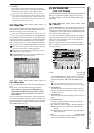
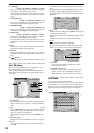
1. Set View
Press this button to open the Set View dialog box. Press
the OK button to apply your selections, or press the Can-
cel button to cancel them.
1a. Event View Source
Press a radio button to choose the parameter that will
appear in the event view.
1b. Time Resolution/dot [0.05, 0.1, 0.2, 0.5, 1sec]
Specify the range that will appear in the event view.
The range shown will be the time you specify here
× 192.
2. Event view
This area shows the events of the source you selected in
Set View.
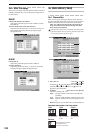
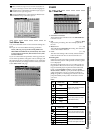
3. Event list
Displays the events selected in the “9. Select List.” To edit
an event, select (highlight) it by pressing it in the list.
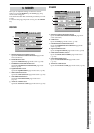
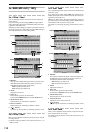
4. Edit
Press this button to open the Edit Event dialog box.
4a. Event select button
Use this to select the event you want to edit. Press this
button and use the value dial (or +/– keys) to make
your choice.
4b. Parameter/Parameter value [MIDI value]/Location
Select (highlight) the parameter or location that you
want to edit, and use the value dial (or +/– keys) to
edit it.
The only way to edit a scene is to change its location.
The values will not be updated until you press the OK
button to confirm your edits.
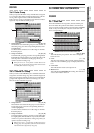
5. Cut
Press this button to open the Cut Event dialog box.
The selected event will be cut (deleted) from the event
list. However, the event itself will be temporarily saved
in the edit buffer (clipboard).
To execute the cut, press the Yes button. To cancel, press
the No button.
To cut all events in the event list, press (highlight) the
Select All button and then execute Cut.
6. Copy
Press this button to open the Copy Event dialog box.
The selected event will be copied temporarily to the edit
buffer (clipboard).
To execute the copy, press the Yes button. To cancel, press
the No button.
To copy all events in the event list, press (highlight) the
Select All button and then execute Copy.
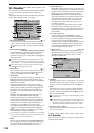
7. Paste
Press this button to open the Paste Event dialog box. The
event temporarily saved in the edit buffer (clipboard) will
be pasted at the selected event.
To execute the paste, press the Yes button. To cancel,
press the No button.
If the event at the paste-destination is the same type as the
event that was Cut or Copied, it will be overwritten. If the
event at the paste-destination is a different type, the pasted
event will be added at that location.
If you paste multiple events (Select All), they will overwrite
the existing data starting at the paste-destination you selected.
However, only the types of event included in these multiple
events will be overwritten.
8. Undo
Press this button to return to the state prior to executing
Cut, Copy, or Paste. This can be used only to return to the
immediately previous state. If the button indicates Redo,
you can use it to cancel the Undo.
The data is held in common with the “7. Undo” data of “3c-2.
Automation.” If you press the Automation Undo button
immediately after event-editing, the last event-edit will be
undone – not the automation recording.
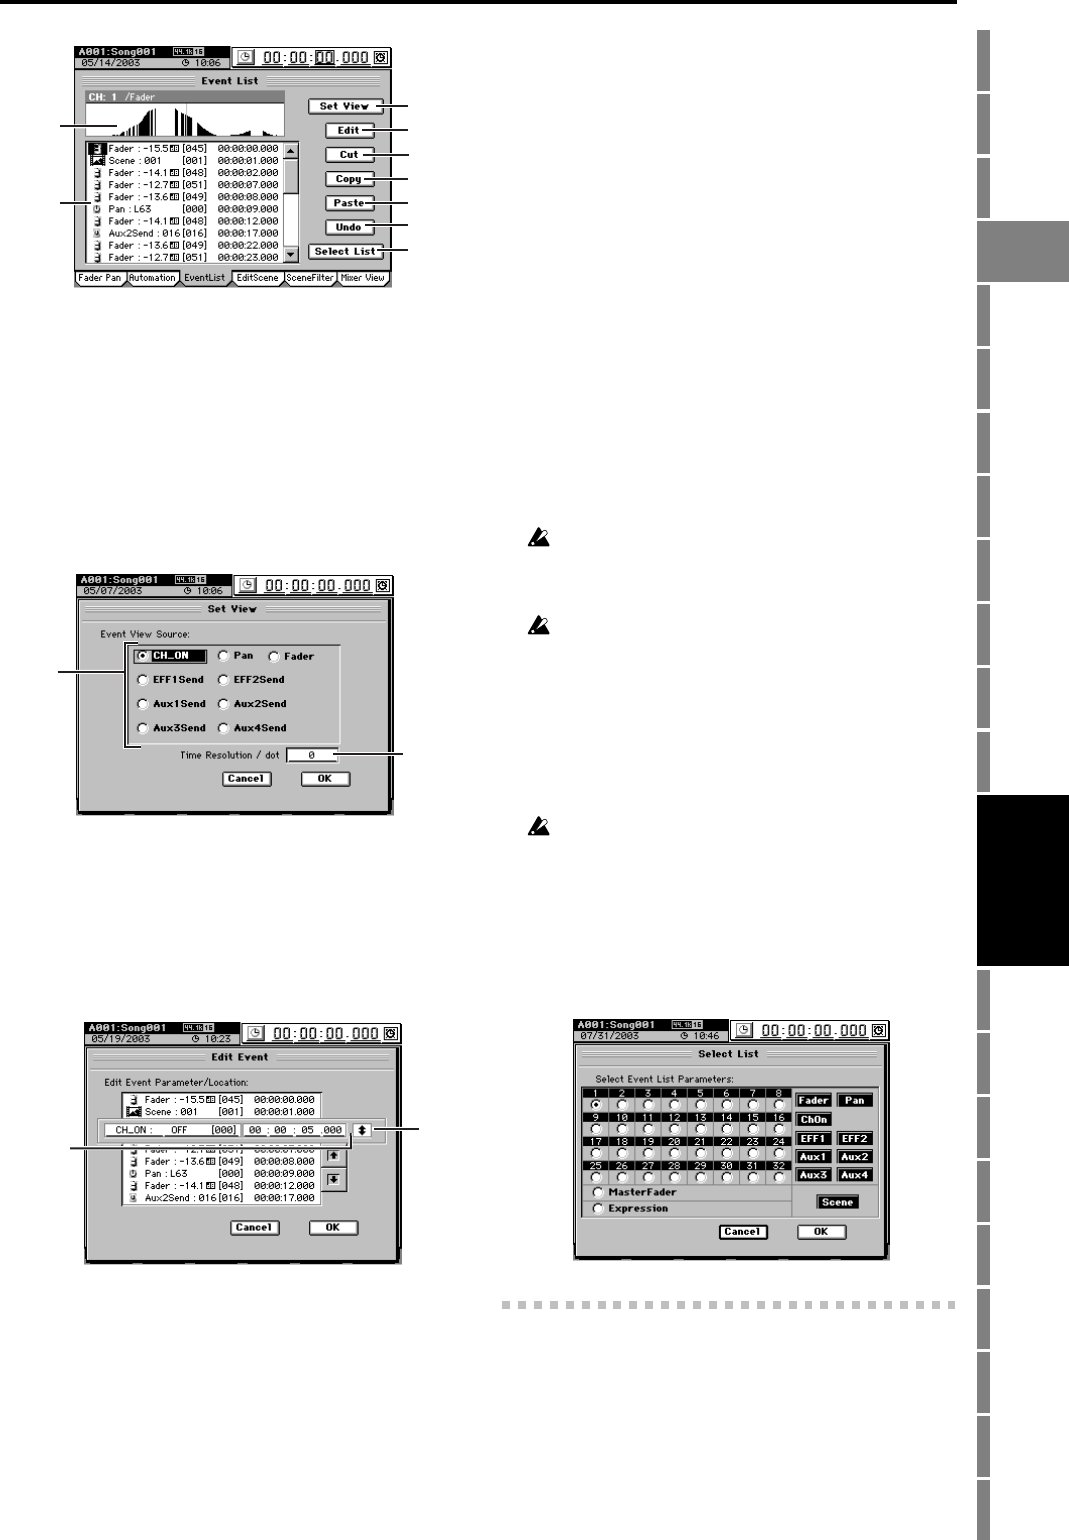
9. Select List
Press this button to open the Select List dialog box. Here
you can select the channel and parameter that will be dis-
played in the event list. You can select one (and only one)
of channels 1–32, Master Fader, or Expression.
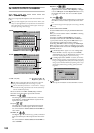
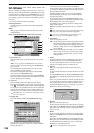
3c-4. Edit Scene
The mixer settings you adjust can be stored as a “scene” at a
desired location, and automatically recalled during playback
to change the mixer settings (when the “3c-2. Automation”
setting “Automation” is on). You can also recall a scene
when desired as a set of general-purpose settings (→p.52).
You can store one hundred scenes for each song.
A scene may contain the following settings.
2
1
3
5
6
7
8
9
4
1a
1b
4b
4a
MIXER