


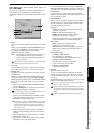

124
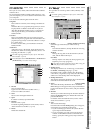
Cancel button
Returns to the “Album CD” tab page without adding
the selected song to the list.
OK button
Adds the selected song to the list.
When you press this button, the display will ask “Are
you sure?” Press Yes to confirm your settings (or No
to discard them) and return to the “Album CD” tab
page.
You cannot add a song whose master track contains no data.
If you select a song that is other than 44.1 kHz/16-bit,
press the Dither button to turn it on (highlighted), and
the sampling frequency and bit-depth will be converted.
The converted data will consume additional disc capac-
ity. If the song has a different sampling frequency, con-
version will be performed; this will take a certain amount
of time to complete.
Only the data to be burned to the CD-R/RW disc will be
converted; the song data itself will remain in its original
sampling frequency and bit-depth.
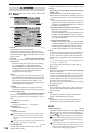
4. Delete
Deletes a song from the track list. In the list, choose the
song that you want to delete and press this button to dis-
play the Delete dialog box. Press the Yes button to delete
the song from the list. Subsequent song tracks will be
moved back one track.
If you want to delete all songs from the list, press the
Select All button and then press the Yes button.
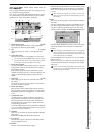
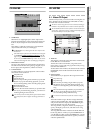
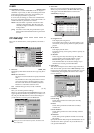
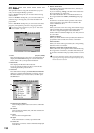
5. Drive
Selects the drive that contains the songs you want to
write to the CD-R/RW disc. When you press this button,
the Select Drive dialog box will appear.
The dialog box will display the total capacity of the inter-
nal drive, and a list of the song drives.
For each song drive, the display will show the drive
name, partition size, partition name, amount used, and
remaining space.
The songs to be written to one CD-R/RW disc must all be on
one song drive.
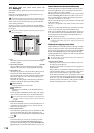
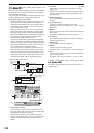
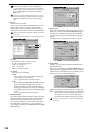
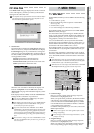
6. Gap
This lets you specify a duration of silence that will be
inserted before and after a song. When you press the but-
ton, the Edit Gap dialog box will appear.
In this dialog box, Frm refers to a CDDA Frame, where 75
Frm = one second.
6a. PreGapTime [0…59 (sec), 0…75 (Frm)]
Specifies the duration of silence to be inserted before
the track (song). The default is two seconds.
The default setting will be 0 seconds for the song added to TR1
(track 1) or for a track divided by album CD track marks
(→p.148).
6b. PostGapTime [0…59 (sec), 0…74 (Frm)]
Specifies the duration of silence to be inserted after the
track (song). The default is 0 seconds.
7. Write To CD
Executes writing to the CD-R/RW.
When you press this button, the Write to CD dialog box
will appear, displaying a message of “Obey Copyright
Rules.” Carefully read the section “COPYRIGHT WARN-
ING” (→p.iii), and use this function only if you accept
the terms.
• When you press the Yes button, the Write to CD dia-
log box will appear.
• Use the “Write Speed” list button to specify the speed
at which the data will be written to CD-R/RW.
• When you press the Yes button, the D32XD/D16XD
will begin creating the image file. You can press the
Cancel button to abort this process.
• When the image file has been created, the D32XD/
D16XD will begin writing the disc. This cannot be
aborted.
• The disc will automatically be finalized.
• When the disc has been written a message of “Write
Anoter CD?” will appear.
• If you want to create another identical CD, press the
Yes button. If not, press the No button.
If you press the Yes button, a message of “Insert Next
Disc. After Insert, Press OK.” will appear, and the CD-
R/RW drive tray will open. Insert another CD and press
the OK button.
If you successively write another disc, the D32XD/
D16XD will not need to create the image file again, so the
process will take less time.
A CD-R/RW disc written using Album CD Project will be
finalized automatically.
Changing the writing speed will not affect the time that is re-
quired to create the temporary image file that is created before
writing an audio CD.
6a
6b