


2. Creating Pattern Chains (Pattern Chain Recording)
162 RS7000
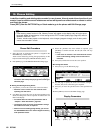
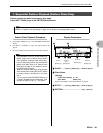
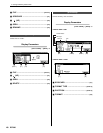
Displays the currently-playing style and section. Also allow
the style and section to be recorded at the beginning of the
next measure to be selected during pattern track recording.
If further style or section changes are record in the chain,
however, those changes will take priority.
The STYLE parameter can be set to OFF to create breaks
(blank sections) in the chain (the chain continues playing).
When STYLE is set to END, playback will stop at that point.
Press [F2] to move the cursor and use [Knob 2] to set the sec-
tion.
5
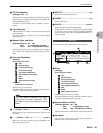
REC TYPE (Record Type) ..............................[Knob 3]
[Settings] REPLACE, STEP
REPLACE.........Any previous data in the recorded
track will be erased (overwritten) and
replaced by the new data.
STEP.................This mode allows events to be
entered one at a time. This mode is
only available when the BPM track is
selected.
Selects the record mode.
Only the REPLACE option is available when any track other
than BPM is selected.
6
BPM ..................[Knob 4], [F4] → [Knob 4], [SHIFT]+[F4]→
Numeric Keypad
[Settings] 001.0 ~ 300.0 (BPM)
Sets the pattern chain playback tempo.
Use [Knob 4] to adjust the BPM in steps of 1, or press [F4] to
move the cursor to the right of the decimal point and use
[Knob 4] to adjust in steps of 0.1.
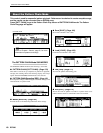
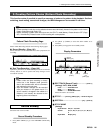
Operations performed via the RS7000 keyboard, scene/mute
memory buttons, and knobs as well as pattern and tempo changes
can be recorded in real time.
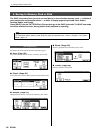
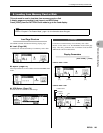
Real Time Recording Procedure
1. Press [PATT CHAIN] to go to the PATTERN CHAIN Play
mode.
2. Use [Knob 1] (CHAIN) to select the chain number to be
recorded.
3. Press [REC] to engage the record standby mode.
4. Use [Knob 1] (REC TRACK) to select the track to be
recorded.
5. If the BPM track is selected for recording, use [Knob 3]
(REC TYPE) to select the REPLACE record mode.
6. Use [Knob 4] to set the BPM.
7. If the pattern track is to be recorded in real time, use [Knob 2]
(STYLE) and [F2] → [Knob 2] (SECTION) to set the style
and section for the first measure.
8. Press [PLAY] so that its indicator flashes, then start recording
after the count-in.
9. Operate [Knob 2] (STYLE), [F2] → [Knob 2] (SECTION),
[Knob 4] (BPM), [F4] → [Knob 4] (BPM) the keyboard and
scene/mute memory buttons as required.
10. Press [STOP] to stop recording.
NOTE
• Refer to “Chapter 1: Basics”, page 59, for
more information on styles and sections.
• Sections can be changed by pressing the
[KEYBOARD] button so that its indicator goes
out, and then pressing the black key on the
keyboard corresponding to the desired sec-
tion. (Page 72)
Real Time Recording
NOTE
• If the pattern track is selected, [Knob 2] and
[F2] → [Knob 2] can be used to record style
and section changes. Sections A ~ J can also
be selected via the black keys on the key-
board after the [KEYBOARD] button is
pressed so that its indicator goes out. These
changes will actually be recorded at the
beginning of the next measure.
• If the BPM track is selected use [Knob 4] or
[F4] → [Knob 4] to record BPM changes.
• If the SCENE (scene/mute) track is selected
use the [SCENE/MUTE] and [MEMORY 1] ~
[MEMORY 5] buttons to record scene and
mute memory operations. Also, if the [MUTE]
button is pressed so that its indicator lights
the white keys on the keyboard can be used
to record track mute and un-mute operations.
NOTE
• Pressing [JOB] while holding [SHIFT] directly
accesses the “00 Undo/Redo” job (Page 134),
allowing the previous record operation to be
undone. This is useful if, for example, you’ve
accidentally erased material you wanted to
keep.
• When you need to make large value changes
rotate a knob while holding the [SHIFT] button
to change values in increments of 10 rather
than 1.
• You can also use the SUB MODE buttons as
a numeric keypad to enter values after hold-
ing both the [SHIFT] and [F4] button.