


3. Phrase Recording
80 RS7000
Real-time recording allows anything played on the RS7000 key-
board, operation of the assignable knobs, and data received from
an external MIDI controller to be recorded in real time.
In this section we’ll look at the real-time REPLACE or OVER-
DUB recording procedure.
Record Procedure (REPLACE, OVERDUB)
1. Press [PATTERN] to enter the PATTERN Play mode.
2. Specify a style and section to select the pattern for which the
phrase is to be recorded (Page 72).
3. Press [PATTERN] to switch to the PATTERN Patch mode.
4. Select a track and a user phrase (Page 75).
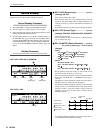
5. Press [REC] to engage the Rec Standby mode (PATTERN
Patch).
6. Use [Knob 1](BANK) and [Knob 2](PGM) to select a voice
for the phrase.
If necessary also use [Knob 3](TRANS ON/OFF) to turn
transposition ON or OFF.
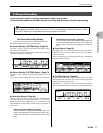
7. Press [PATTERN] to switch to the PATTERN Play Rec
Standby mode.
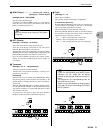
8. Use [Knob 2](REC TYPE) to select the REPLACE or
OVERDUB record type.
Use [Knob1](REC LOOP) to turn the REC LOOP parameter
ON or OFF, as required. Also use [Knob 3](REC QUAN-
TIZE) and [F3] to set up record quantize, and [Knob
4](BPM) to set the BPM as required.
9. Press [PLAY] and begin recording after the count-in.
10. Play the part on the keyboard and assignable knobs.
11. Tracks can be switched during recording.
12. Stop recording and return to the PATTERN Play (or PAT-
TERN Patch) mode by pressing the [STOP] button.
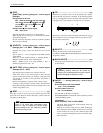
User phrase notes, pitch bend data and control change data can be
recorded step-by-step.
Record Procedure
1. Press [PATTERN] to enter the PATTERN Play mode.
2. Specify a style and section to select the pattern for which the
phrase is to be recorded (Page 72).
3. Press [PATTERN] to switch to the PATTERN Patch mode.
4. Select a track and a user phrase (Page 75).
5. Press [REC] to engage the Rec Standby mode (PATTERN
Patch).
6. Use [Knob 1](BANK) and [Knob 2](PGM) to select a voice
for the phrase.
If necessary also use [Knob 3](TRANS ON/OFF) to turn
transposition ON or OFF.
7. Press [PATTERN] to switch to the PATTERN Play Rec
Standby mode.
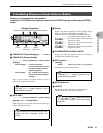
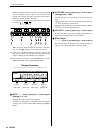
8. Use [Knob 2](REC TYPE) to select the STEP record type.
9. Use [Knob 3](EVENT TYPE) to select the type of data you
want to record: notes, pitch bend, or control change.
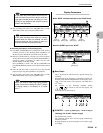
10. Press [PLAY] and the Step Rec display will appear.
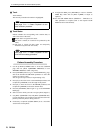
● Recording Notes
11.
Use [Knob 1](POINTER) to move the pointer to the position
at which you want to enter a note, [Knob 2](STEP) to set the
note length, [Knob 3](VELOCITY) to set the note velocity,
and [Knob 4](GATE TIME) to set the gate time.
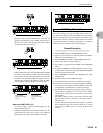
12. Enter the note by pressing the appropriate key on the key-
board.
Press [F1](REST) to enter a rest, or [F2](TIE) to enter a tie.
The [F3] (DELETE) and [F4] (BACK DELETE) buttons can
be used to delete entered notes.
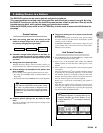
Real-Time Recording
NOTE
• If REC LOOP is ON, the phrase being
recorded will continue to loop until the [STOP]
button is pressed.
• Mistakes can be “erased” by holding the
[SHIFT] button and pressing the key corre-
sponding to the note or instrument you want
to erase.
• Assignable knob data can also be erased by
holding the [SHIFT] button and operating the
appropriate knob. The knob data is erased
from the point at which the [SHIFT] button is
held and the knob operated until the [SHIFT]
button is released.
NOTE
Pressing [JOB] while holding [SHIFT] directly
accesses the “00 Undo/Redo” phrase job (Page
68, Page 134), allowing the previous record
operation to be undone. This is useful if, for
example, you’ve accidentally erased material
on a track you wanted to keep by recording in
the REPLACE mode.
Step Recording