


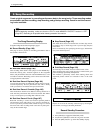
2. Song Recording
188 RS7000
11. If you press the [PLAY] button the [PLAY] indicator will
flash and you will be able to hear how your step-recorded
song is shaping up. Press [STOP] to stop playback and con-
tinue entering notes in the step mode.
12. Stop recording and return to the SONG Play mode by press-
ing the [STOP] button.
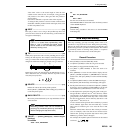
● Recording Pitch Bend or Control Change Data
9. Use [Knob 1] (POINTER) to move the pointer to the position
at which you want to enter the data, [Knob 2] (STEP) to set
the data step size, and [Knob 3] (VALUE) to set the value.
When you need to make large value changes rotate a knob
while holding the [SHIFT] button to change values in incre-
ments of 10 rather than 1.
10. Enter the specified data by pressing a key on the keyboard.
All keys have the same effect except when “KEYBOARD” is
selected by [Knob 3] (VALUE), in which case the value
entered depends on the key pressed.
Press [F1] (REST) to enter a rest. The [F3] (DELETE) and
[F4] (BACK DELETE) buttons can be used to delete entered
notes.
11. Press the [PLAY] button the [PLAY] to hear how your step-
recorded song is progressing. Press [STOP] to stop playback
and continue entering data in the step mode.
12. Stop recording and return to the SONG Play mode by press-
ing the [STOP] button.
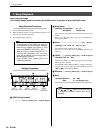
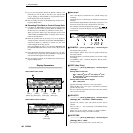
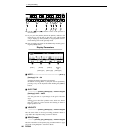
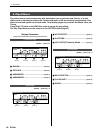
Display Parameters
When EVENT TYPE = NOTE
When EVENT TYPE is not NOTE
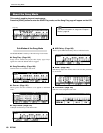
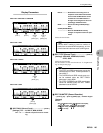
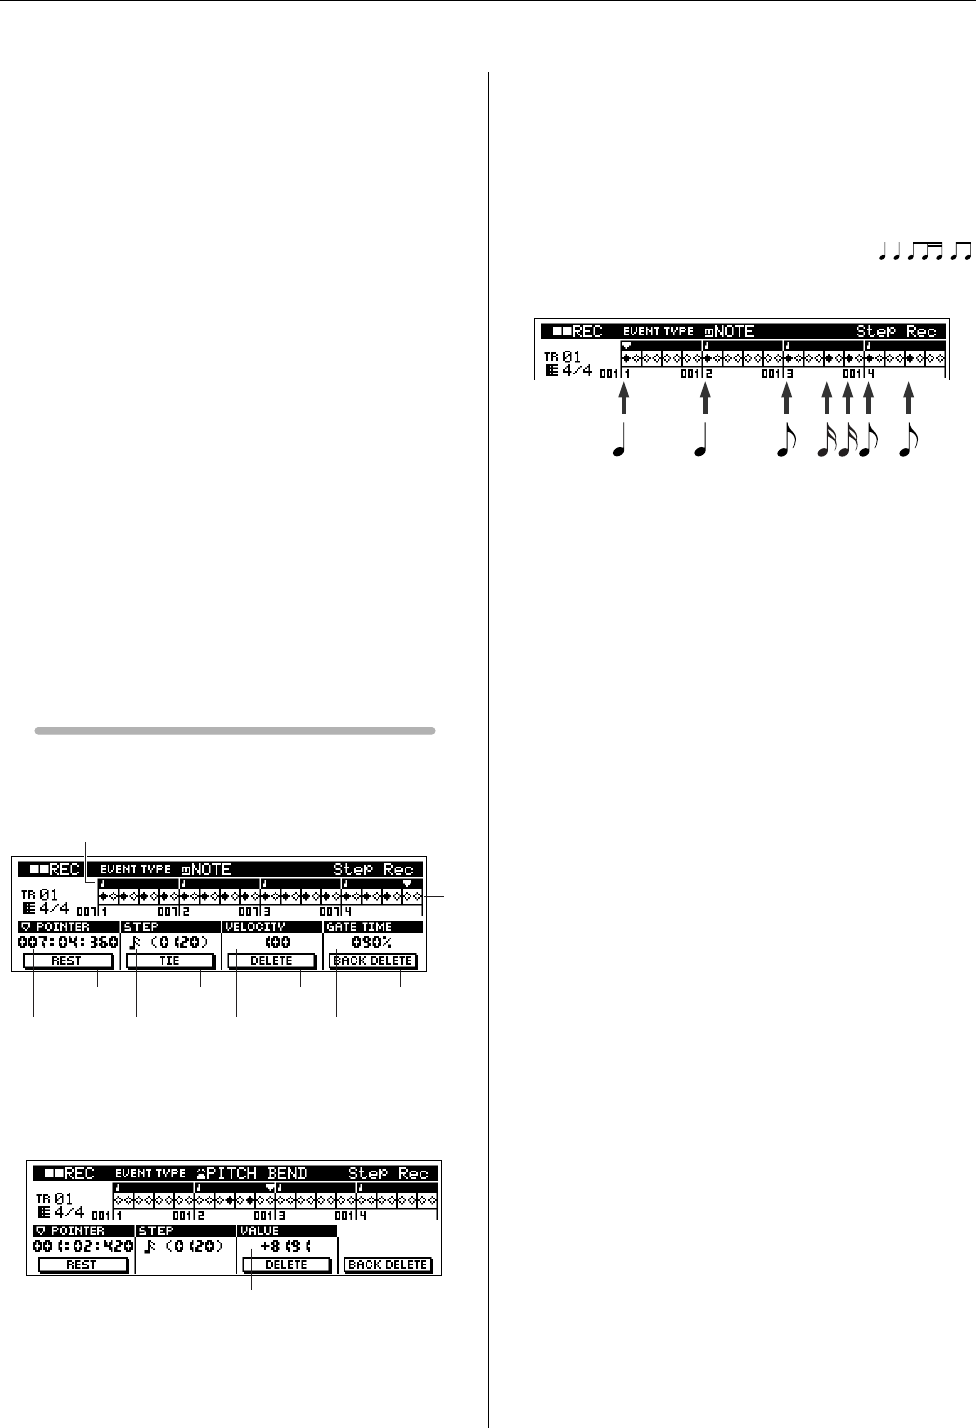
1 Beat Graph
This is the display in which notes are “placed” during step
recording.
When the meter is 4/4, the display is divided into 4 beats (one
measure).
Each diamond-shaped marker in the display represents 1 32
nd
beat (each 1/4 note division is divided into 8 32
nd
beats).
For example, if the following rhythmic pattern
is entered in 4/4 time the display will appear like the one
shown below.
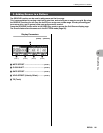
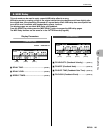
2
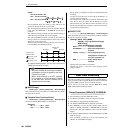
POINTER ......[Knob 1], [SHIFT]+[F1] → Numeric Keypad
Sets the data-entry position.
The triangular pointer above the beat graph indicates the
data-entry position.
Rotating the [knob 1] causes the pointer to move left or right,
accordingly.
Use [SHIFT] + [F1] → Numeric Keypad to directly enter a
measure number.
3
STEP (Step Time)
..........................[Knob 2], [SHIFT]+[F2] → Numeric Keypad
[Settings]
Settings made via the knob
0001 ~ 0059, 32
nd
note, 16
th
note triplet, 16
th
note,
8
th
note triplet, 8
th
note, 1/4 note triplet, 1/4 note,
half note, whole note
Settings made via the numeric keypad
0001 ~ 9999 clocks
Specifies the length of the note or rest to be entered.
When the PB or CC event type is selected this parameter
specifies the step time:
the size of the step the pointer will move to the next position
after an event is entered.
4
VELOCITY
..........................[Knob 3], [SHIFT]+[F3] → Numeric Keypad
[Settings] 001 ~ 127, RND1 ~ RND4 (random)
Specifies the velocity value with which the note will be
entered.
The set value (1 ~ 127) corresponds to the MIDI velocity
value entered.
When one of the random settings is selected (RND1 ~
RND4) a random velocity value will be entered.
5
GATE TIME
..........................[Knob 4], [SHIFT]+[F4] → Numeric Keypad
[Settings] 001% ~ 200%
Sets the gate time to produce slurs, staccato notes, etc.
2
6
1
2
3
7
4
8
5
9
[Knob 1]
[SHIFT]+[F1]
[Knob 2]
[SHIFT]+[F2]
[Knob 3]
[SHIFT]+[F3]
[Knob 4]
[SHIFT]+[F4]
[F1] [F2]
[F3] [F4]
0
[Knob 3]
[SHIFT]+[F3]