


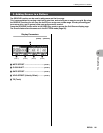

2. Song Recording
RS7000 187
4
The Song Mode
]
7. Press [PLAY] and begin recording after the count-in.
8. Play the part on the keyboard, velocity pads, and assignable
knobs.
9. Stop recording and return to the SONG Play mode by press-
ing the [STOP] button.
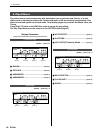
Record Procedure (Punch)
Steps 1 ~ 5 are the same as for Replace or Overdub recording,
above.
6. Use [Knob 2] (REC TYPE) to select the PUNCH record type.
Also use [Knob 3], [F3] → [Knob 3] to set up punch-in and
punch-out points.
If necessary, use [Knob 4] to adjust BPM.
7. Press [PLAY] and begin recording after the count-in.
• Recording will begin automatically when the punch-in point is
reached, and recording will be disengaged when the punch-out
point is reached.
All steps from 8 onward are the same as for Replace or Over-
dub recording, above.
i
Notes, pitch bend data and control data can be recorded step-by-
step.
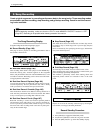
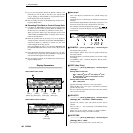
Record Procedure
1. Press [SONG] to enter the SONG Play mode.
2. Use [Knob 1] (SONG) to select the song to be recorded.
3. Press [REC] to engage the Rec Standby mode.
4. Use [Knob 1] (REC TRACK) to select the record track.
5. Press [MIXER] to access the Voice Select display and use
[Knob 1] (BANK) and [Knob 3] (PROGRAM) to select the
desired voice, then press [EXIT] to return to the Rec Standby
display.
6. Use [Knob 2] (REC TYPE) to select the STEP record type.
7. Use the EVENT TYPE parameter to specify the type of data
you want to record: note, pitch bend, control change.
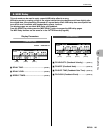
8. Press [PLAY] to go to the STEP recording page.
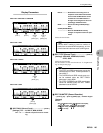
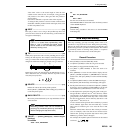
● Recording Notes
9. Use [Knob 1] (POINTER) to move the pointer to the position
at which you want to enter a note, [Knob 2] (STEP) to set the
note length, [Knob 3] (VELOCITY) to set the note velocity,
and [Knob 4] (GATE TIME) to set the gate time.
10. Enter the note by pressing the appropriate key on the key-
board.
Press [F1] (REST) to enter a rest, or [F2] (TIE) to enter a tie.
The [F3] (DELETE) and [F4] (BACK DELETE) buttons can
be used to delete entered notes.
NOTE
• The OVERDUB and GRID record types can-
not be selected when the REC TRACK
parameter is set to BPM.
• The STEP, OVERDUB and GRID record types
cannot be selected when the REC TRACK
parameter is set to SCENE.
NOTE
• Voices can be selected in the MIXER sub
mode (Page 194).
• BPM changes produced by operating [Knob
4] can be recorded when the BPM track is
selected for recording.
• When the SCENE (Scene/Mute) track is
selected, SCENE and MUTE changes can be
recorded by pressing the [MEMORY 1] ~
[MEMORY 5] buttons. Also, track mute opera-
tions can be recorded by pressing the [MUTE]
button so that its indicator lights, and then
using the keyboard to mute and un-mute
tracks as required.
NOTE
Pressing [JOB] while holding [SHIFT] directly
accesses the “Undo/Redo” phrase job (Page
213), allowing the previous record operation to
be undone. This is useful if, for example, you’ve
accidentally erased material on a track you
wanted to keep by recording in the REPLACE
mode.
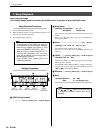
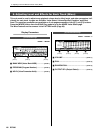
Step Recording
NOTE
If the BPM track is selected for recording, the
event type will be set at BPM and cannot be
changed.
NOTE
In the step record mode notes are actually
entered when the keys are released. So when
entering chords be sure to press all notes you
want to enter before releasing the keys.