


2. Assemble a Pattern Using Preset Phrases
RS7000 31
TUTORIAL
Tutorial
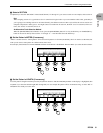
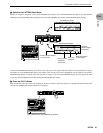
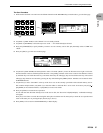
3 Select a SECTION
Use [Knob 2] to select the “SECTION” of the selected STYLE (“A” through “P”) you want to record. For our example, select section A.
Hint
When assigning sections it is a good idea to do so in some kind of logical order so you can remember what’s what, particularly if
you’re going to be switching sections in real time. Generally, the different sections within a style will be the various sections of a
complete composition or dance groove. You might want to record the intro in section A, the main “verse” in section B, a fill in sec-
tion C, the “chorus” in section D, and so on.
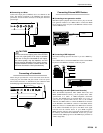
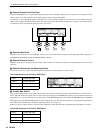
An Alternative Track Selection Method
When the [KEYBOARD] button indicator is out (press the [KEYBOARD] button if it is lit), the black keys on the RS7000 key-
board can be used to directly select sections “A” through “J” — note the labels above the black keys.
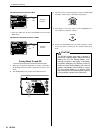
4
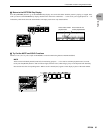
Set the Pattern’s METER (if necessary)
“Meter” is another term for “time signature”. Since our tutorial pattern is in 4/4 time (the default), there’s no need to set the meter, but
when you do want to create pattern in a different meter, here’s how:
Press the [F1] function button so that the METER parameter on the display is highlighted. Then use [Knob 1] to select the desired meter.
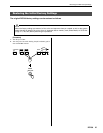
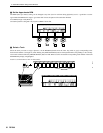
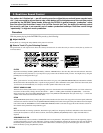
5
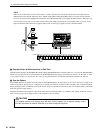
Set the Pattern’s LENGTH (if necessary)
To set the pattern’s length in measures press the [F3] function button so that the LENGTH parameter on the display is highlighted, then
use [Knob 3] to select the desired length (001 through 256). For our example the pattern will be one measures long, so select “001” if
LENGTH is not already set to this value.
F1 F2 F3 F4
F1 F2 F3 F4