


3. Sample Editing
242 RS7000
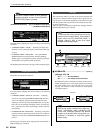
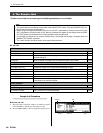
1 ZOOM IN/OUT ......................................................[Knob 1]
[Settings] IN, OUT
Rotate counter-clockwise to zoom in.
Rotate clockwise to zoom out.
Above a certain zoom-in level, the waveforms near the start
and end points will be shown on the left and right halves of
the display.
2
ZOOM...............................................................................[F1]
When the ZOOM IN/OUT parameters is set to IN or OUT,
each press on this button zooms the waveform display either
in or out, respectively.
3
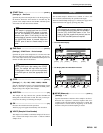
START Point, START (ATCK) Point, START (LOOP)
point .........................................................................[Knob 2]
[Settings] 0 ~ END Point
Sets the sample start and/or loop start points.
When PLAY MODE = FORWARD, REVERSE, or LOOP
Sets the START point.
When PLAY MODE = ATK+LOOP
[F2] switches between START(ATCK) and START(LOOP).
Sets the initial sample start point when START(ATCK)
selected.
Sets the loop START point when START(LOOP) selected.
4
END Point .............................................................[Knob 3]
[Settings]
START Point ~ End of sample
Specifies end point of the sample.
5
STEP.........................................................................[Knob 4]
[Settings] ×1, ×10, ×100, ×1000, ×10000, ×100000
Sets the “magnification factor” to be used when [Knob 2] and
[Knob 3] are used to specify the START and END points.
Higher settings allow higher value changes.
6
START ATCK / LOOP...............................................[F2]
[Settings] START(ATCK), START(LOOP)
START(ATCK)...... Sets the sample start point.
START(LOOP)......Sets the loop start point.
When the PLAY MODE is set to ATK+LOOP this button
switches the parameter to be adjusted by [Knob 2]. The but-
ton alternately selects the START(ATCK) and START
(LOOP) parameters.
START(ATCK).......Sets the initial playback start point for
the sample.
START(LOOP)........Sets the point at which the sample loop
begins.
7
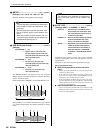
AUDITION...................................................................... [F4]
The sample will loop between the specified START and
END points while this button is held. This lets you hear pre-
cisely how the settings are affecting the sample.
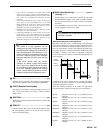
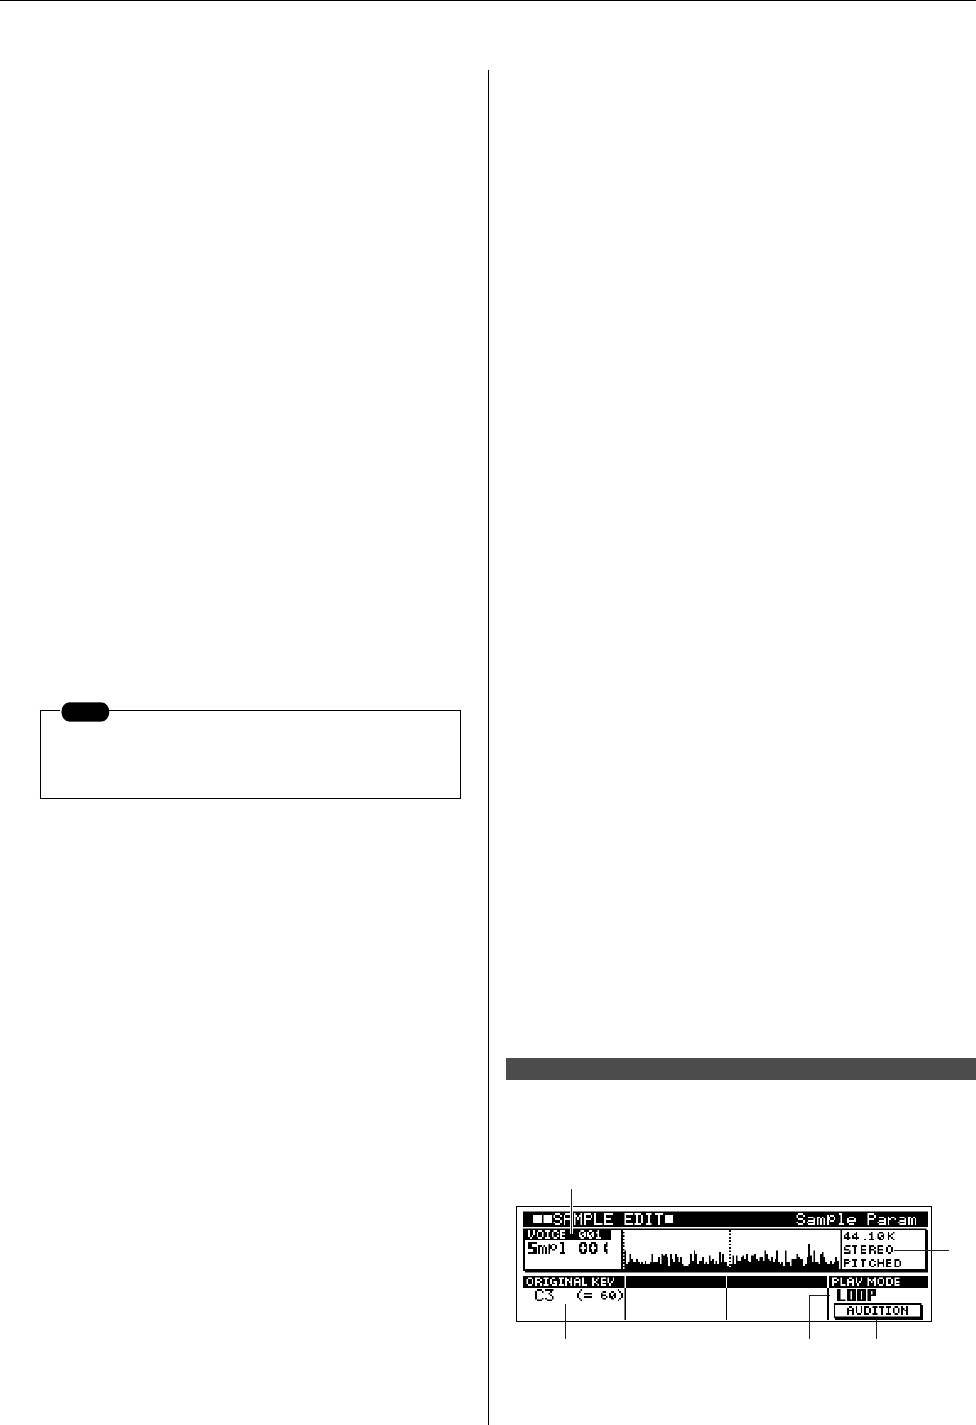
8 VOICE (Sample Voice Number)
[Settings]
Sample Voice Number
............001 ~ 128 are local sample voices;
C001 ~ C128 are common sample
voices.
Sample Name ......Display only.
Key Number (when a Sample Kit Voice is selected)
............C-2 ~ G8
Displays the number and name of the sample voice assigned to
the currently selected track. When a Sample Kit Voice is
assigned to the current track, the key number can be changed to
change the sample to be edited.
Refer to “Sample Edit Procedure”, step 3, on page 241 for
information on changing the track and key number.
9
Sample Information
[Settings] All are display only.
Sampling Frequency....kHz
Mono/Stereo ................MONO, STEREO
Sample Type ................ KIT (Sample Kit Voice),
PITCHED (Pitched Voice)
Shows the sampling frequency, mono/stereo status, and sam-
ple type (KIT, PITCHED) of the selected sample.
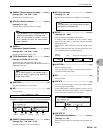
[SAMPLE EDIT] × 2
Sample Voice = PITCHED VOICE
NOTE
The PLAY MODE parameter is set in the Sam-
ple Parameter page (Page 242).
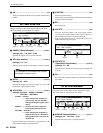
[2] Sample Parameters
6
45
7
1
[Knob 1]
[SHIFT]+[F1]
[Knob 4]
[F4]