


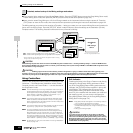

Creating a Song on the MOTIF ES
112
Owner’s Manual
Quick Guide — Advanced Course
■ Recording a rhythm pattern created by Arpeggio
playback to a Pattern track
The Arpeggio function is a virtually endless source of creative
inspiration, putting a huge variety of rhythm patterns, riffs and
phrases at your fingertips — patterns that change depending
on the notes you play. Once you come with some patterns
you like and want to use in a Song, you can record them to a
Pattern track.
You can make changes to the Voice settings after entering the
Record mode (in step #5 below). However, if you intend to
make detailed settings to the Mixing parameters, you should
do so before enabling recording.
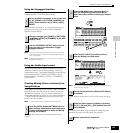
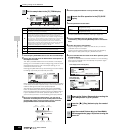
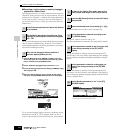
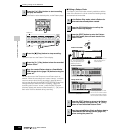
1 Enter the Mixing Edit mode ([MIXING] →→
→→
[EDIT]), select the
desired Part (track to be recorded), then press the [F1] VOICE
button, followed by the [SF2] MODE button.
2 Set the ArpSwitch (Arpeggio Switch) parameter to “on.”
3 Call up the Arpeggio Type selection display ([COMMON] →→
→→
[F3]
ARP →→
→→
[SF1] TYPE).
4 Select the desired Arpeggio type in the [SF1] TYPE display,
then press the [ARPEGGIO ON/OFF] button (the lamp lights).
Try out various Arpeggio types, and also try tweaking various
parameters in the [SF1] - [SF4] displays. When you find a
rhythm or phrase that you like and want to use, go to step #4.
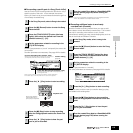
For details about how to select a track, see page 58.
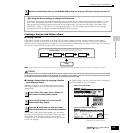
Set Type to “replace” and set Loop to “off.”
Set other parameters as necessary. See page 243 for details.
Call up the display for setting a Voice by pressing the [F2]
VOICE button. You won’t need to make settings in this display
if you’ve already completed Voice/Mixing settings in step #2
above.
Call up the display for setting a Voice by pressing the [F3]
ARP button. You won’t need to make settings in this display if
you’ve already completed Arpeggio settings in the Mixing Edit
mode, in step #3 above.
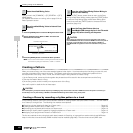
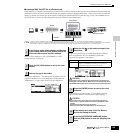
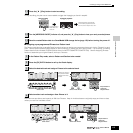
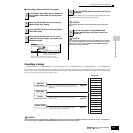
1
In the Pattern mode, select a Pattern and Section
to be created.
2
Set the Mixing parameters (including the Voice
settings) by following the instructions on pages
127 - 128.
3
Play with the Arpeggio features and find a
rhythmic pattern/phrase you like.
REMOTE ARPEGGIO
ON/OFF ON/OFF
R-AUDIO
G-MIDI
Select an Arpeggio Type and Bank.
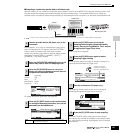
4
Go back to the Pattern Play mode, then set the
meter, tempo, and length of the current pattern.
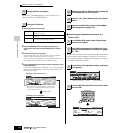
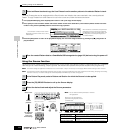
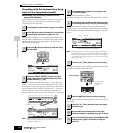
5
Press the [●] (Record) button to enter the Pattern
Record mode.
6
Select the desired track for recording ([1] - [16]).
7
Set the parameters related to recording in the
[F1] SETUP display.
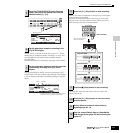
8
Set the parameters related to the Voice you wish
to use during recording in the [F2] VOICE
display.
9
Set the parameters related to an Arpeggio you
wish to use during recording in the [F3] ARP
display.
10
Set the RecArp parameter to “on” in the [F4]
RECARP display.
When this is set to “on,” the Arpeggio playback data is
recorded to a track as MIDI sequence data.