


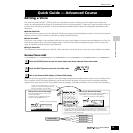


Quick Guide — Advanced Course
Editing a Performance
87
Owner’s Manual
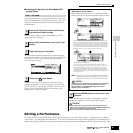
■ Loading Voice data from the SmartMedia/USB
storage device
In the previous section, we saved Voice data as an “All Voice”
file to a SmartMedia card or USB storage device. Here, we’ll
recall that Voice data and load it to the instrument with the
Load operation.
Refer to “Basic settings for using SmartMedia or a USB
storage device” on page 30.
The file saved in operation explained on the previous page
has all the User Voices. If you wish to load all the User Voices,
set Type to “All Voice.” If you wish to load only a specific
voice, set Type to “Voice.”
Move the cursor to the file (extension: W7V) saved in the
operation explained on the previous page. If you’ve set the
Type to “AllVoice” in step #3, go to step #5. If you’ve set the
Type to “Voice” in step #3, execute the operations in the
following box, then go to step #5.
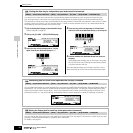
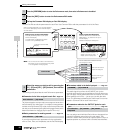
When Type is set to “Voice”:
When Type is set to “Voice,” you can specify and load a
specific Voice from a file (with the extension W7V or W7A).
n
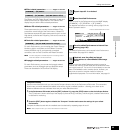
If you want to change the source Voice Bank/Number, press
the [EXIT] button to return the display to the first one (shown at
the top of this box) then perform the above instructions again.
Loading data to this synthesizer automatically erases and replaces
any existing data in the User memory. Make sure to save any
important data to a SmartMedia/USB storage device before
performing any Load operations.
After the data has been loaded, a “Completed” message
appears and operation returns to the original display.
While the data is being saved, make sure to follow these precautions:
•
Never remove or eject the media from the device (SmartMedia or USB storage).
•Never unplug or disconnect any of the devices.
•Never turn off the power of the MOTIF ES or the relevant devices.
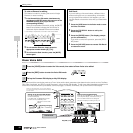
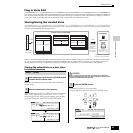
Editing a Performance
The Performance Edit mode ([PERFORM] → [EDIT]) lets you create your own original Performances — containing up to four different
Parts (Voices) — by editing the various parameters. The Voices can be selected from the internal tone generator or the installed Plug-in
Boards. After assigning different Voices to separate ranges of the keyboard, edit the detailed parameters in the Performance Edit mode.
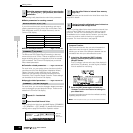
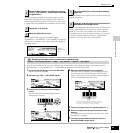
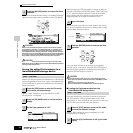
[FILE] → [F3] LOAD
1
Press the [FILE] button to enter the File mode,
then execute the basic settings.
2
Press the [F3] LOAD button to call up the Load
display.
3
Select the file type to be loaded.
4
Select a file ( ) to be loaded.
5
Press the [ENTER] button to execute the Load
operation.
ENTER
EXECUTE
ENTER
EXECUTE
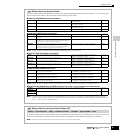
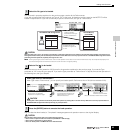
Move the cursor to the file (extension: W7V) saved
in the operation explained on the previous page.
Select a source Voice Bank from the selected file with the following operation.
To select a User Normal Voice Bank, press one of the [USER1] and [USER2]
buttons. To select a User Drum Voice Bank, simultaneously hold the [DRUM
KITS] button and press the [USER1] button. To select a User Plug-in Voice
Bank, press one of the [PLG1], [PLG2] and [PLG3] buttons. After selecting a
source Voice Bank, all the Voices contained in the selected Bank are listed in
the display. Move the cursor to the desired Voice to be loaded.
Select a destination Voice Number.
You can also change the destination Voice Bank when loading a Normal
Voice or a Plug-in Voice by moving the cursor to the location of “USR1” in the
above display and using the data dial. When loading Plug-in Voice data,
note that the Plug-in Board for the source Voice Bank should match the one
for the destination Voice Bank. When a source Voice Bank is created for the
PLG150-AN, for example, you should select the Voice Bank for the PLG150-
AN as the destination.
CAUTION
CAUTION