


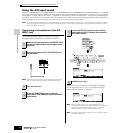

Using the Plug-in Board
75
Owner’s Manual
Quick Guide — Playing the MOTIF ES
Using a Single Part Plug-in Board
Install any of the Single Part Plug-in Boards such as PLG150-AN, PLG150-PF, PLG150-DX, PLG150-VL, PLG150-DR, and
PLG150-PC to the MOTIF ES and play the Plug-in Voice in the Voice Play mode.
See page 283.
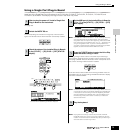
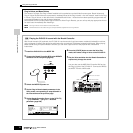
The corresponding slot indicator at the right top of the front panel
lights. This indicates that the board has been successfully installed.
n If the MIDI Port number here is set to “1” or “off,” the Plug-in Voice may
sound simultaneously with the internal Voice, when playing back
Song/Pattern data. To keep this from happening, make sure the MIDI
Port number of the Plug-in Board is set to “2” or “3” — especially when
using the Song/Pattern mode. To prevent a similar problem when
using both a Single Part Plug-in Board and a Multi Part Plug-in Board
together, set each board to a different MIDI Port number.
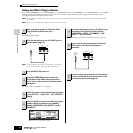
Selecting a Plug-in Voice is done in the same way as selecting a
Normal Voice (page 60) with the exception that you select one of the
PLG (Plug-in) Banks. Press the PLG button which corresponds to the
slot to which the Plug-in Board has been installed.
You’ll also need to select a Bank within the Plug-in Board. Press the
[F2] BANK button to call up the Plug-in Board Bank selection display,
then select the desired Bank.
n For details about the Bank structure of each Plug-in Board, refer to the
Owner’s Manual of each Plug-in Board. Regarding the PLGPRE (Plug-
in Preset) bank, refer to the Plug-in Voice List. Regarding the Board
Voice bank displayed as “035/000,” refer to the Voice Map/List. The
PLGUSR (Plug-in User) banks contain the Voices you edited and
stored as User Voices.
n Playing Voices of the Plug-in User banks (PLG1USR, PLG2USR,
PLG3USR) will result in no sound, if the Plug-in Board has just been
installed. These banks become available only after you edit a Plug-in
Voice and store it as a User Plug-in Voice.
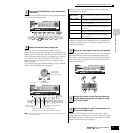
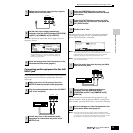
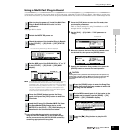
1
After turning the power off, install a Single Part
Plug-in Board to the instrument.
2
Switch the MOTIF ES on.
3
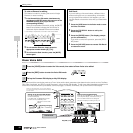
Check the status of the installed Plug-in Boards
in the [UTILITY] → [F6] PLUG → [SF1] STATUS
display.
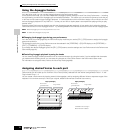
STRINGS
PLG 1
SLOT 1 SLOT 2 SLOT 3
BRASS
PLG 2
REED/PIPE
PLG 3
SCENE
SF1 SF
2 SF3 SF4 SF5
F1 F2 F3 F4 F5 F6
INFORMATION
VOICE
SONG
PERFORM MASTER
PATTERN FILE
MODE
SEQUENCER
INTEGRATED
SAMPLING
MIXING UTILITY
DEMO
The name of the installed Plug-in Board is displayed.
4
Set the MIDI port of the installed Plug-in Board to
“2” or “3” in the [UTILITY] → [F6] PLUG → [SF2]
MIDI display.
5
Press the [VOICE] button to enter the Voice Play
mode and select a Plug-in Voice.
6
Play the keyboard.
STRINGS
PLG 1
SLOT 1 SLOT 2 SLOT 3
BRASS
PLG 2
REED/PIPE
PLG 3