


Reference Sampling Mode
Sampling Record mode When entering the Sampling mode from the Voice mode/Performance mode
252
Owner’s Manual
Source Determines the recording source.
Settings: A/D, resample, AIB2, mLAN1~4
A/D...................Analog audio from the A/D INPUT jacks is recognized as the recording source.
resample..........The audio signal produced from the instrument when you play the keyboard along with the Audio Input part (in other
words all the audio signals output from the OUTPUT jacks) is recognized as a recording source and “resampled.”
AIEB2...............Digital audio from the DIGITAL IN terminal or OPTICAL IN terminal (with optional AIEB2) is recognized as the recording
source.
mLAN1~4.........The mLAN connector (with optional mLAN16E) is recognized as the recording source.
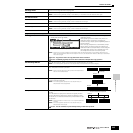
Next Determines whether multiple samples can be recorded without exiting from the Record mode (on) or not (off). When
you wish to assign individual samples to the keys one by one to create a Drum Voice, set this parameter to on.
Keep in mind that the Next parameter may be fixed to “off” and cannot be changed. This occurs when you enter the
Sampling mode from the Voice mode/Performance mode, set the Voice to something other than “off” in the [F1]
DEST display, and set the Source (above) to “resample” in the [F2] SOURCE display.
Mono/Stereo Determines whether new samples will be recorded as stereo or mono samples.
Settings: monoL, monoR, monoL+R, stereo
L mono.............The L-channel signal will be recorded as a mono sample.
R mono.............The R-channel signal will be recorded as a mono sample.
L+Rmono .........The L-channel and R-channel signals will be mixed and recorded as a mono sample.
stereo...............A stereo sample will be recorded.
Frequency
(Sampling Frequency)
Specifies the sampling frequency. The rate at which digital readings are taken is referred to as the sampling
frequency. Higher sampling frequencies result in higher quality sound, but use up more memory.
Settings: 44.1k (44.1 kHz), 22.0kLo (22.05 kHz Lo-Fi), 11.0kLo (11.025 kHz Lo-Fi), 5.5kLo (5.5125 kHz Lo-Fi)
n When the Source is set to any of mLAN1~4 and the mLAN terminal is used as an audio input, the Frequency is fixed to 44.1
kHz and cannot be changed.
n At settings other than 44.1 kHz, the sound monitored during recording may be different from the recorded sound, depending
on the source signal.
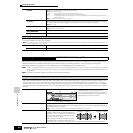
[F6] REC
Even if you press the [F6] REC button, recording (sampling) will not start immediately. Set various parameters such as Trigger Mode in the Sampling Standby
display, then start the actual sampling according to the settings.
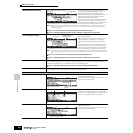
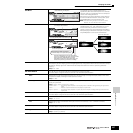
STANDBY (Sampling Standby)
Press the [REC] button to enter the Sampling Standby display. From this display you can turn the Confirm function on
or off by pressing the [F2] CONFM button as well as set parameters listed below. For details on the Confirm function,
refer to page 95 in the Quick Guide section.
TrggrMode (Trigger Mode) Specifies the method by which sampling will be triggered.
Settings: level, manual
level..................When this is selected, press the [F6] REC button to enable the Trigger Waiting condition. Sampling will then begin as
soon as an input signal exceeding the specified trigger level is received. When this is selected, you need also set the
Trigger Level (1~127).
manual .............When this is selected, sampling will begin as soon as the [F6] START button is pressed, regardless of the input signal
level.
Key This is the same parameter as Keybank in the [F1] DEST display.
RecMonitor (Recording Monitor) Determines the output level of the monitor for the input signal.
This monitor signal is output from the PHONES jack or the OUTPUT R and L/MONO jacks. This has no effect on the
recording level.
Settings: 0 ~ 127
RecGain (Recording Gain) Determines the recording gain when resampling. This parameter is available only when the Source is set to
“resample.”
Settings: -12dB ~ +12dB
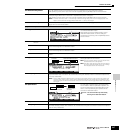
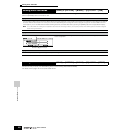
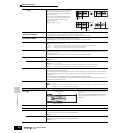
WAITING (Trigger Waiting)
When Trigger Mode is set to “level” in the Sampling Standby display, press the [F6] REC button again to enter the
Trigger Waiting condition; the [F6] menu changes to “STOP.” In this status, sampling will begin as soon as an input
signal exceeding the specified trigger level is received. Before recording starts, press the [F6] STOP button or
[EXIT] button to return to the Sampling Standby display.
Keep in mind that the Confirm function can also be turned on or off by using the [F2] CONFM button in the Trigger
Waiting condition.
RECORDING
During recording, press the [F6] STOP button or [EXIT] button to stop the sampling.
After sampling (recording) stops:
The following menus appear only when the Confirm function is turned on.
[F3] AUDITION Pressing this lets you hear the sample obtained by recording (sampling).
[F4] CANCEL Pressing this deletes the sample obtained by recording (sampling) and return to the Sampling Standby display.
[F5] OK Pressing this stores the sample obtained by recording (sampling) to the specified destination.