


Quick Guide — Advanced Course
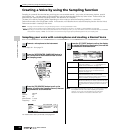
Creating a Voice by using the Sampling function
95
Owner’s Manual
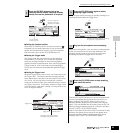
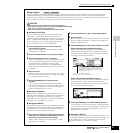
● Setting the Confirm function
When the [F2] CONFM (Confirm function) is turned on ( is
indicated), you can easily listen back to your just-recorded
sample and conveniently re-record it if you’re not satisfied
with the results. Here, set the [F2] CONFM button on.
● Setting the Trigger mode
The Trigger mode lets you determine how the Sampling
actually starts. For example, you can start the Sampling
simply by pressing the button or when the Song/Pattern
playback reaches a specified point. Here, set the TrggrMode
(Trigger mode) to “level” which lets you start sampling as
soon as the microphone level exceeds the specified Trigger
Level.
● Setting the Trigger Level
When the Trigger mode is set to “level,” you’ll also need to set
the Trigger Level. This determines when sampling actually
starts, depending on the level of the input signal (in this case,
your voice). As you sing into the microphone, notice the
movement of the level meter (bar), and when the bar crosses
the Trigger Level arrow. If necessary, select the Trigger Level
value and use the data dial to change it, moving the arrow as
low or as high as needed.
Doing this puts sample recording on standby, waiting for an
input signal that exceeds the Trigger level.
Sing into the microphone. (You may want to match the pitch
of your voice to the note C3, set in step #4 above.) The
sampling actually starts as soon as the an input signal
exceeding the specified trigger level is received.
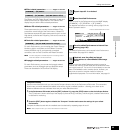
Press the [F3] AUDITION button to hear the sampled sound.
If you’re not satisfied with the results and you wish to try
again, press the [F4] CANCEL button to return to the
Sampling Standby display and try sampling from step #5
again. If you are satisfied with the results, press the [F5] OK
button to store the sampled sound as a “sample” and return
to the [F1] DEST or [F2] SOURCE display.
Keep in mind that if the Confirm function is turned off in step
#5 above, the display shown above will not appear when
stopping sampling. Instead, stopping sampling returns
directly to the [F1] DEST or [F2] SOURCE display.
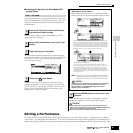
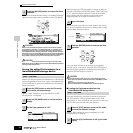
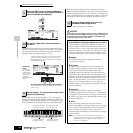
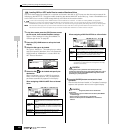
5
Press the [F6] REC button to call up the
Sampling Record display (Sampling Standby
status), then set the parameters as required.
F6
Turn the Confirm
function on or off
Indicates Sampling
Standby status.
Trigger Level
You can change the
Keybank (set in step
#4) also in this display.
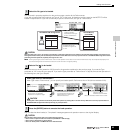
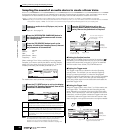
Trigger Level
Trigger Level
Indicates Sampling
Standby status.
The section of the bar exceeding
the Trigger Level becomes black.
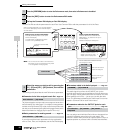
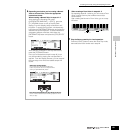
6
Press the [F6] REC button again to enable
Sampling Trigger Waiting.
7
Sing into the microphone to start sampling.
8
Press the [F6] STOP button to stop sampling,
then check the results.
F6
Indicates that sample recording is waiting
for a signal of an appropriate level.