


Appendix
Installing Optional Hardware
286
Owner’s Manual
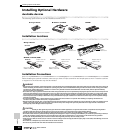
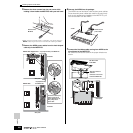
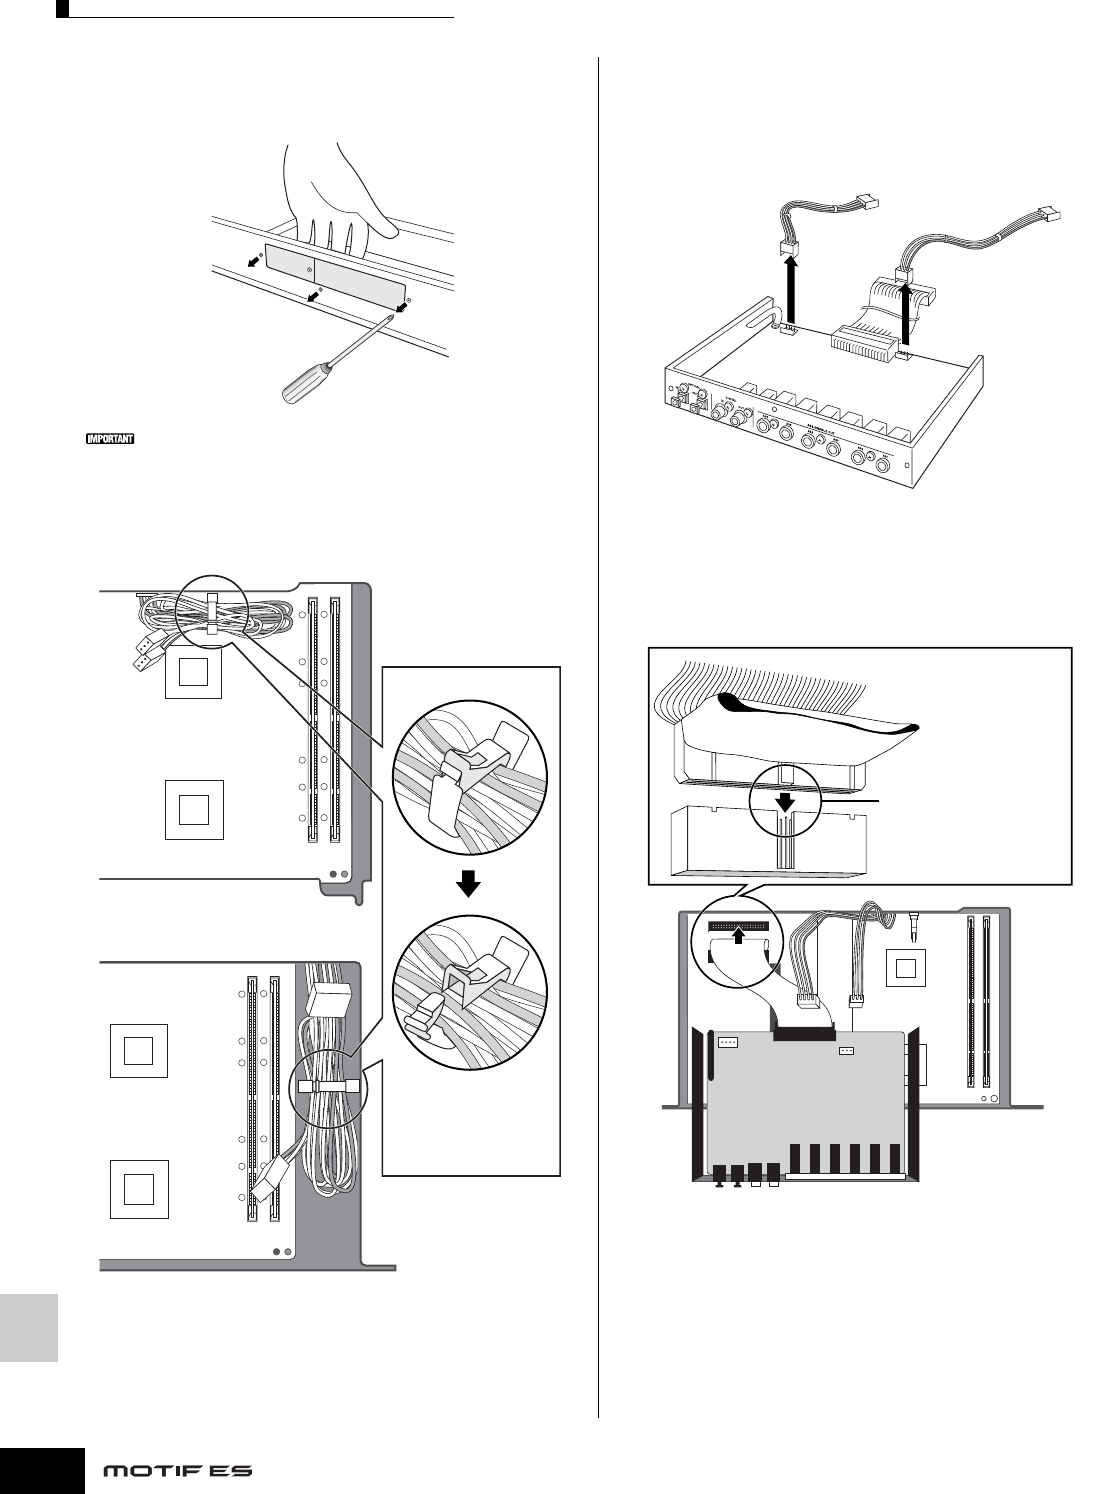
4 Remove the three screws from the rear cover while
holding it from inside the MOTIF ES with your left hand.
Keep the removed screws in a safe place. They will be used when
re-attaching the cover to the instrument after installing the AIEB2.
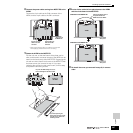
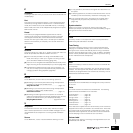
5 Remove the AIEB2 power cables from the hook shaped
cable clip in the MOTIF ES.
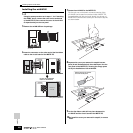
6 Remove the AIEB2 from its package.
The AIEB2 has one flat ribbon cable and two power cables.
Since these two power cables are used for the main body
and are not needed when installing to the MOTIF ES, you
can remove them from the AIEB2.
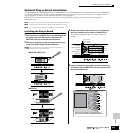
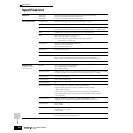
7 Connect the flat ribbon cable coming from AIEB2 to the
circuit board of the MOTIF ES.
Be careful to connect the cable in the proper direction as
shown.
Rear side of the
MOTIF ES
MOTIF ES6 / MOTIF ES7
MOTIF ES8
↑ Top (keyboard side) of the MOTIF ES
Underside
↓ Rear panel
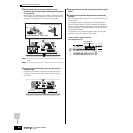
Unlatch the cable clip by
pulling out the tab as
shown. Replace the clip
after pulling out the
power cable.
↑ Top (keyboard side)
of the MOTIF ES
Underside
↓ Rear panel
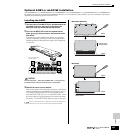
AIEB2
Remove the two
power cables.
AIEB2
Flat ribbon cable
of the AIEB2
Align the connectors
as shown.
Connector on the circuit
board of the MOTIF ES
↓ Rear panel