


Installing Optional Hardware
285
Owner’s Manual
Appendix
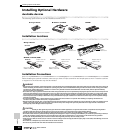
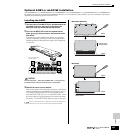
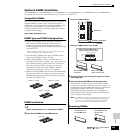
Optional AIEB2 or mLAN16E Installation
By installing an optional mLAN expansion board (mLAN16E) or an I/O expansion board (AIEB2), you can increase the input/output
capability and interfacing options of the MOTIF ES.
Installing the AIEB2
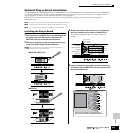
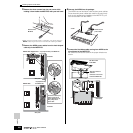
1 Turn the power of the MOTIF ES off, and disconnect the
AC power cord. Also, make sure to disconnect the
MOTIF ES from any connected external devices.
2 Turn over the MOTIF ES so that the keyboard faces
down, giving you direct access to the underside of the
instrument.
To protect the Knobs, Wheels and Sliders from damage,
place the keyboard so the four corners are supported by
something that provides sufficient support like magazines
or cushions.
Since the instrument — particularly the MOTIF ES8 — is very heavy, this
procedure should not be done alone, but by two or three people.
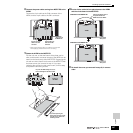
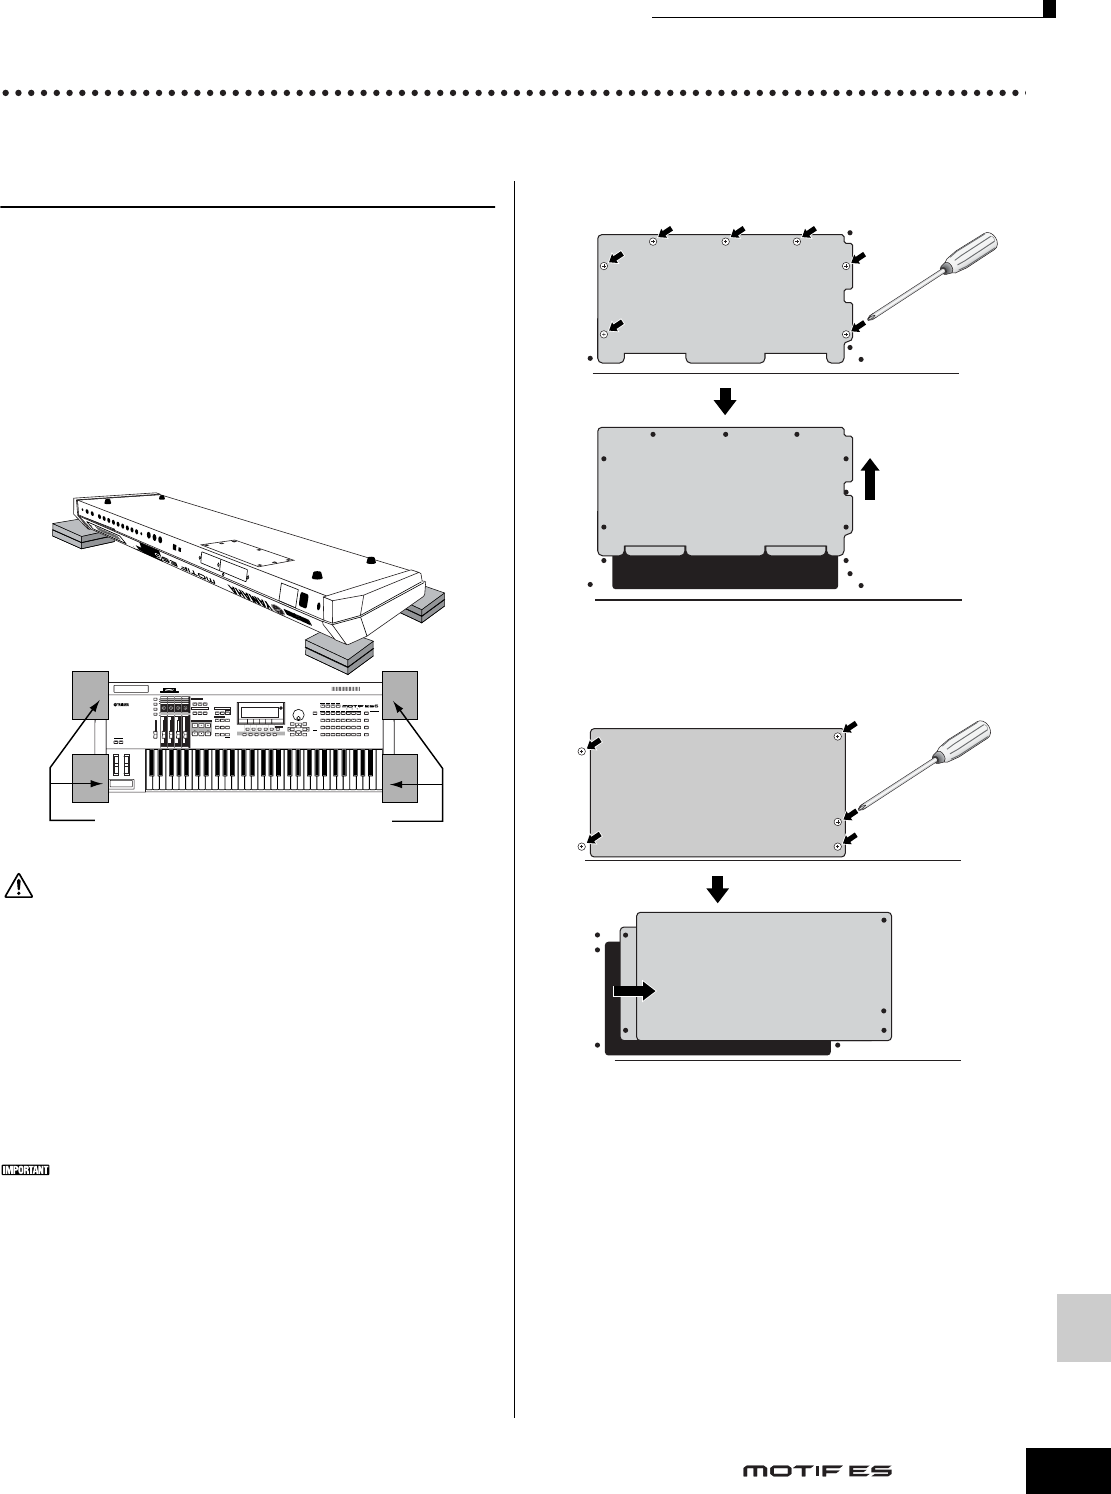
3 Remove the cover from the bottom.
With the rear panel of the instrument facing you, remove the
screws from the cover and slide the cover away to remove
it. (The MOTIF ES6 and MOTIF ES7 have seven screws,
while the MOTIF ES8 has five.) On the MOTIF ES6/7, slide
the cover away from you (toward the front of the instrument,
as shown). On the MOTIF ES8, slide the cover to the right.
Keep the removed screws in a safe place. They will be used when re-
attaching the cover to the instrument after installing the AIEB2.
MUSIC PRODUCTION SYNTHESIZER
Place supports at all four corners, taking care
not to touch the Knobs, Wheels and Sliders.
View of the keyboard
from the bottom
CAUTION
MOTIF ES6 / MOTIF ES7
MOTIF ES8
Bottom
↓ Rear side
Slide the cover
away to remove.
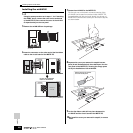
Bottom
Slide the cover
away to remove.
↓ Rear side
Bottom
↓ Rear side
Bottom
↓ Rear side