


Quick Guide — Playing the MOTIF ES
Playing the Demo Songs/Patterns
58
Owner’s Manual
Using Mute/Solo with the Song and
Pattern tracks
Try this with the Demo Songs to hear how the tracks sound
both in isolation and in various combinations.
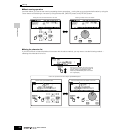
■ To mute a track
The corresponding track is set to mute (its lamp goes off) and
produces no sound. When pressing the same number button
again, the track mute is canceled (its lamp lights).
To turn Mute off, press the [MUTE] button again (the lamp
goes off).
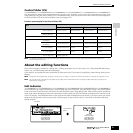
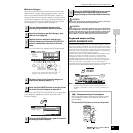
■ To solo a track
Simultaneously hold down the [MUTE] button and press one
of the NUMBER buttons [1] to [16] to solo the corresponding
track. Once you’ve selected a track for soloing, the [MUTE]
button’s lamp flashes, indicating the Solo function is active.
While Solo is active, you can change the soloed track simply
by pressing the corresponding NUMBER button [1] to [16].
To cancel the Solo function, press the [MUTE] button again.
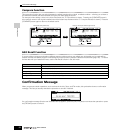
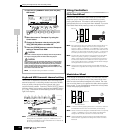
Selecting a Song/Pattern track and
playing the keyboard
You can play along with the Song or Pattern using the sound
of a track — for example, playing additional drum/percussion
sounds on a drum track while the Song plays. Press the
[TRACK SELECT] button so that its lamp lights, and select a
track by pressing the one of the NUMBER buttons [1] to [16].
If you want you can also mute a track and play the part of the
track yourself. To do this, select the desired track as
described, then mute the track (as explained in “To mute a
track” above).
Song Location
The Song Play mode has a convenient Location function that
lets you jump to user-specified parts of a song. This lets you
assign a specific measure number in the selected song, and
instantly jump to the assigned measure – either during
playback or when the song is stopped. Two Locations can be
assigned.
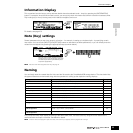
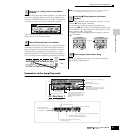
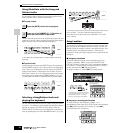
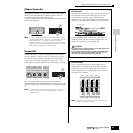
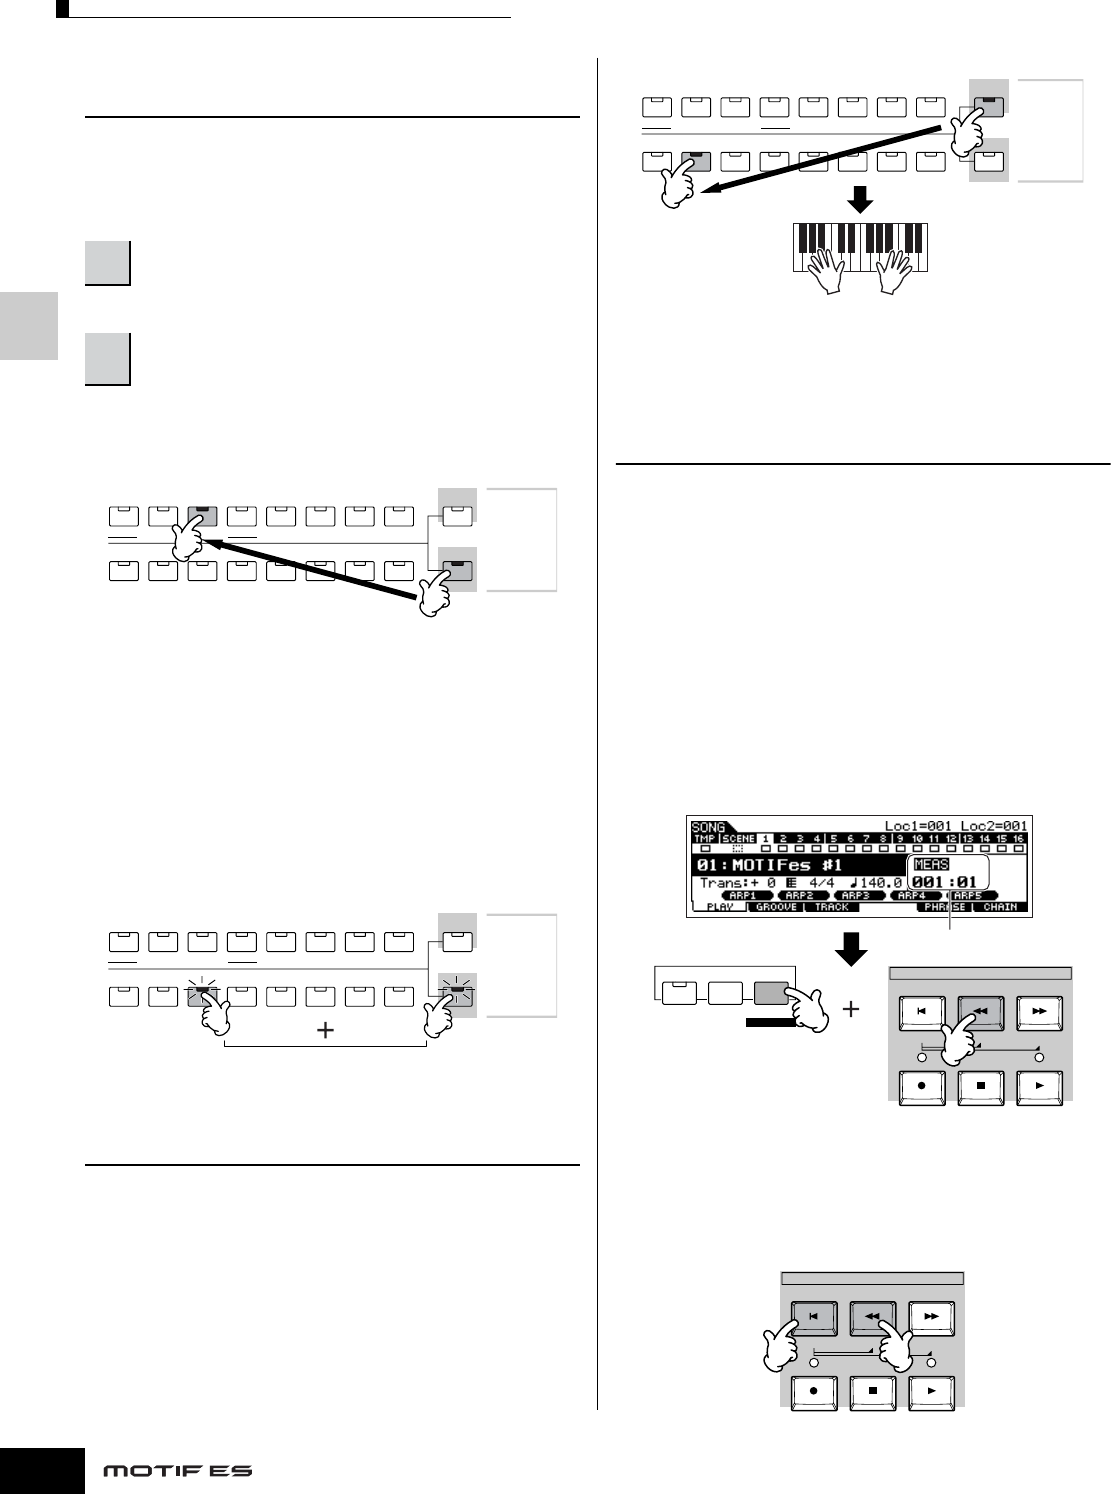
■ Assigning Locations
Select the desired measure in the recorded song for the
Location. (Highlight “MEAS” and use the [INC/YES] and
[DEC/NO] buttons or data dial.) Then, to assign the measure
to Location 1, simultaneously hold down the [SET LOCATE]
button and press the [G] (Reverse) button.
To assign Location 2, use the [H] (Forward) button.
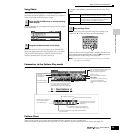
■ Jumping to an assigned Location
To instantly jump to the assigned Location 1 or 2,
simultaneously hold down the [LOCATE] button and pressing
the [G] (Reverse) button (for Location 1) or the [H]
(Forward) button (for Location 2).
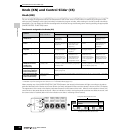
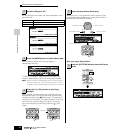
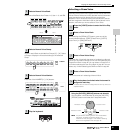
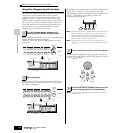
1
Press the [MUTE] button (the lamp lights).
2
Press any of the NUMBER [1] - [16] buttons to
select the track number to be muted.
ELEMENT/ PERF. PART/ ZONE
87654321
16
MUTE
TRACK
SELECT
NUMBER
SOLO
15
1412 13
11
10
9
ELEMENT/ PERF. PART/ ZONE
87654321
16
MUTE
TRACK
SELECT
NUMBER
SOLO
15
1412 13
11
10
9
ELEMENT/ PERF. PART/ ZONE
87654321
16
MUTE
TRACK
SELECT
NUMBER
SOLO
15
1412 13
11
10
9
EDIT
COMPARE SCENE STORE
SET LOCATE
JOB STORE
SEQ TRANSPORT
LOCATE 1 2
Specify a measure number
to be registered.
In this example, the selected measure
is assigned to Location 1. The current
settings for Locations 1 and 2 are
shown at the top right of the display.
SEQ TRANSPORT
LOCATE 1 2