


Reference Utility Mode
Utility mode
261
Owner’s Manual
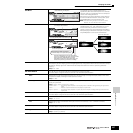
System
F
Reverb
When this is set to on and the [SYSTEM] button is turned on, the Reverb effect is bypassed.
F
Chorus
When this is set to on and the [SYSTEM] button is turned on, the Chorus effect is bypassed.
n
For details about the Effects, see page 177.
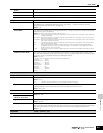
[SF4] OTHER
AutoLoad
Determines whether the Auto Load function is on or off. When this is on, the instrument will automatically load the
specified files (from SmartMedia/USB storage device) to User memory — whenever the power is turned on.
For details about the Auto Load function, see page 135.
Settings:
on, off
PowerOnMode
This determines the default power-on mode (and memory bank) — letting you select which condition is automatically
called up when you turn the power on.
Settings:
performance, voice (USR1), voice (PRE1), GM, last, master
performance....When turning the power on next time, the Performance Play mode is entered and the first program number (USER: 001)
is selected automatically.
voice (USR1) ...When turning the power on next time, the Voice Play mode is entered and the first program number of the User Voices
(USR1: 001) is selected automatically.
voice (PRE1)....When turning the power on next time, the Voice Play mode is entered and the first program number of the Preset Voices
(PRE 1: 001) is selected automatically.
GM...................When turning the power on next time, the Voice Play mode is entered and the first program number of the GM Voices
(GM: 001) is selected automatically.
last...................When turning the power on next time, the mode and program number (Voice/Performance/Song/Pattern/Master)
registered the last time before turning the power off are called up. For information on how to register the mode and
program number for “last,” see page 265.
master .............When turning the power on next time, the Master Play mode is entered and the first program number (001) is selected
automatically.
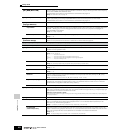
CtrlReset (Controller Reset)
Determines the status of the controllers (Modulation Wheel, Aftertouch, Foot Controller, Breath Controller, Knobs,
etc.) when switching between voices. When this is set to “hold,” the controllers are kept at the current setting. When
this is set to “reset,” the controllers are reset to the default states (below).
Settings:
reset, hold
If you select “reset,” the controllers will be reset to the following states/positions:
Pitch Bend.....................Center
Modulation Wheel..........Minimum
Aftertouch .....................Minimum
Foot Controller ..............Maximum
Breath Controller ..........Maximum
Foot Switch ...................Off
Expression ....................Maximum
Foot Volume ..................Maximum
Sustain ..........................Off
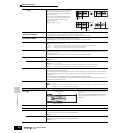
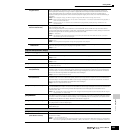
[F2] I/O (Input/Output)
[SF1] INPUT
From this display you can set parameters related to audio input.
Mic/Line
When using the A/D INPUT jacks, this determines the input source, microphone (mic) or line.
Settings:
mic, line
mic...................Intended for low output equipment, such as a microphone, electric guitar or bass.
line...................Intended for high output equipment, such as a keyboard, synthesizer, or CD player.
Digital
When the optional AIEB2 board is installed, two separate input connections for digital audio transfer are available:
coaxial and optical. One or the other must be set; the two cannot be used at the same time.
Settings:
coaxial, optical
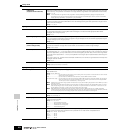
[SF2] OUTPUT
From this display you can set parameters related to audio output.
L&RGain
Set the output gain of each jack.
Settings:
0dB, +6dB
Assign Gain L&R, 1&2, 3&4, 5&6,
7&8, 9&10, 11&12, 13&14
Digital
Specify the digital output resolution of the optionally installed AIEB2 board (page 25).
Settings:
20bit, 24bit
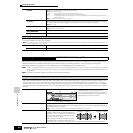
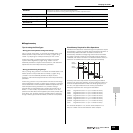
mLAN MonitorSw
When this is set to on, the audio signal of the instrument output via an IEEE1394 cable to a computer will be output
also via the main OUTPUT L/MONO and R jacks. When this is set to on, the audio signal sent from a computer to the
instrument will be output via the main OUTPUT L/MONO and R jacks directly, bypassing the Effect block.
Settings:
on, off
[F3] VOICE
[VOICE]
→
[UTILITY]
→
[F3]
These special voice-related settings are available only when entering the Utility mode from the Voice mode, letting you set parameters related to all the Voices.