


Quick Guide — Advanced Course
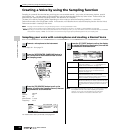
Creating a Voice by using the Sampling function
99
Owner’s Manual
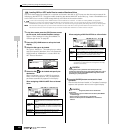
Doing this puts sample recording on standby, waiting for an
input signal that exceeds the Trigger level.
The sampling actually starts as soon as the an input signal
exceeding the specified trigger level is received.
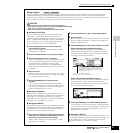
Press the [F3] AUDITION button to hear the sampled sound.
If you’re not satisfied with the results and you wish to try
again, press the [F4] CANCEL button to return to the
Sampling Standby display and try sampling from step #5
again. If you are satisfied with the results, press the [F5] OK
button to store the sampled sound as a “sample” and return
to the Sampling Standby display.
Keep in mind that if the Confirm function is turned off in step
#5 above, the display shown above will not appear when
stopping sampling. Instead, stopping sampling returns
directly to the Sampling Standby display.
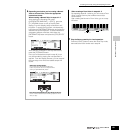
In step #7, select a different sound (on a CD, for example) for
each Sample. Though the Key is automatically set to the note
name the next one higher than that just assigned, you can
change it in step #5.
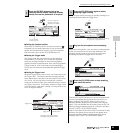
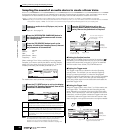
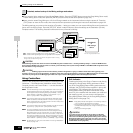
By repeating steps #5 - 8 above, you can create a Drum Voice
in which each key has a different sound (as shown below).
Refer to “Saving a Sample” on page 97.
The recorded (edited) sample data resides temporarily in DIMM (page 187).
Because data contained in DIMM is lost when the power is turned off, you
should always save any data residing in DIMM to a SmartMedia /USB
storage device before turning off the power.
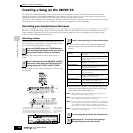
Example Sampling sources
The examples below show you some of the different audio
sources you can use as raw material for your Samples and
Sample Voices.
● Vocals with effects
With a PLG100-VH Plug-in Board installed, you can apply a
vocal harmony effect to your voice, and sample the entire
processed sound. After setting the PLG100-VH related
parameters as required referring to “Using an Effect Plug-in
Board” on page 78, execute the Sampling operation.
● The sound of an mLAN compatible instrument
After setting up referring to page 34, execute the Sampling
operation. You should set the [INTEGRATED SAMPLING] →
[F2] SOURCE → Source parameter to “mLAN1 - 4.”
● Electric guitar or bass
Instruments such as guitar and bass can also be sampled,
using the A/D INPUT jack. After setting up referring to page
33, execute the Sampling operation. You should set the
[INTEGRATED SAMPLING] → [F2] SOURCE → Source
parameter to “A/D.”
● Digital audio
With an optional AIEB2 interface installed to the instrument,
you can connect to the digital out jack on your DAT deck or
CD/MD player and directly record digital audio, for the
highest possible sound quality. For details on installing the
AIEB2, refer to page 285; for details on connecting digital
audio devices to the instrument, refer to
page 34
. When
executing AIEB2, you should set the [INTEGRATED
SAMPLING]
→
[F2] SOURCE
→
Source parameter to
“AIEB2.”
● Resampling the MOTIF ES
You can also resample anything you play on the MOTIF ES
itself — riffs, rhythms, melodies, thick multi-layered chord
pads, etc. You should set the [INTEGRATED SAMPLING] →
[F2] SOURCE → Source parameter to “resample.”
● WAV or AIFF audio files
Audio data created and edited on a computer can also be
used for Samples. (For details, see the next page.)
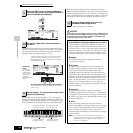
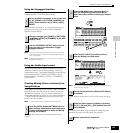
6
Press the [F6] REC button again to enable
Sampling Trigger Waiting.
7
Start the external audio device.
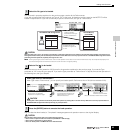
8
Press the [F6] STOP button to stop sampling,
then stop the external audio device.
9
Repeat steps #5 - 8 above to assign additional
Samples to the notes as desired to create your
Drum Voice.
F6
Indicates that sample recording is waiting
for a signal of an appropriate level.
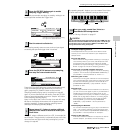
10
Save your newly created User Voice to a
SmartMedia/USB storage device.
Sound Effect C Sound Effect Y
Sound Effect B
Sound Effect A
CAUTION