


Creating a Song on the MOTIF ES
122
Owner’s Manual
Quick Guide — Advanced Course
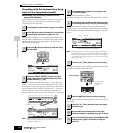
Using the Groove function
Just as in the Pattern Play mode, the Groove function is
available also in the Song Play mode.
For details, refer to the explanation of Groove in the Pattern
Play mode (page 114).
The created Song data resides temporarily in DRAM (page 187). Because
data contained in DRAM is lost when the power is turned off, you should
always store any data residing in DRAM to a SmartMedia/USB storage
device before turning off the power.
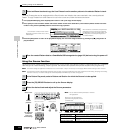
Sampling a one-shot sound to a Song
track
The MOTIF ES conveniently lets you sample audio material,
even while a Song is playing. This allows you to quickly and
easily “fly in” samples to your Song as you need them — for
example, capturing short sound effects from a CD, or
recording background vocal phrases with a microphone.
Sounds like these can be added to the Song as desired, and
can even be aligned in time as needed after recording in the
Song Edit mode.
In order to use the Sampling function, DIMM modules must be
installed to the instrument. For details on installing DIMMs, see page
289.
Follow steps #1 - 8 on page 73, substituting the instructions
below for steps #4 and 8.
In step #4, press the [SONG] button to enter the Song Play
mode then select a song to be created.
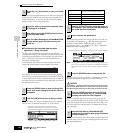
In step #8, set the related parameters from the AUDIO IN
display ([SONG] → [MIXING] → [EDIT] → [COMMON] → [F5]
AUDIO IN).
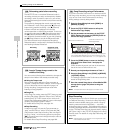
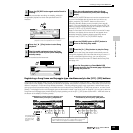
Type: sample+note
Source: A/D
Next: off
Mono/Stereo: stereo
Frequency: 44.1k
For details about each parameter, see page 253.
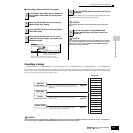
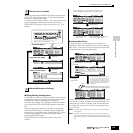
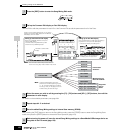
Set the TrggrMode (Trigger Mode) to “meas” then specify the
Punch In measure (at which the Sampling starts
automatically) and the Punch Out measure (at which
Sampling stops automatically).
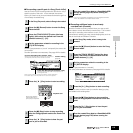
1
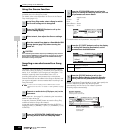
In the Song Play mode, select a Song for which
the Groove settings are to be applied.
2
Press the [F2] GROOVE button to call up the
Groove setting display.
3
Select a track, then adjust the Groove settings.
4
Save the created Song data to a SmartMedia/USB
storage device (page 132) before turning the
power off.
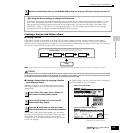
1
Connect an audio device (CD player, etc.) to the
instrument.
2
Press the [INTEGRATED SAMPLING] button in
the Song mode to enter the Sampling mode.
CAUTION
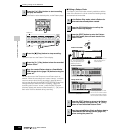
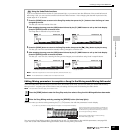
3
Press the [F2] SOURCE button to call up the
display for setting the Sampling Source, then set
the parameters as shown below.
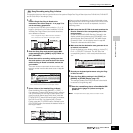
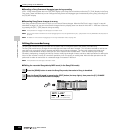
4
Press the [F1] DEST button to call up the display
for setting the Sampling Destination, set the
parameters as described below.
Track This parameter determines the Song track to which the
Sample Voice is assigned.
Keybank This parameter determines the note to which the sample
is assigned.
5
Press the [F6] REC button to call up the
Sampling Record display (Sampling Standby
status), then set the parameters as required.
Punch Out measure
Measure number at which
Sampling stops
automatically
Punch In measure
Measure number at which
Sampling starts automatically
Indicates Sampling
Standby status.