


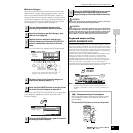

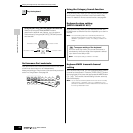
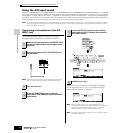

Playing the Keyboard (in the Performance Play mode)
71
Owner’s Manual
Quick Guide — Playing the MOTIF ES
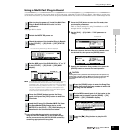
This calls up a list indicating which Voice is assigned to each
Part of the current Performance.
Move the cursor to the desired Part. When a Voice has
already been assigned to the selected Part, change the Voice
Bank or Number by using the data dial, the [INC/YES] and the
[DEC/NO] button. When no Voice is assigned to the selected
Part, press the [SF1] ADD INT button or [SF2] ADD PLG
button to execute the assignment, then change the Voice
Bank or Number.
You can also select a Voice Bank/Number by using the BANK,
GROUP, and NUMBER buttons (page 60).
n Voices of the Multi part Plug-in Board PLG100-XG cannot be assigned
to Performance parts.
When an internal Voice is assigned to a Part, the following
Voice Banks are available.
When a Plug-in Board Voice is assigned to a Part, the
available Voice Banks differ depending on the installed Plug-
in Board. For details, refer to the Owner’s Manual that came
with the Plug-in Board.
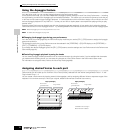
You can set the lowest note of the range over which the Voice
of the selected Part sounds by simultaneously holding the
[SF4] button and pressing the desired key. To set the highest
note of the range, simultaneously hold the [SF5] button and
press the desired key.
Press the [STORE] button to enter the Performance Store
mode, select the destination Performance number, then press
the [ENTER] button to execute the store operation. For details
about Performance Store, see page 91.
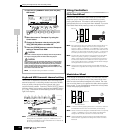
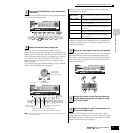
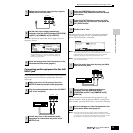
1
Press the [F2] VOICE button in the Performance
Play mode.
2
Assign the desired Voice to each Part.
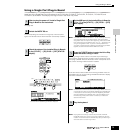
SCENE
SF1 SF
2 SF3 SF4 SF5
F1 F2 F3 F4 F5 F6
INFORMATION
SCENE
SF1 SF
2 SF3 SF4 SF5
F1 F2 F3 F4 F5 F6
INFORMATION
DEC/NO INC/YES
Select a Voice
Bank/Number at
the cursor location.
Voice Bank Voice Number
Assign an internal Voice
to the selected Part.
Delete the Voice assignment of the
selected Part.
Assign a Plug-in Voice to the selected Part.
(Available when the Plug-in Board has been installed.)
PRE1 (Preset1) ~
PRE6 (Preset 6)
Preset Banks 1 - 6 of the Normal Voice. These
correspond to the [PRE1] - [PRE6] buttons in the Voice
mode.
USER1 ~ USER2 User Banks 1 - 2 of the Normal Voice. These correspond
to the [USER1] - [USER2] buttons in the Voice mode.
GM GM Normal Voice Bank. This corresponds to the [GM]
button in the Voice mode.
PDR (Preset Drum) Preset Bank of the Drum Voice. This corresponds to
pressing the [DRUM KITS] button and the [PRE5] button
simultaneously.
GMDR (GM Drum) GM Drum Voice Bank. This corresponds to pressing the
[DRUM KITS] button and the [GM] button simultaneously.
UDR (User Drum) User Bank of the Drum Voice. This corresponds to
pressing the [DRUM KITS] button and the [USER1]
button simultaneously.
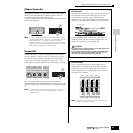
3
Specify the note range of each part, as required.
4
Change the volume of each Part and adjust the
relative balance among the four Parts by using
the Control sliders.
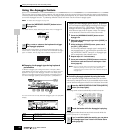
5
Store the settings as a User Performance in the
Performance Store mode.
SF 4 SF 5
Note Limit Low Note Limit High