


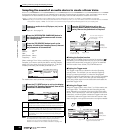
Creating a Voice by using the Sampling function
94
Owner’s Manual
Quick Guide — Advanced Course
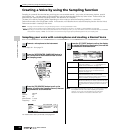
Creating a Voice by using the Sampling function
Sampling is a powerful function that lets you bring your own recorded sounds – your voice, an instrument, rhythms, special
sound effects, etc. – into the system of this synthesizer, and play those sounds just like any other voices. These sounds, the
audio data you capture with the Sampling function, are referred to as “Samples.”
The data you create by Sampling differs depending on which mode you enter the Sampling mode from — the Voice/
Performance mode or the Song/Pattern mode. In this section, we’ll describe how to use the Sampling function from the Voice/
Performance mode in creating a User Voice.
n See page 173 for instructions on using the Sampling function in the Song mode/Pattern mode.
In order to use the Sampling function, DIMM modules must be installed to the instrument. For details on installing DIMMs, see page 289.
Depending on the size of the audio (sample) data obtained via the Sampling function, you may not be able to save all of the desired data to a SmartMedia
card (maximum capacity: 128MB). For this reason, we recommend using a large-capacity USB storage device for your Sampling data.
Sampling your voice with a microphone and creating a Normal Voice
Follow steps #1 - 8 on page 72.
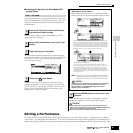
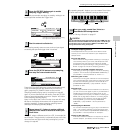
Type: sample
Source: A/D
Next: off
Mono/Stereo: L mono
Frequency: 44.1k
For details about each parameter, see page 251.
n If the Voice parameter above is set to “off,” you won’t be able to play
the sampled sound as a Voice after completing this operation.
However, you can call up the sampled sound by selecting a
Waveform. For details on how to select a Waveform, see .
1
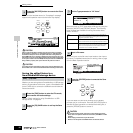
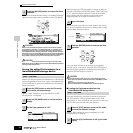
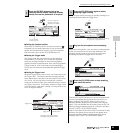
Connect a microphone to the instrument.
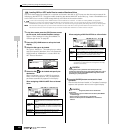
2
Press the [INTEGRATED SAMPLING] button in
the Voice mode or Performance mode to enter
the Sampling mode.
3
Press the [F2] SOURCE button to call up the
display for setting the Sampling Source, then set
the parameters as shown below.
VOICE
SONG
PERFORM MASTER
PATTERN FILE
MODE
SEQUENCER
INTEGRATED
SAMPLING
MIXING UTILITY
DEMO
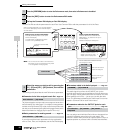
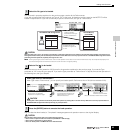
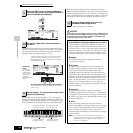
4
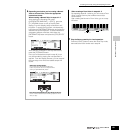
Press the [F1] DEST button to call up the display
for setting the Sampling Destination, then set the
parameters as described below.
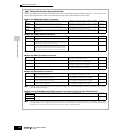
Waveform Determines the Waveform number. Select a number
which has no data ([--- : -----------] is indicated). For
details about the Waveform, see page 173.
Keybank Here, set this parameter to “C3.” After the Sampling is
completed, you can hear the sampled sound by
pressing the note set here. For details about the
Keybank, see page 173.
Part This is available when entering the Sampling mode
from the Performance mode. This parameter
determines the Performance Part to which the Voice
(below) created by sampling is assigned.
Voice Set the Bank to “USR1” or “USR2” (one of the User
Normal Voice Banks), then select a User Normal Voice
Number. After the Sampling is completed, you can hear
the created Voice by selecting the Voice number set
here.