


Reference Utility Mode
Utility Job mode
265
Owner’s Manual
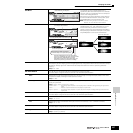
In this Mode, you can restore this synthesizer’s User memory (page 186) to the factory default settings (Factory Set). For details, see page 44.
n Since the settings of the Plug-in Boards in the Utility mode are stored not to internal User memory but to the memory on the respective boards themselves,
the data cannot be restored with this Job.
■ Supplementary
Setting the default display when turning the power on
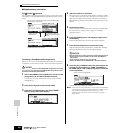
1 Enter the desired mode and the program number you wish to call up first when turning the power on.
2 Press the [ENTER] button while holding the [STORE] button to register the mode and program number set in step #1.
3 Set the PowerOnMode parameter to “last” in the [UTILITY] →→
→→
[F1] GENERAL →→
→→
[SF4] OTHER display.
4 Press the [STORE] button to store the Utility setting made in step #3 above.
5 Turn the power off and turn the power on again to call up the mode/program number set in step #2 to the display.
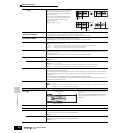
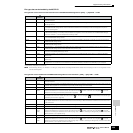
[SF4] OTHER
MIDI IN/OUT Determines which physical output terminal(s) will be used for transmitting/receiving MIDI data: MIDI IN/OUT, USB, or
mLAN (when the optional mLAN16E has been installed).
Settings: MIDI, USB, mLAN
n Three types of terminals above cannot be used at the same time. Only one of them can be used to transmit/receive MIDI data.
ThruPort (Through Port) Many computer sequencers are capable of transmitting data over several MIDI ports, effectively breaking the 16-
channel barrier. When using the USB terminal or mLAN terminal (when the optional mLAN16E has been installed) for
MIDI transmission/reception, you can have this synthesizer respond to MIDI data over one port, while relaying the
data for another port number (you can set here) to a separate tone generator (connected to the MIDI OUT terminal).
In this way, 16 channels of data can be played on this synthesizer and another 16 can be played on the connected
MIDI device.
Settings: 1~8
n When the mLAN16E has been installed and the MIDI IN/OUT is set to mLAN, ports 5 ~ 8 are not available even if you set them
here.
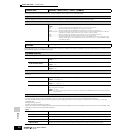
[F6] PLUG
[SF1] STATUS
Plug1: ~ Plug3: Indicates the name of the Plug-in Board which has been installed to this synthesizer.
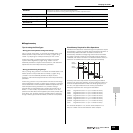
PolyExpand This parameter is accessible only when you have two or three identical Plug-in boards installed. The “off” setting
enables two or three boards to work separately (you can select them for two or three different Parts). When this is set
to “on,” the two boards effectively function together as one board (used in a single part) — giving you double the
amount of polyphonic notes you can play at one time.
Settings: on, off
[SF2] MIDI
From this display you can set various MIDI-related parameters for the Plug-in board.
DEVNO. (Device Number) Determines the MIDI Device Number of the Plug-in Board. This number must match the Device Number of the
external MIDI device when transmitting/receiving bulk data, parameter changes or other system exclusive
messages.
Settings: 1~16, all, off
PORTNO. (Port number) Determines the MIDI Port number over which the Plug-in board receives MIDI data in the multi-timbral tone
generator mode (Song/Pattern modes). One port can be set for a Multi-part Plug-in board and two ports can be set
for a Single part Plug-in board.
Settings: off, 1~3
n The Port number for the Effect Plug-in board (VH) is fixed to 1.
n For information on the Plug-in board and the internal tone generator block, see page 163.
GM/XG Determines whether “GM on” and “XG on” messages are recognized (on) or not (off). This parameter is available
only when a Multi-part Plug-in board has been installed to slot 3.
Settings: on, off
[SF3] NATIVE1
From this display you can set the Native System parameters of the Plug-in board installed to slot 1.
For details on the parameters, refer to the owner’s manual of your particular Plug-in board.
[SF4] NATIVE2
From this display you can set the Native System parameters of the Plug-in board installed to slot 2.
For details on the parameters, refer to the owner’s manual of your particular Plug-in board.
[SF5] NATIVE3
From this display you can set the Native System parameters of the Plug-in board installed to slot 3.
For details on the parameters, refer to the owner’s manual of your particular Plug-in board.
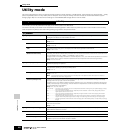
Utility Job mode
[UTILITY] → [JOB]
[UTILITY] →→
→→
[F1] GENERAL →→
→→
[SF4] OTHER →→
→→
PowerOnMode