


Creating a Song on the MOTIF ES
126
Owner’s Manual
Quick Guide — Advanced Course
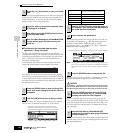
Since the Song can be played back from within the Song Edit
mode, you can instantly hear and check the changes you’ve
made while editing. If you want to hear just the track being
edited, use the Solo function (page 58).
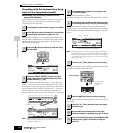
■ Transforming the recorded data and other
operations — Song Job mode
The Song Job mode has a wide variety of operations for
changing and working with Song data. Virtually all of the Jobs
share the same procedure, so we’ll explain only one of them
here — Quantize, which lets you clean up the timing of a
previously recorded track.
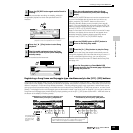
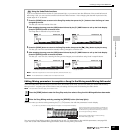
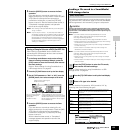
In the following example, this musical passage has been
written with exact quarter-note and eighth-note values.
Even though you think you may have recorded the passage
accurately, your actual performance may be slightly ahead of
or behind the beat (or both!). Quantize allows you to align all
the notes in a track so that the timing is absolutely accurate to
the specified note value.
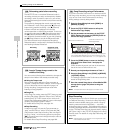
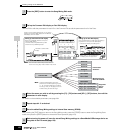
As shown below, the Jobs are divided into six main groups,
each of which is selected using the [F1] - [F6] buttons.
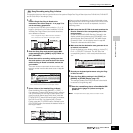
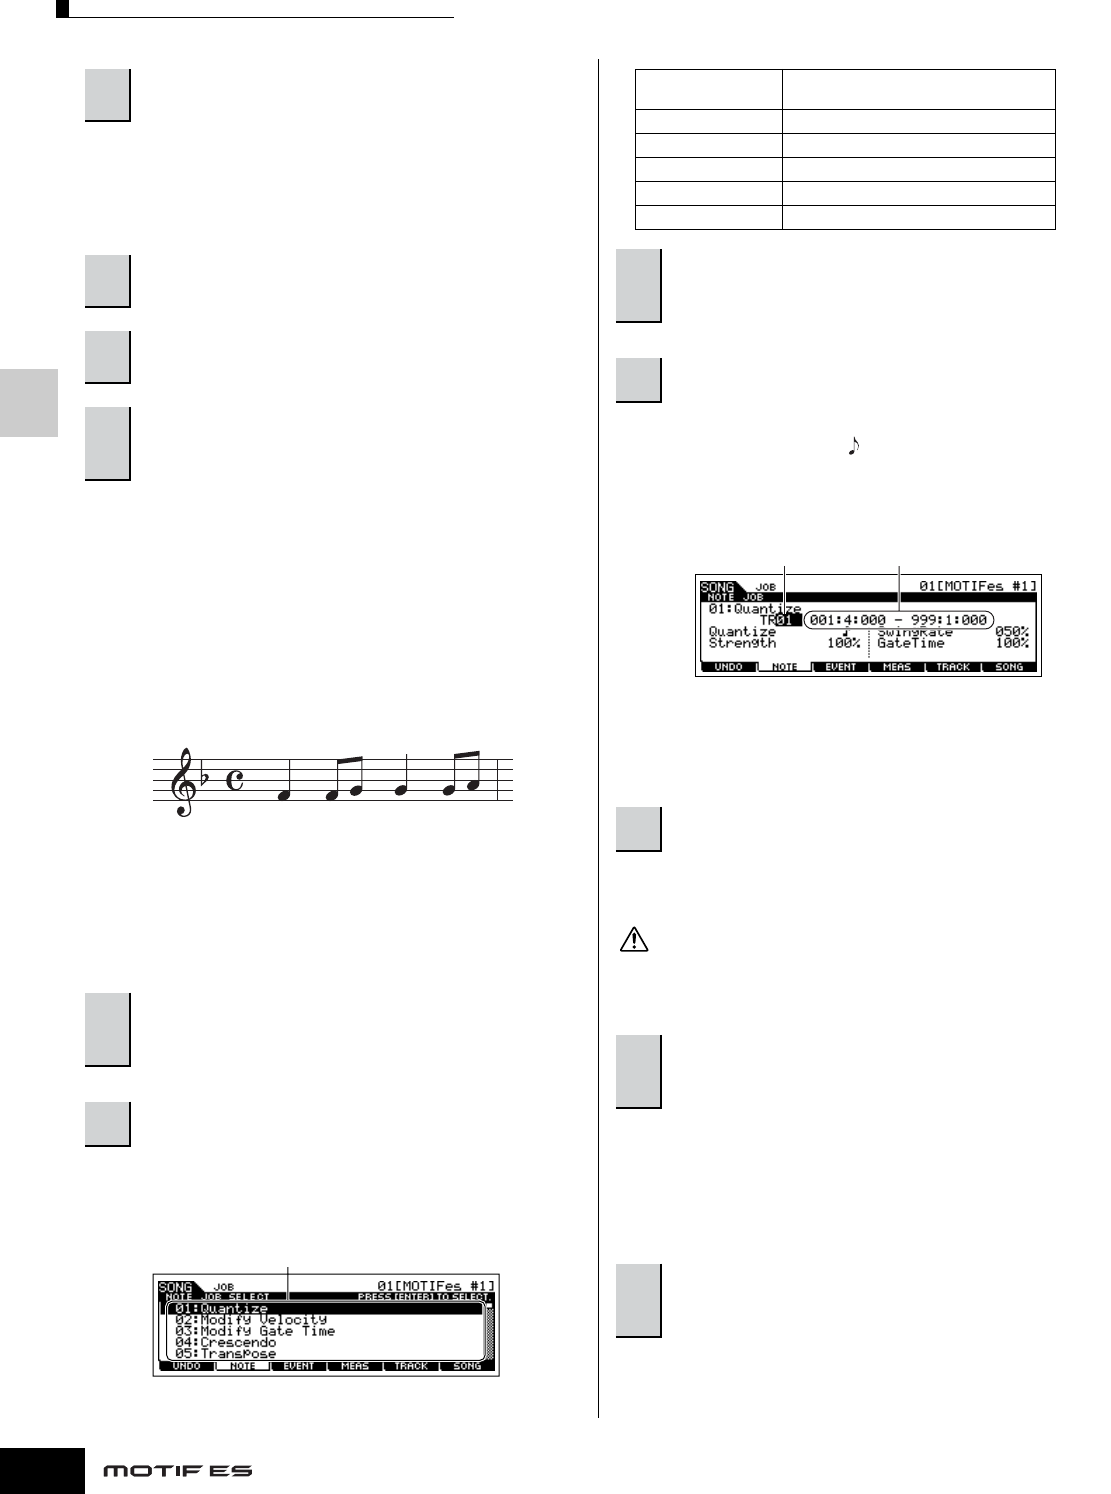
After specifying the track and range over which the Job is to
be applied, set Quantize to “ ” (8th note) according to the
notation example above. Set the Strength to “100%,”
SwingRate to “050%,” and GateTime to “100%.” Regarding
these parameters, see page 227.
n Set the Quantize value to correspond to the smallest value notes in the
track you are working with. For example, if the data was recorded with
both quarter notes and eighth notes, use eighth note for the quantize
value.
After the Job has been completed, a “Completed” message
appears and operation returns to the original display.
An “Executing...” message is shown when it takes a short amount of time to
execute the Job. Never attempt to turn off the power while the Job is being
executed. Turning the power off in this state results in loss of all user data.
If you are satisfied with the result of the Job, go to step #7.
If not, execute the UNDO Job in the [F1] UNDO display in the
Song Job mode to restore the data to its previous state, then
try out the Job (from step #4) again. For details about Undo,
see next page.
In addition to Quantize, you’ll find a variety of other useful and
powerful Jobs in the Song Job mode (page 226) and Pattern
Job mode (page 244).
5
Press the [F] (Play) button to hear your edited
data.
6
Edit other tracks as required by repeating steps
#3 through #5 as desired.
7
After editing, press the [SONG] button to return
to the Song Play mode.
8
Save the edited Song data to a SmartMedia/USB
storage device (page 132) before turning the
power off.
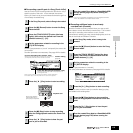
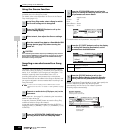
1
Press the [SONG] button to enter the Song Play
mode, then select a Song for which the Job is to
be applied.
2
Press the [JOB] button to enter the Song Job mode.
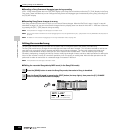
[F1] [F2] [F3] [F4] [F5] [F6]
Indicates the Job List. Because all the Jobs cannot be
displayed simultaneously, you will need to use the cursor
buttons to scroll the display in order to find the desired Job.
[F1] UNDO Undo (Canceling the executed Job)/Redo
(Restoring the executed Job) functions
[F2] NOTE Note Data Job
[F3] EVENT Event Job
[F4] MEAS Measure Job
[F5] TRACK Track Job
[F6] SONG Song Job
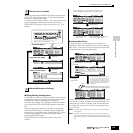
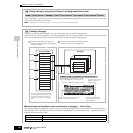
3
Press the [F2] NOTE button, move the cursor to
“01: Quantize” then press the [ENTER] button to
call up the Quantize Job display.
4
Set the relevant Job parameters.
5
Press the [ENTER] button to execute the Job.
6
Press the [SONG] button to return to the Song
Play mode, then press the [F] button to hear
the song over which the Job is applied.
7
Save the Song data to a SmartMedia/USB
storage device in the File mode (page 132) before
turning the power off.
Track over which the Job is applied Range over which the Job is applied
CAUTION