


Reference Performance Mode
Performance Play mode
212
Owner’s Manual
Performance mode
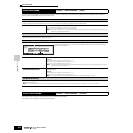
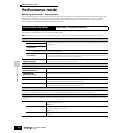
■ Creating Performances — basic procedure
You can create and edit your original Performances by setting various parameters in both the Performance Play mode and Performance Edit
mode, while the Performance Job mode provides some basic parameter-related tools, such as Initialize and Copy. Once you’ve edited a
Performance, you can store it to a User Bank in internal memory (Flash ROM) in the Performance Store mode and save all the edited
Performances to a SmartMedia/USB storage device in the File mode.
The Performance Play mode lets you perform a variety of general editing operations on the selected Performance. For more detailed and
comprehensive editing operations, use the Performance Edit mode.
n The parameters that have the same name in the Performance Play mode and in the Performance Edit mode have the same functions and settings.
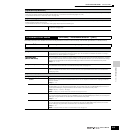
Performance Play mode
[PERFORM] → Performance selection
[F1] PLAY
TCH (Transmit Channel) Same as in Voice Play mode.
These parameters are available both in the Voice mode and the Performance mode regardless of the selected Voice
or Performance.
OCT (Octave)
ASA (ASSIGN A),
ASB (ASSIGN B)
n TCH (Transmit Channel), OCT (Octave), ASA (ASSIGN A), and ASB (ASSIGN B) settings do not belong to each Performance. Because of this, these are not stored as an
individual Performance in the Performance Store mode (page 220).
AS1 (ASSIGN 1),
AS2 (ASSIGN 2)
Indicates the values obtained by controlling the respective Knobs (printed “ASSIGN 1” and “ASSIGN 2”) when the
lamps of both the [PAN/SEND] and [TONE] buttons are turned on. The functions assigned to these knobs depend on
the setting of the Voice assigned to each Part of the Performance.
[SF1] ARP1 (Arpeggio 1) - [SF5]
ARP5 (Arpeggio 5)
You can register the desired Arpeggio types to these buttons and call them up any time during your keyboard
performance. Refer to page 70 in the Quick Guide section.
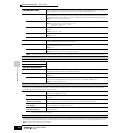
[F2] VOICE
From this display you can select a Voice for each Part and determine the note range it can be played from.
[SF1] ADD INT
(Add Internal Voice)
Press this button to assign an internal Voice to the selected Part.
[SF2] ADD PLG
(Add Plug-in Voice)
Press this button to assign a Plug-in Voice to the selected Part.
[SF3] DELETE
Pressing this button deletes the Voice assignment for the selected Part, leaving the Part blank.
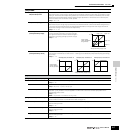
[SF4] LIMIT L (Note Limit Low)
This sets the lowest note of the range over which the Voice of the selected Part sounds. Simultaneously hold down
this button and press the desired key on the keyboard to set the note.
[SF5] LIMIT H (Note Limit High)
This sets the highest note of the range over which the Voice of the selected Part sounds. Simultaneously hold down
this button and press the desired key on the keyboard to set the note.
[F3] EFFECT
Pressing the [F3] EFFECT button in the Performance Play mode calls up the same EFFECT display in the Performance Edit mode ([PERFORM] → [EDIT] →
[COMMON] → [F6] EFFECT). From this display, you can set the effect related parameters for the current Performance. See page 215.
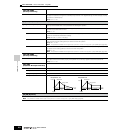
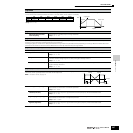
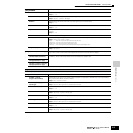
[F4] PORTA (Portamento)
From this display you can set the Portamento parameters. Portamento is used to create a smooth transition in pitch from the first note played on the keyboard to
the next.
PortaSw (Portamento Switch) Determines whether Portamento is on or off for all Parts. (This is a global switch and overrides the individual Part
settings in Part Switch below.)
Settings: off, on
PortaTime (Portamento Time) Determines the pitch transition time. This parameter offsets the same parameter in Part Edit (page 216). Higher
values result in longer transition times.
Settings: -64 ~ 0 ~ +63
PartSwitch Determines whether Portamento is on or off for each individual Part. This is available only when the PortaSw (above)
is set to on.