Option boards/Memory/Calendar battery Installing an option board/memory/calendar battery
1037
Installing an option board/memory/calendar battery
Opening and closing the front panel
You must read “Safety precautions” on page 1035
before you install anything.
Be careful not to cut your hand on the hardware of
the OASYS, option board, or memory module you
are installing.
1. You will need a Phillips (+) screwdriver.
2. Place the OASYS on a level, stable surface.
3. Turn off the power of the OASYS, and disconnect
the AC power cable and any cables connecting it
to other equipment.
Opening the front panel
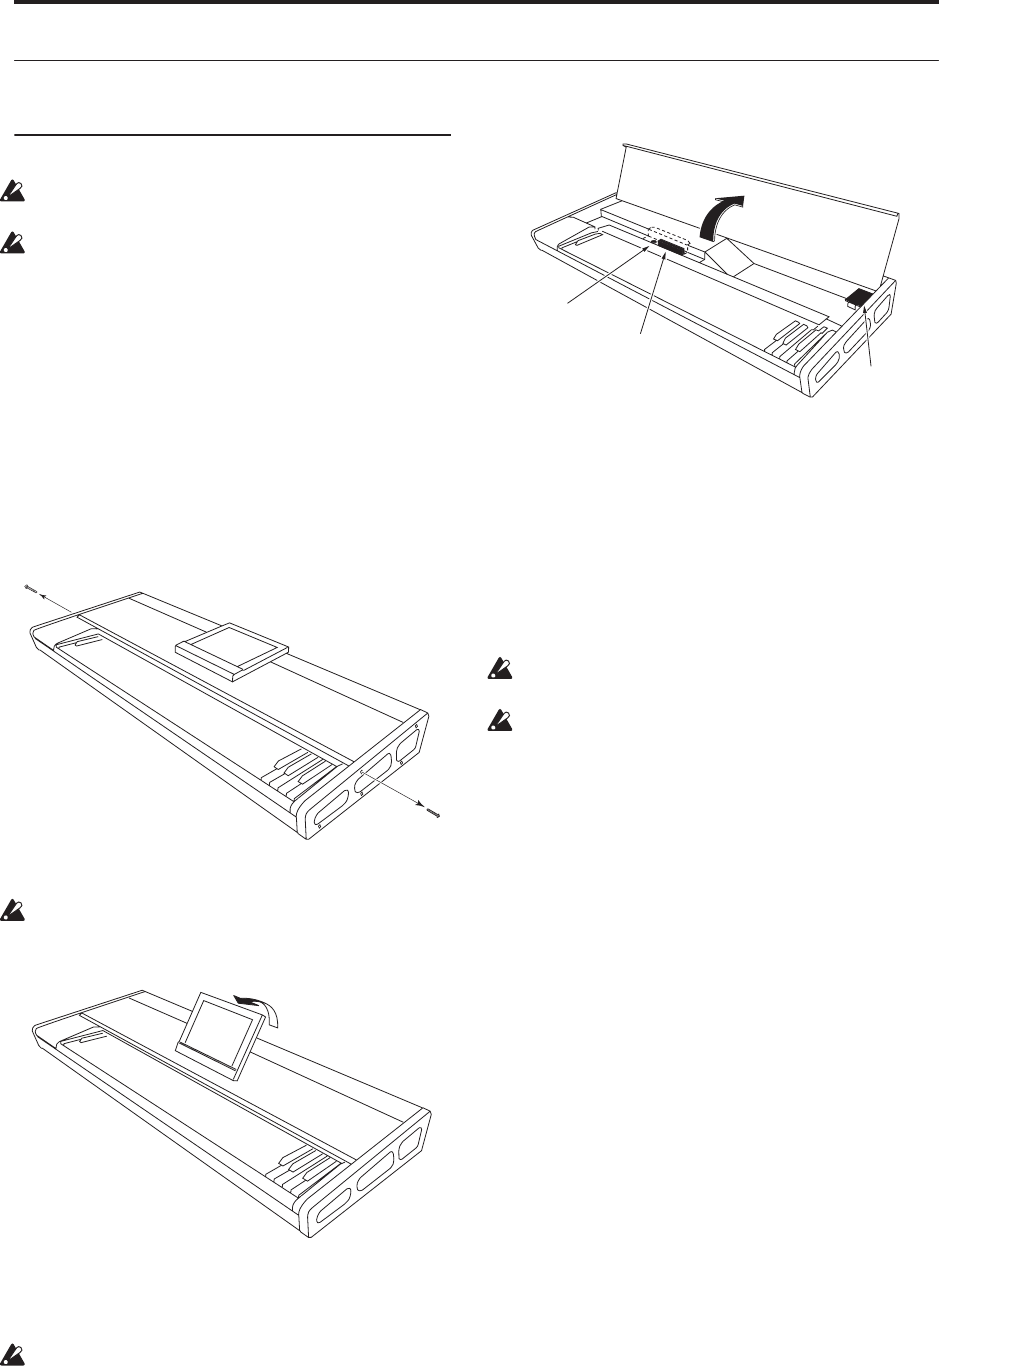
4. Remove two screws from the side panels of the
OASYS.
The illustration below shows the two screws you
must remove.
5. Raise the LCD screen as high as it will go.
If you open the front panel with the LCD screen in
the lowered position, you will damage the LCD
screen and front panel.
6. Lift the front edge of the front panel to open it.
Carefully raise the panel, opening it as far as it will
go.
Be careful not to pinch your fingers when opening
or closing the front panel.
Note: You can also grasp the frame of the LCD
screen to open or close the front panel.
7. Install the desired item as directed in the
following sections “Installing the EXB-DI,”
“Installing memory,” or “2–3. Installing the
calendar battery.”
Closing the front panel
8. When you have finished installing the desired
item, grasp the front edge of the front panel or the
frame of the LCD screen, and carefully close the
front panel.
When closing the front panel, be careful not to pinch
any of the internal wiring.
When opening or closing the front panel, be careful
not to pinch your fingers.
9. Fasten the front panel in place by installing the
two screws you removed in step 4.
Note: Connect the AC power cable, turn on the power,
and verify that the item was installed correctly.
The start-up screen will indicate the items that are
installed. (See “Checking after installation” on
page 1036)
EXB-DI
Calendar battery
Memory


