Sequencer mode
536
4. In “Step Time,” specify the length (in terms of a
note value) of the basic interval at which you will
input data.
From the popup menu at the left, select the note
length in a range of (whole note) through (32nd
note).
If you want the selected note value to be a dotted
note or a triplet, use the popup menu at the right to
select a dot “. (Dot)” or triplet “3 (Triplet).” To use
the unmodified value of the selected note, choose “–
(Normal).”
The following table shows the number of clocks
represented by each “Step Time” selection.
5. In “Note Duration,” specify the length that the
note will actually be held, relative to the “Step
Time.”
In general, 100% will be tenuto, 85% will be normal,
and 50% will be staccato.
6. Use “Note Velocity” to specify the velocity value
(keyboard playing strength) of the note data.
With the PAUSE switch pressed, you can hold down
the ENTER switch and play a note on the keyboard
to specify the velocity value. If you set this to Key,
the actual velocity at which you played the key will
be input.
7. Input the note events described below by playing
notes on the keyboard or by pressing the buttons
in the lower part of the dialog box.
• Entering notes
When you press a key on the keyboard, that note
number will be input as a note of the length
specified in step 4.
When you press a chord on the keyboard, those note
numbers will be input as chords of the length
specified in step 4. Since each of the note numbers
you press before releasing all of the keys will be
input at the same location, the notes will be input as
a chord even if they are actually played at different
times.
Each time you press and release the keyboard, the
location will advance by the length specified in step
4.
• Entering rests
Press the Rest button to enter a rest of the length
specified in step 4.
• Entering a tie
If you press the Tie button without pressing the
keyboard, the previously-input note will be tied,
and lengthened by the amount specified in step 4.
If you press the Tie button while holding down a
note, the note you are playing will be tied, and
lengthened by the amount specified in step 4.
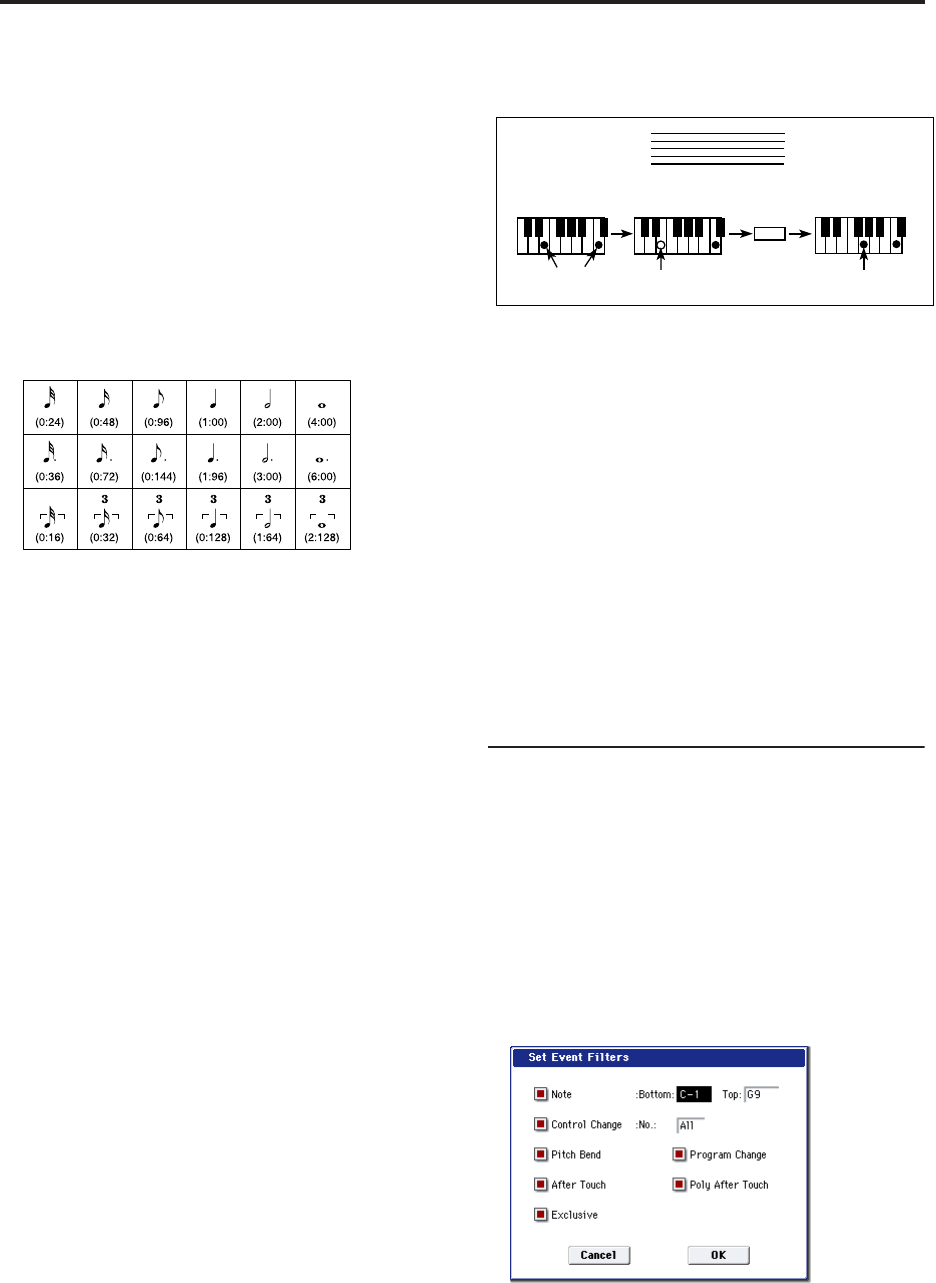
You can even enter notes as shown in the following
diagram.
• Deleting a note or rest
To delete a note or rest, press the Step Back button.
The location will move backward by the amount
specified in step 4, and the data in that interval will
be deleted.
• Auditioning the next note before input
If you wish to make sure of the next note before you
actually input it, press the PAUSE switch (the LED
will light). Now when you press a key, you will hear
sound but the note will not be input. Press the
PAUSE switch once again (the LED will go dark) to
cancel the pause mode and resume input.
8. When you are finished with step recording, press
the Done button.
If you press the COMPARE switch, you will return
to the condition of before you began step recording.
MIDI Event Edit
Here you can edit individual events of MIDI data that
were input.
1. Use Track Select to select the track that you wish to
edit, and use From Measure (4–1b) field to specify
the measure at which you wish to begin editing.
If you specified MIDI Track01–16 in Track Select,
and selecting “MIDI Event Edit” will open the Set
Event Filters dialog box.
If you selected Master Track in Track Select, this
dialog box will not appear.
In the Set Event Filters dialog box you can select the
types of events (musical data) that will appear and
can be edited in the event edit window.
For “Note” you can set Bottom and Top to specify
the range of notes available for editing. These
settings can also be entered by holding down the
ENTER switch and pressing a key. Normally you
will leave these set at C–1 and G9.
3
Step Time =
Step Time =
Step Time =
Tie
On
Press E and C
ON
Press G
Off
Release E (continue holding C)


