


Program P4: String 4-2: PCM Oscillator
241
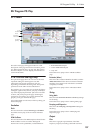
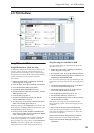
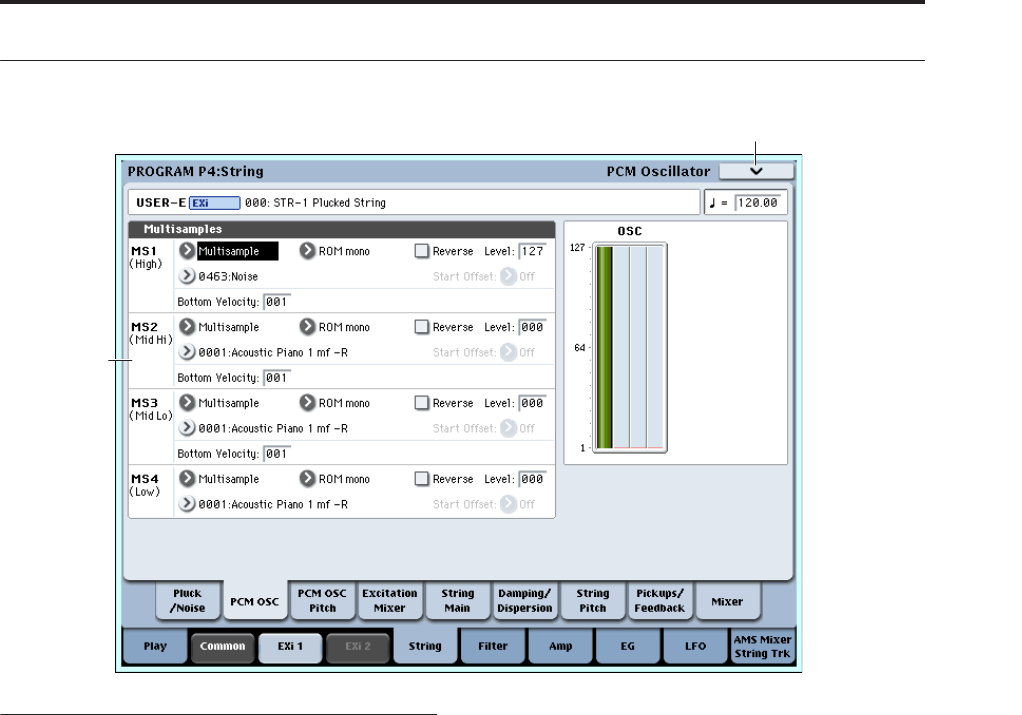
4-2: PCM Oscillator
Using PCM in the STR-1
Using PCM samples to “pluck” the string
In addition to the Pluck and the Noise Generator, you
can also “pluck” the string with PCM samples. In
general, this will work best if you use a fast envelope
to control the level of the PCM in the Excitation Mixer,
so that it becomes just a short attack transient.
For instance:
1. Follow the steps under “Creating an initialized
STR-1 Program” on page 242.
2. Press the EXi 1 tab, to get to the STR-1 parameters.
3. Go to the Excitation Mixer page (P4–4).
4. Set both the Pluck and PCM Levels to 0.
5. Set the PCM Level AMS 1 source to EG 3, and the
AMS1 Intensity to 50.
6. Go to the EG 3 page (P7–3).
7. Set the Start and Sustain Levels to 0, and the
Attack and Break Levels to 99.
8. As a first pass, set the Attack Time to 0, the Decay
Time to 10, and the Slope Time to 2.
With these settings, the Attack Time controls how fast
the EG attacks, the Decay Time sets the duration, and
the Slope Time controls the decay.
9. Use Key Track or Note Number to modulate the
Decay time via AMS, so that it is shorter for higher
notes, and longer for lower notes.
If you use looped PCM as the excitation, without EG
control of the amplitude, it will tend to sound like
bowing. In this case, using a bit of constant Harmonic
Pressure can produce a good effect; among other
things, this removes some energy from the string.
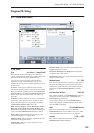
Using the string as a comb filter for PCM
You can use the string as a comb filter for the PCM
Oscillator. To do so:
1. Follow the steps under “Creating an initialized
STR-1 Program” on page 242.
2. Press the EXi 1 tab, to get to the STR-1 parameters.
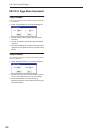
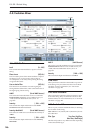
3. On the PCM Oscillator page (P4–2), set MS1 to use
Multisample 0433 POWER SAW.
You can use this technique with any Multisample, but
a sawtooth waveform will make the effect particularly
clear.
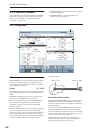
4. On the Excitation Mixer page (4–4), set the Pluck
Level to 0, and the PCM Level to 25.
5. On the EG2 (Pitch) page (P7–2), set the Attack
Time to 50, and the Decay Time to 70.
6. Set the Break and Sustain Levels to +25.
7. Set the Attack and Decay Curves to +5.
8. On the String Pitch page (P4–7), in the EG section,
set the Intensity to +36.00.
EG2 (Pitch) is already selected, by default. In this
setup, the string’s pitch controls the frequency of the
comb filter.
9. Play a note in the lower part of the keyboard.
Notice how the Program makes a sweeping sound,
with some resemblance to oscillator sync. That’s the
sound of the comb filter.
10.Experiment with the String’s Decay parameter.
Decay controls the resonance of the comb filter.
11.Experiment with the Damping and Dispersion
parameters.
4–2a
4–2PMC