


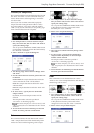

Sampling: Page Menu Commands Time Slice
631
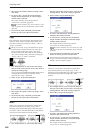
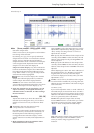
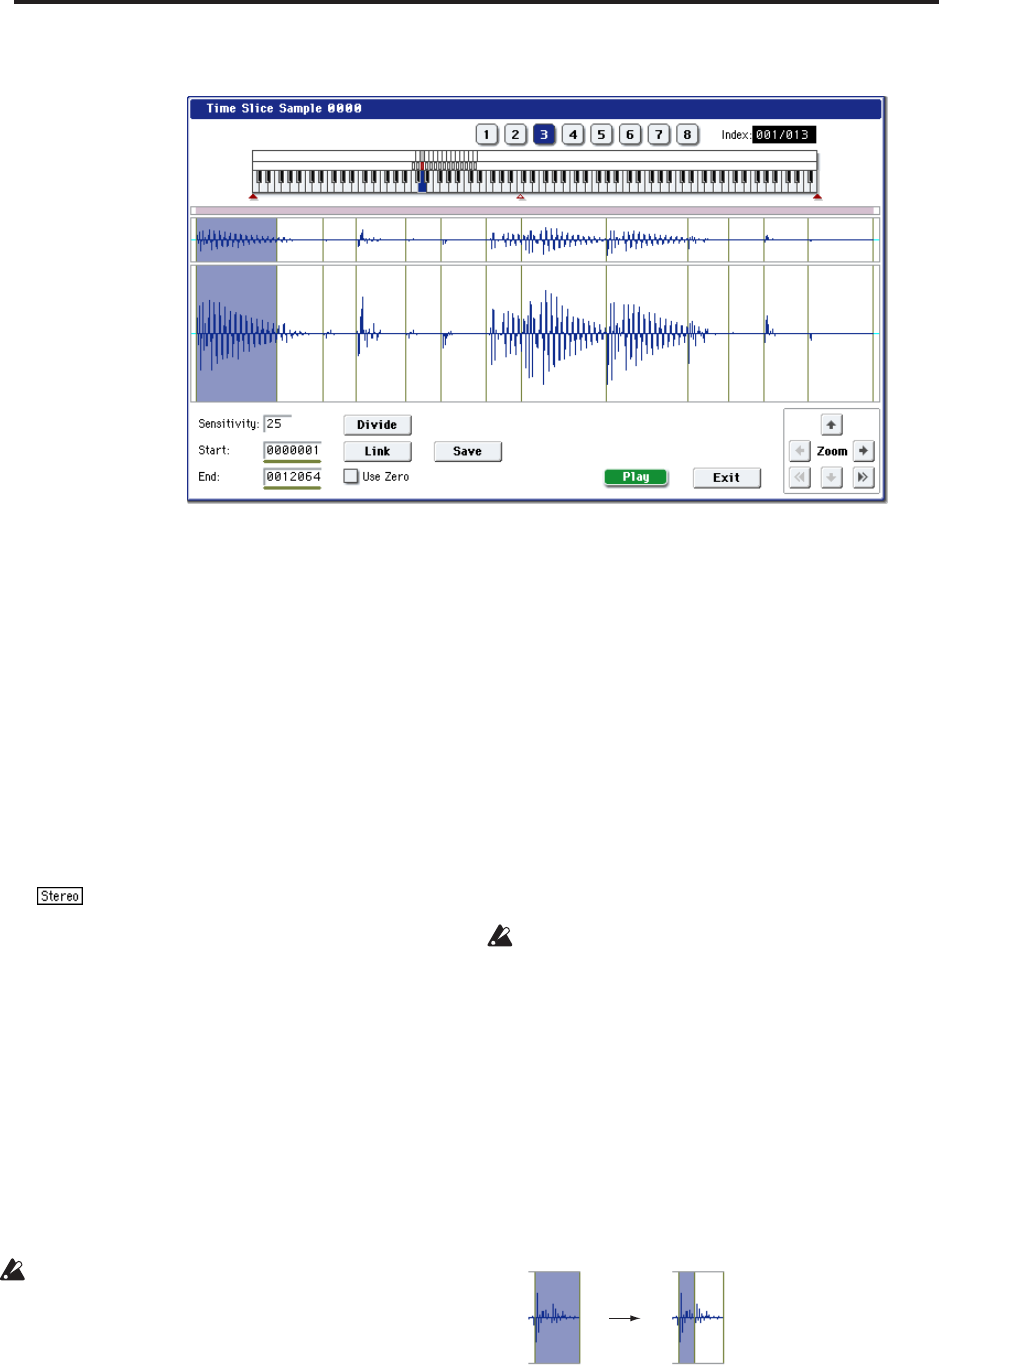
Time Slice step 4
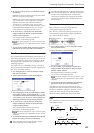
Index [Source, xxx(001…090)/yyy(001…090)]
Selects the sample index.
If this is set to Source, the original waveform before
time slicing will be selected.
By selecting xxx/yyy you can specify individual
samples that were sliced. xxx indicates the selected
sample, and yyy indicates the total number of
samples that were sliced. A maximum of 90 samples
can be assigned to the keyboard. If more than 90
samples were sliced, this will display 90.
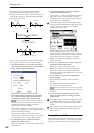
Sample waveform display: Gray lines indicate the
locations at which the sample is sliced. Red and blue
lines indicate the Start and End addresses respec-
tively. When “Index” is xxx/yyy, the sample of the
selected index will be highlighted.
In the case of a stereo sample, the L channel
sample data will be displayed above, and the R
channel sample data will be displayed below.
ZOOM: You can zoom in and zoom out in the
vertical and horizontal dimensions of the waveform
shown in the sample waveform display. (1–1f)
6. If the slice locations are not appropriate, you can
adjust “Sensitivity” to change the sensitivity at
which the attacks are detected, in order to change
the slice locations.
Sensitivity [00…30]
Adjusts the sensitivity at which the attacks are
detected. By increasing this value, you can detect
attacks at even lower levels, to create more finite
slices.
The Level in this case does not necessarily
correspond to the “waveform level.”
Depending on the sample, the desired slicing may
not occur even if you increase the “Sensitivity.” If
the attack portion of the following sample has
overlapped into the end of the sample, or if the
sample contains two sounds, make adjustments in
step 7.
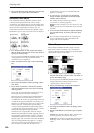
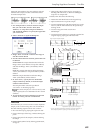
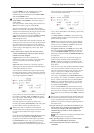
7. Make adjustments where the automatic attack
detection did not occur correctly.
Change Index to select the sample that you wish to
adjust. Make adjustments by changing “Start” and
“End,” and by executing “Divide” or “Link” to
adjust the slice location.
Start: Specify the start address for the sample of the
currently selected Index. At the same time, the end
address of the sample for the preceding Index will
also be adjusted.
End: Specify the end address for the sample of the
currently selected Index. At the same time, the start
address of the sample for the next Index will also be
adjusted.
When adjusting the “Start” and “End” addresses of
the divided samples, use “ZOOM” to increase the
magnification (×1 or more) so that the sample
waveform is displayed accurately when you make
adjustments. (1–1f)
If Index is set to Source, the address of the original
waveform will be modified. If you change the start
address, the loop start address will also be changed
at the same time.
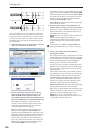
Use Zero: (1–1d)
If you wish to adjust the “Start” or “End” address of
a divided sample, it is best to first check “Use Zero.”
In general, using zero-cross points to specify sample
addresses will make it less likely that clicks or pops
will occur, particularly at the end address.
Divide: This splits the sample of the currently
selected Index into two. Use this when you wish to
add another location to slice the sample. Modify
“End” or “Start” to adjust the divided sample.
Link: This joins the sample of the currently selected
Index to the sample of the next Index. Use this
when you wish to merge together two sliced
locations.