Sampling: Page Menu Commands Auto Sampling Setup
621
When you execute this command, the applicable
parameters will be set automatically. You cannot use
the COMPARE switch to recall the previous
settings.
The settings are automatically made for the most
typical applications. After executing the auto setup
operation, you can further adjust any of the settings
to suit your needs as described in the “Note:”
paragraphs of each section.
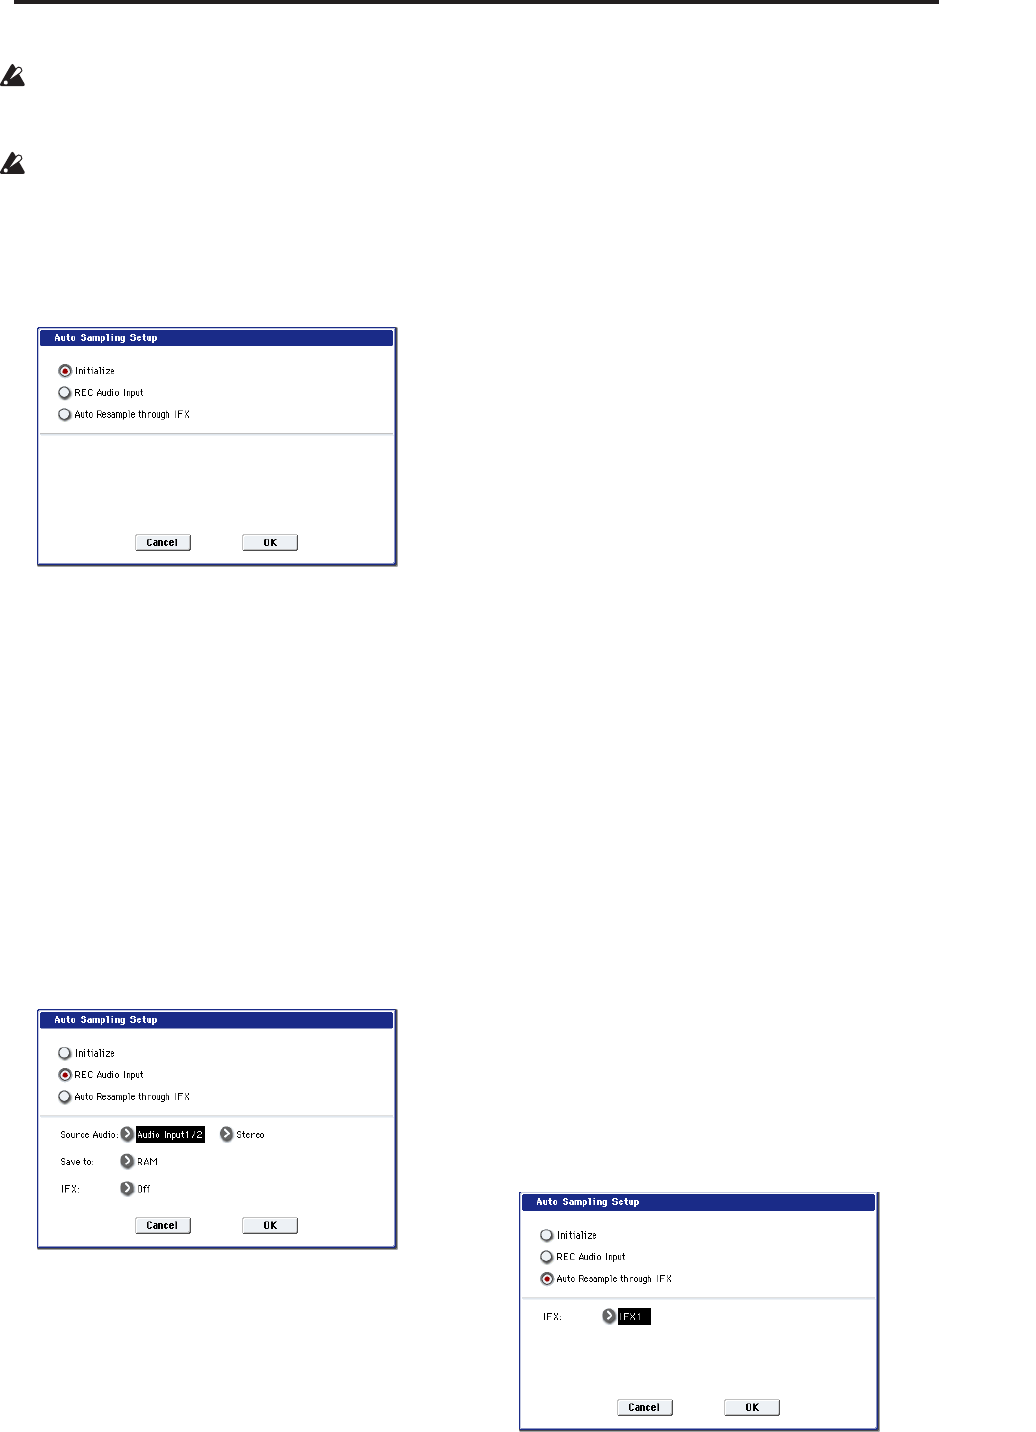
1. Select Auto Sampling Setup to open the dialog
box.
2. Use the radio buttons to select the type of settings
you want to make.
Initialize: Initialize the sampling-related
parameters to their default values.
REC Audio Input: Make settings for sampling an
external audio source.
Auto Resample through IFX: Make settings for
applying an effect to a sample and resampling it.
3. Specify the conditions. These will depend on what
you select in step 2.
If you select Initialize:
Press the OK button to initialize the settings, or
press the Cancel button if you decide not to execute.
For more information, please see “Auto Sampling
Setup: Automatically-set parameters and their
values” on page 622.
If you select REC Audio Input:
1) Use “Source Audio” to select the external audio
input source.
Analog 1/2: An analog audio source such as a
musical instrument connected to the AUDIO
INPUT 1 and 2 jacks will be input to the OASYS.
Analog 3/4: An analog audio source such as a
musical instrument connected to the AUDIO
INPUT 3 and 4 jacks will be input to the OASYS.
S/P DIF: Selects the digital audio output from an
instrument or DAT etc. connected to the S/P DIF IN
jack. (0–8a “Audio Input”)
2) Use “Mono-L/Mono-R/Stereo” to select the
input source, and either mono or stereo as the
number of channels that will be sampled.
Mono-L: Settings will be made for sampling to L-
MONO from Input 1 (if you’ve selected Analog 1/2)
or from Input 3 (if you’ve selected Analog 3/4).
Mono-R: Settings will be made for sampling to R-
MONO from Input 2 (if you’ve selected Analog 1/2)
or from Input 4 (if you’ve selected Analog 3/4).
Stereo: Settings will be made for sampling in stereo
from Input 1/2 or 3/4.
3) Use “Save to” to specify the destination to which
the sampled data will be written. RAM writes the
data into RAM memory. DISK creates a Wave file
from the sampled data and saves it to disk.
4) If you want to apply an insert effect to the
external audio input source while it is being
sampled, use “IFX” to specify the insert effect that
you want to use. If you don’t want to use an insert
effect, set this Off.
5) Press the OK button to execute the REC Audio
Input command, or press the Cancel button if you
decide not to execute.
For more information, please see “Auto Sampling
Setup: Automatically-set parameters and their
values” on page 622.
Note: When you are ready to sample (after executing
REC Audio Input), press the SAMPLING REC switch
and then the SAMPLING START/STOP switch to
begin sampling. (This is because “Trigger” is set to
Sampling START SW.) When you’ve finished
performing, press the SAMPLING START/STOP
switch to stop sampling.
Note: Here’s how to check the data you just sampled.
If you specified “Save to” RAM, play the C2 note of the
keyboard to hear the sample. If you specified “Save to”
DISK, use the menu command “Select Directory” to
hear the sample.
Note: If you specified “Save to” DISK and want to
change the save-destination for the Wave files, use the
menu command “Select Directory.”
Note: If you want to change the way in which sampling
is initiated, change the “Trigger” setting.
Note: If you selected S/P DIF for “Source Audio,” use
System Clock (Global 0–1d) to change the system
clock.
If you select Auto Resample through IFX:
1) Use “IFX” to select the effect that you want to
apply to the sample.


