


Sequencer mode
532
Note: Use the page menu command “Select Directory”
to specify the location in which the new WAVE file will
be created.
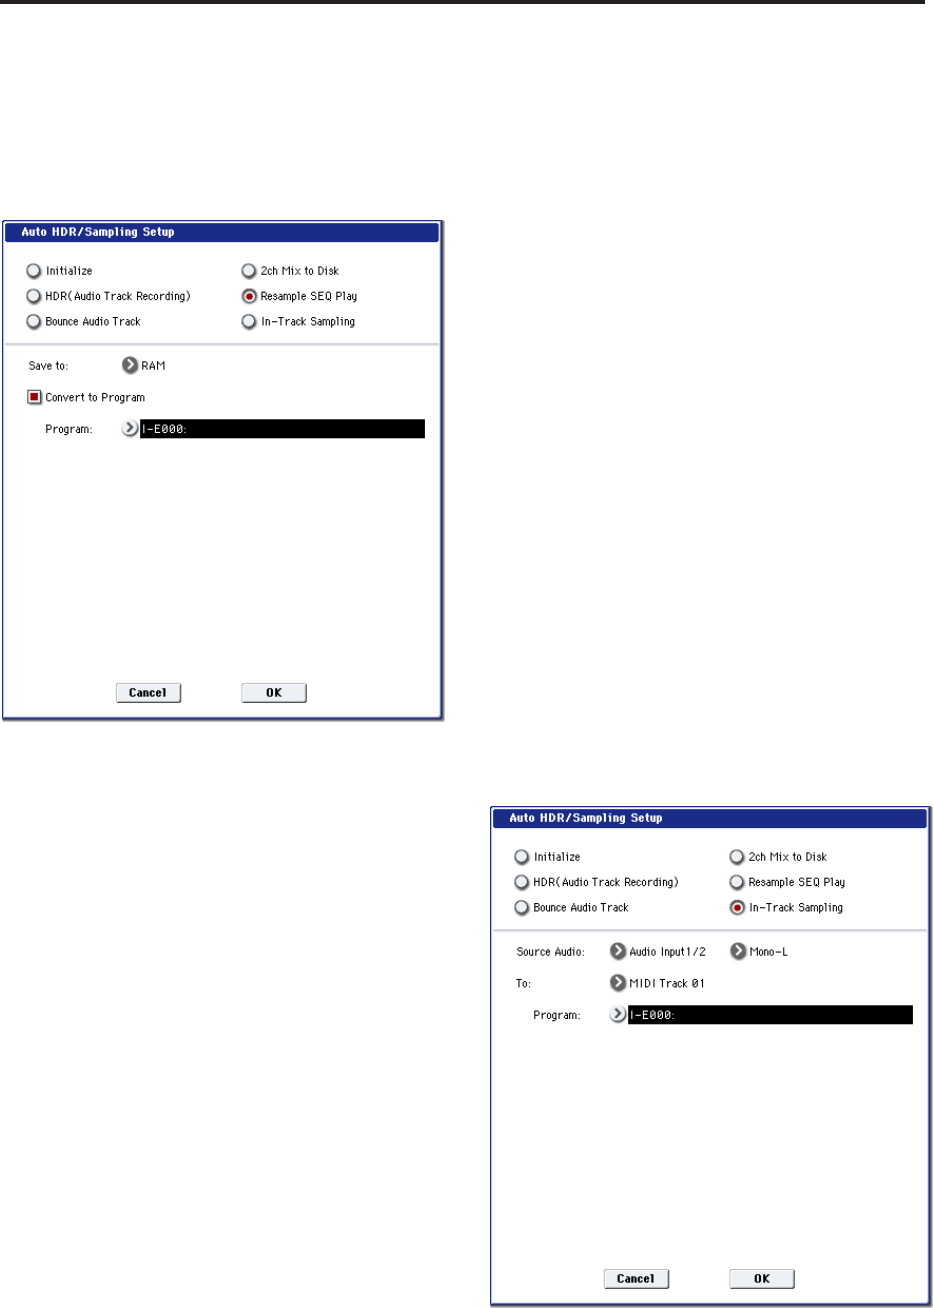
If you selected Resample SEQ Play:
1. Refer to Auto HDR/Sampling Setup steps 1 and 2,
and select Resample SEQ Play.
2. Use “Save to” to select either RAM or DISK as the
destination to which the resampled data will be
written.
If you select RAM, the data will be written to RAM
memory. If you select the DISK setting, a WAVE file
will be created from the sampled data and saved to
the hard disk.
3. If you selected “Save to” RAM, you can specify
whether the data will be automatically converted
to a program after resampling.
If you want the data to be converted, check
“Convert to Program” and use the “Program” field
to specify the convert-destination program.
4. Press the OK button to execute the command. If
you decide not to execute, press the Cancel button.
For more information, see “Auto HDR/Sampling
Setup: Automatically-set parameters and their
values” on page 533.
Resampling after you execute this command
1. Press the SAMPLING REC switch and then the
SAMPLING START/STOP switch, and then play
the keyboard etc.
Since “Trigger” (0–8c) is set to Note On, sampling
will begin at the first note-on.
2. When you’ve finished playing, press the
SAMPLING START/STOP switch to stop
resampling.
Note: If you execute Resample SEQ Play with “Save
to” RAM and “Convert to Program” checked, you
can continue sampling without changing the
settings, and the samples will automatically be
assigned to C#2, D2, … and so on. A new
multisample will be created when you execute
“Resample SEQ Play” once again and sample.
Auditioning the data you sampled
• If you executed with “Save to” RAM and “Convert
to Program” checked, select the program you
specified as the convert-destination, and play the
C2 key to hear the result.
If you didn’t check “Convert to Program,” use
Sampling mode to select and audition the sample.
• If you executed with “Save to” DISK, use the page
menu command “Select Directory” to audition the
sample.
Note: To change the sample number used for
sampling (when using “Save to” RAM), use the
page menu command Select Sample No. If you
want to change the save-destination for the WAVE
file (when using “Save to” DISK), use the page
menu command “Select Directory”.
An example of changing the settings
• To change the way in which sampling is initiated,
change the “Trigger” setting.
• If you want to simultaneously sample an external
audio source from AUDIO INPUT etc. together
with your own playing on a program, set the
Sampling page Input 1–4 and S/P DIF “Bus
(INF/Indiv.) Select” setting to L/R, and the Source
Bus to L/R.
If you selected In-Track Sampling:
1. Refer to Auto HDR/Sampling Setup steps 1 and 2,
and select In-Track Sampling.
2. Use “Source Audio” to select the external audio
input source.
If you select Audio Input 1/2 or 3/4, the analog
audio output of an instrument or other device
connected to the AUDIO INPUT 1, 2, 3, 4 jacks will
be input to the OASYS.
If you select S/P DIF, the digital audio output from
an instrument or DAT player etc. connected to the